Tuesday, 4 March 2014

Decorating MDF Shapes for Embellishments


Hello, and thanks for stopping by, today I thought I would show you some great MDF shapes now being sold by Inkydoodles, I will start by showing what the bag contains and then I go on to explain how the 3 in the photo above were made.


OK, the picture above shows all the different shapes and sizes that are in the bag and the numbers above each mdf shape is how many of each kind are in the pack. There is a total of 52 items in all!

For todays crafty make I shall be using these 3.


To begin with the heart and tag were given a coat of white gesso and left to dry. If you don't have any gesso in your crafty stash a coat of slightly watered down white emulsion paint will also work as its just to give a light base to work on.

I shall start with the heart, this was inked with tumbled glass Distress ink and then using iced spruce Distress ink I stencilled the centre pattern on the bottom two thirds of the heart as in the photo.


Once completely dry I stamped the chicken wire pattern from the Inkydoodles 'Primative Angel' set in versa-mark ink and heat embossed with Wow Metallic Platinum embossing powder.


Next I took the word stamp Wonderful from the Inkydoodles 'Its all about you' set and curved it to the shape of the heart when placing it on the acrylic block before stamping it in black Archival ink.


The flowers were stamped onto some coated card stock that had been coloured with alcohol inks and then cut out by hand. They were layered and the petals curled before fastening in the centre with a brad. The trailing leaves were cut using the Memory Box die Ivy Tendrils. These were then stuck in place with a little glossy accents.


I then crocheted a chain with some cream cotton.


This was then finished with a button.


Next is the flower shape, this was inked well with versa-mark and then sprinkled with Cosmic Shimmers Ultra thick Midnight Blue embossing powder and heated with the heat gun.


This was after one coat and then I gave it a second coat---


Much nicer! Then another inking of versa-mark and then a coat of clear UTEE. Whilst the clear layer was still hot I placed the Leafy Swirl stamp by Clarity which had been well inked with black Archival ink into the molten Utee.


You need to press quite hard on the stamp and leave it in place for a few seconds. This doesn't damage the Clarity Stamps or the Inkydoodles ones but I'm not sure about other makes!

Some Treasure Gold wax in pewter was applied to areas of the flower and then buffed up with a soft cloth. Narrow ribbon was threaded through the hole for hanging or attaching as an embellishment.


And now for the third and final MDF shape the tag. A coat of Paperartsy Fresco Chalk Acrylic in French Roast was painted on top of the gesso. Once touch dry a coat of Americana Weathered Wood  Crackle Medium was then brushed on. When this was touch dry a final coat of Fresco Chalk Acrylic in nougat was given for the cracked, peeled paint effect.


Allow this to completely dry before stamping the peacock from Inkydoodles Peacock Mini set in Brilliance pearlescent crimson at an angle. 


Using the same colour ink stamp another peacock onto some white card stock. Allow to dry and then over stamp the birds body but not the head with versa-mark ink using the medieval background stamp from Inkydoodles and then emboss with white embossing powder. Once heated cut out the body and head and stick onto the peacock previously stamped on the tag. The tree branch was stamped in Archival sepia from the "May all your Dreams and Wishes come True" set of stamps again from Inkydoodles. The edges were rubbed with Creative Expressions Metallic Gilding wax in vintage plum and buffed up when dry. An eyelet was placed in the tags hole and some white ribbon threaded through and knotted.


I have used several of these MDF shapes on cards and have loved everyone of them. Its great having a big bag as you don't get the " oow I'm not sure I want to use this as I will only have 2 left" feeling. There are so many different ways of decorating them but its fun just experimenting, and in most cases if you don't like how it turned out paint over it in another colour and start again.

I'm sorry this ended up such a long blog entry but there was a lot to cover and I hope you will have found some of it of interest. Thanks for stopping by and I hope you all have a good week and can manage to fit in a little crafting time along the way. Take care and hopefully see you soon Jane x


Tuesday, 25 February 2014

Home is Where The Heart is


Hi Everyone, I'm making up for lost time ---- 2 blogs in a week ! 
Todays card is my entry for The Sunday Stampers Challenge titled ' Anyone Who Had a Heart', if you would like to see Hels Sheridans blog and the other entries click on the link. http://pinkleart.blogspot.co.uk/2014/02/sunday-stamper-week-296-anyone-who-had.html

ITEMS USED

Gelli-plate
Acrylic Paints in Hansa Yellow, Birch, Viridian, and Deep Madder.
White card 15cm square
Core'dinations card in deep red and dark teal
Claudine Hellmuth stencil Summer Garden
Corrigated Kraft card 
2 brads
scraps of card for 2 hearts in co-ordinating colours
Grunge paste
Words cut from an old book or printed onto card from the computer
Memory box Die foliage/vine
Heartfelt Creations stamp set Sun Kissed Fleur
Stickles
Treasure Gold in Olive Bronze
Decoart Metallic Lustre in Black shimmer
Distress inks in Bundled Sage, Peeled Paint, Aged Mahogany, Pumice Stone and Stormy Sky
Archival ink pad in black
Clear embossing Powder
Pro-markers in pink shades


To start with I made the background of the picture from a ghost print taken from the Gelli-plate. This was inked up 4 separate times with the acrylic paints listed. The first print taken of each colour  ended up too dark for this project, but the second pulling, being the ghost print I felt was perfect.
I then cut the houses from the various card listed and the hearts were cut from the patterned card.


 The Core'dinations card was sanded quite hard to give the old, worn look and the roofs were rubbed with the treasured gold and then buffed with a soft cloth. The houses were then assembled and the brads attached as door handles. The printed background was then trimmed to size and a little stormy sky ink was applied to the top with a blending tool and a little bundled sage and peeled paint to the bottom before sticking the houses  on. I then repositioned the stencil over the fence at the bottom of the picture and spread some grunge paste that had been coloured with the hanse yellow acrylic paint,  with a palette knife. Once this was dry I rubbed on some metallic lustre over the grunge paste and this too was buffed when dry.


The stencil was repositioned again this time over the centre of the large flower on the lefthand side and a little aged mahogany was applied with a make-up sponge just to hi- light the centre.
The flowers were stamped in black archival ink and then embossed with the clear embossing powder. These were then coloured with pro-markers and cut out. The centres were hi-lighted using the stickles in burgundy. A few stems of vine were cut using the Memory Box die and then the flowers and trailing vine leaves were stuck in place.


A little pumice stone ink was applied from the chimneys to give the impression of smoke. The words Home is Where The Heart is were then trimmed to size and stuck in place. The completed picture was then mounted onto some red Core'dinations card before being attached to the blank greeting card.

This is a card that was made for a close friend that is moving house today, it's a real 'touchy, feely ' card as the acrylic paint gives a grainy texture, the grunge paste fence is raised and a little on the rugged side and then all the elements are made from different textured paper stock. I hope you can get a true impression of this from the photos. Well I must fly as I hadn't realised how long I'd been tapping away at the computer. Hope you all have a good week and hopefully see you back here soon for some more crafty antics. Thanks as always for stopping by and reading this blog, I hope its been of interest to you, have fun crafting Jane x

PS Do leave any comments at the bottom of the page or any questions if you have any.


Friday, 21 February 2014

"Blue or Lilac or Both!"


Hi everyone, todays blog is my entry for Lavinia Stamps Challenge "Blue or Lilac or Both!" to view Lavinia Stamps wonderful range and the other entrants click on the link  http://laviniastamps.com 

Items used
White card measuring 15cm square
Lavinia Stamps Spiral of spells, Secret garden, Poppy pods, Mia fairy, small slender mushrooms and small stars.
Heart from Tando Creative Grab bag of hearts
Distress inks in Shaded lilac, Stormy sky and Tumbled glass
Adirondack in Eggplant and Denim
Versa-mark ink pad
White Seafoam and Black embossing powder
Moon Mask
Brilliance ink pads in Starlight Black and Twilight
Cosmic Shimmers mica powders in Antique Blue and Perfect Pearl
Decoart Metallic Lustre in Black Shimmer
1 Lilac Dragonfly Brad
small amount of ribbon


To start with apply the 3 colours of Distress Inks to the white card, this can be done with a brush or a blending tool.


Once the ink is completely dry stamp the Spiral of Spells in versa-mark ink and emboss with the sea foam embossing powder.


Then place the moon mask in the top right-hand corner and with a make-up sponge apply shaded lilac and stormy sky ink to the surrounding area so as to darken that part of the sky and blend as you go. Remove the moon mask and then apply the negative part of the mask so that the moon is revealed and the surrounding sky is covered by the mask. Dab a tiny amount of versa-mark ink to the moon and then brush on the perfect pearl mica powder. Remove the mask and brush away any excess powder and buff up. 


Next the edges were stamped using the eggplant ink pad,  just the very edges of the secret garden stamp were used.


I only inked the parts I knew I was going to use. The stars were randomly stamped around the top of the sky using the Starlight Black ink pad.


The Poppy pods were then stamped in the Denim ink and the slender mushrooms stamped in the lilac end of the Twilight ink pad. The antique blue mica powder was brushed onto the mushrooms to give a slight shimmer.


Now onto the heart, this was coloured with the shaded lilac using a blending tool. Then the fairy was stamped in versa-mark ink and embossed with black embossing powder. A couple of stars were also stamped onto the background.

The metallic lustre was applied to the edges of the heart and once dry buffed up with a soft cloth.
A small piece of ribbon was then attached to the back of the heart. The dragonfly brad was placed on the picture near the moon. The heart was stuck to the card with glue.
I mounted the whole piece of work onto a painted piece of packaging card which had been painted in white acrylic paint and the edges were defined with black acrylic paint that was applied with a small piece of cut and dry foam sponge. A length of tasselled thread was attached to the bottom of the card before to was mounted onto the painted cardboard.


So there is how this entry was made. I hope there is an idea that you can take from this and use on a card or whatever it is you are creating. If you like fairies and mystical themed stamps do have a look at the wonderful range over on Lavinia's site. 

I hope you all have a good week, enjoy your creative time and see you again soon. Thanks as always for stopping by, take care Jane x


Sunday, 26 January 2014

1st Recipe of the Year

Well a very happy Sunday to you all and I hope you've had a good week and are enjoying the weekend. Yesterday was a bit of a baking session as we had made our sour dough bread on thursday which is left to prove overnight in the fridge and then moulded the next day ready to bake after it's second prove. But things didn't quite go to plan and only 2 of the 4 loaves got cooked on friday and the other 2 were left in the fridge overnight ready for baking in Saturday morning. The sour dough bread is a much slower bread to double in size and this is when the flavour is developed.

So while I was getting things organised with the baking of the bread I thought I might as well bake a cake. We have an aga so the different temperatures needed for the bread and the slow baking of the cake are catered for.


The cake recipe today is a Dundee Cake. This recipe was taken from a magazine some time ago so I'm not quite sure where it originated from but it really does make for good eating. The ground almonds help to keep the cake beautifully moist and the very slight hint of lemon gives it a fresh taste.


Ingredients

140gr unsalted butter at room temperature
70gr light brown soft sugar
70gr demerara sugar
20gr ground almonds
3 large eggs lightly beaten
280gr sultanas
zest of half a large lemon
175gr plain flour
15gr self-raising flour
whole blanched almonds to decorate the top

cooking time around 2 hours

Preheat the oven to 150C or gas mark 2. Line a deep round 15-16cm cake tin with baking parchment, then wrap a folded strip of baking parchment around the outside of the tin and tie this with string. This prevents the sides of the cake over colouring and drying out whilst baking.

Cream the butter and 2 sugars together till light and creamy in texture. Then gradually add the beaten eggs. Stir in the ground almonds, lemon zest and sultanas. Add the 2 flours and gently beat  until they  are combined into the mixture.

Spoon into the prepared cake tin and smooth the top of the cake with the back of a wet spoon to give a flat surface. Place the whole almonds on the top in a classic circular pattern or a design of your choice.

Place the cake tin on a baking tray and put in the centre of the oven for around 2hrs. Test with a skewer inserted in the centre of the cake and if this comes out clean the cake is cooked. I cooked mine in the simmering oven of the aga and this tends to not over colour the tops of cakes and meringues but if you find your cake top is colouring too quickly place a sheet of either brown paper of tin foil on the top to prevent it turning dark brown or burning. 

Leave in the tin to cool and once turned out make sure the cake is completely cold before slicing as it tends to crumble and a perfect slice will not be achieved. This size cake will cut into 8-10 decent size slices. Kept in a good air tight tin this cake will store well.


As you can see in the photo the sides of the cake are just a nice golden colour due to the parchment being wrapped on the outside of the tin, so its worth spending those extra couple of minutes on doing this.

I hope if you make this cake you enjoy it as much as we do. If you have any questions or queries please leave a comment at the bottom of the page and I will get back to you asap. Thanks as usual for stopping by and reading this blog, hope to see you soon, take care and happy crafting  Jane x


Friday, 3 January 2014

WISH - Entry for Sunday Stampers Challenge


Well this is my entry for Hels Sheridan's Sunday Stampers Challenge. to view hers and the other entrants click on the link ink on my fingers . 

List of crafting goodies used 

Large tag
Tim Holtz on the edge die
Sizzix make a wish embossing folder
Tim Holtz Alterations texture fades pattern and stitches
Tim Holtz Idea-ology kraft resist paper stash
Craftwork cards mini bohemian pad
Clarity Stencil - square set
Paper Artsy grunge paste
Tim Holtz Idea-ology foliage set
Bead cap ( found with jewellery making items)
Recycled handle from a paper carrier bag !
Treasure gold sapphire metallic wax
Treasure wax gilt pewter
1 brad
Versa-mark ink pad
Adirondack ink pad  watering can

Paints
Paper Artsy Fresco in nougat, pansy and french toast
Liquitex in green gold and white

Stamps
Inkydoodles butterfly set
Kaiser decorative tape pieces

Pan  Pastels in magenta extra dark and turquoise shade


This was made as an experiment using some Pan Pastels which I received for christmas and were completely new to me so it was a bit of the " Give it a go and see ! " I really like the smooth coverage and will be playing with them much more in the future. The leaves around the metal flower and the butterfly at the top were stamped in versa mark and then the pan pastels sponged over the top and I was so pleased at how clear these came out. I will not go through the complete process of making this tag as it is a bit on the long winded side but if you have any questions please leave a comment at the bottom of the page and I will get back to you asap. Thanks for stopping by and reading this blog and hopefully will see you again soon. Take Care and happy crafting Jane x 


Friday, 13 December 2013

Reindeer Card Using Grunge Paste

Happy Friday 13th folks! Hope you are all having a good day and not being plagued by any old superstitions. Well todays card will probably be  the last christmas card I blog this year as the time seems to be galloping on but I will hopefully do one on something different time permitting.

Ok so here's todays card, this using various techniques but I feel it's worth that little extra time spent on as it's got a lovely variety of textures.


Items Used
White square card blank 
White card for centre image of good thickness i.e. 230mg
Gold or contrasting colour card for layering
4 Metal Brads
Distress inks in Brushed corduroy, antique linen and walnut stain
Brilliance ink pad in starlight black
Grunge Paste
Tando Creative Reindeer stencils
Lavinia Believe stamp
Snow flake stamp ( found in many sets)
Stampendous Frantage Aged Ivory embossing enamel
Treasure Gold in Renaissance
Water in a spritz bottle
Versa-mark ink pad


To start with I secured the reindeer stencil onto the white card with low tack masking tape spread the grunge paste through the stencil with a craft palette knife. This I left to dry over night although I think this would be ready to use after about an hour.


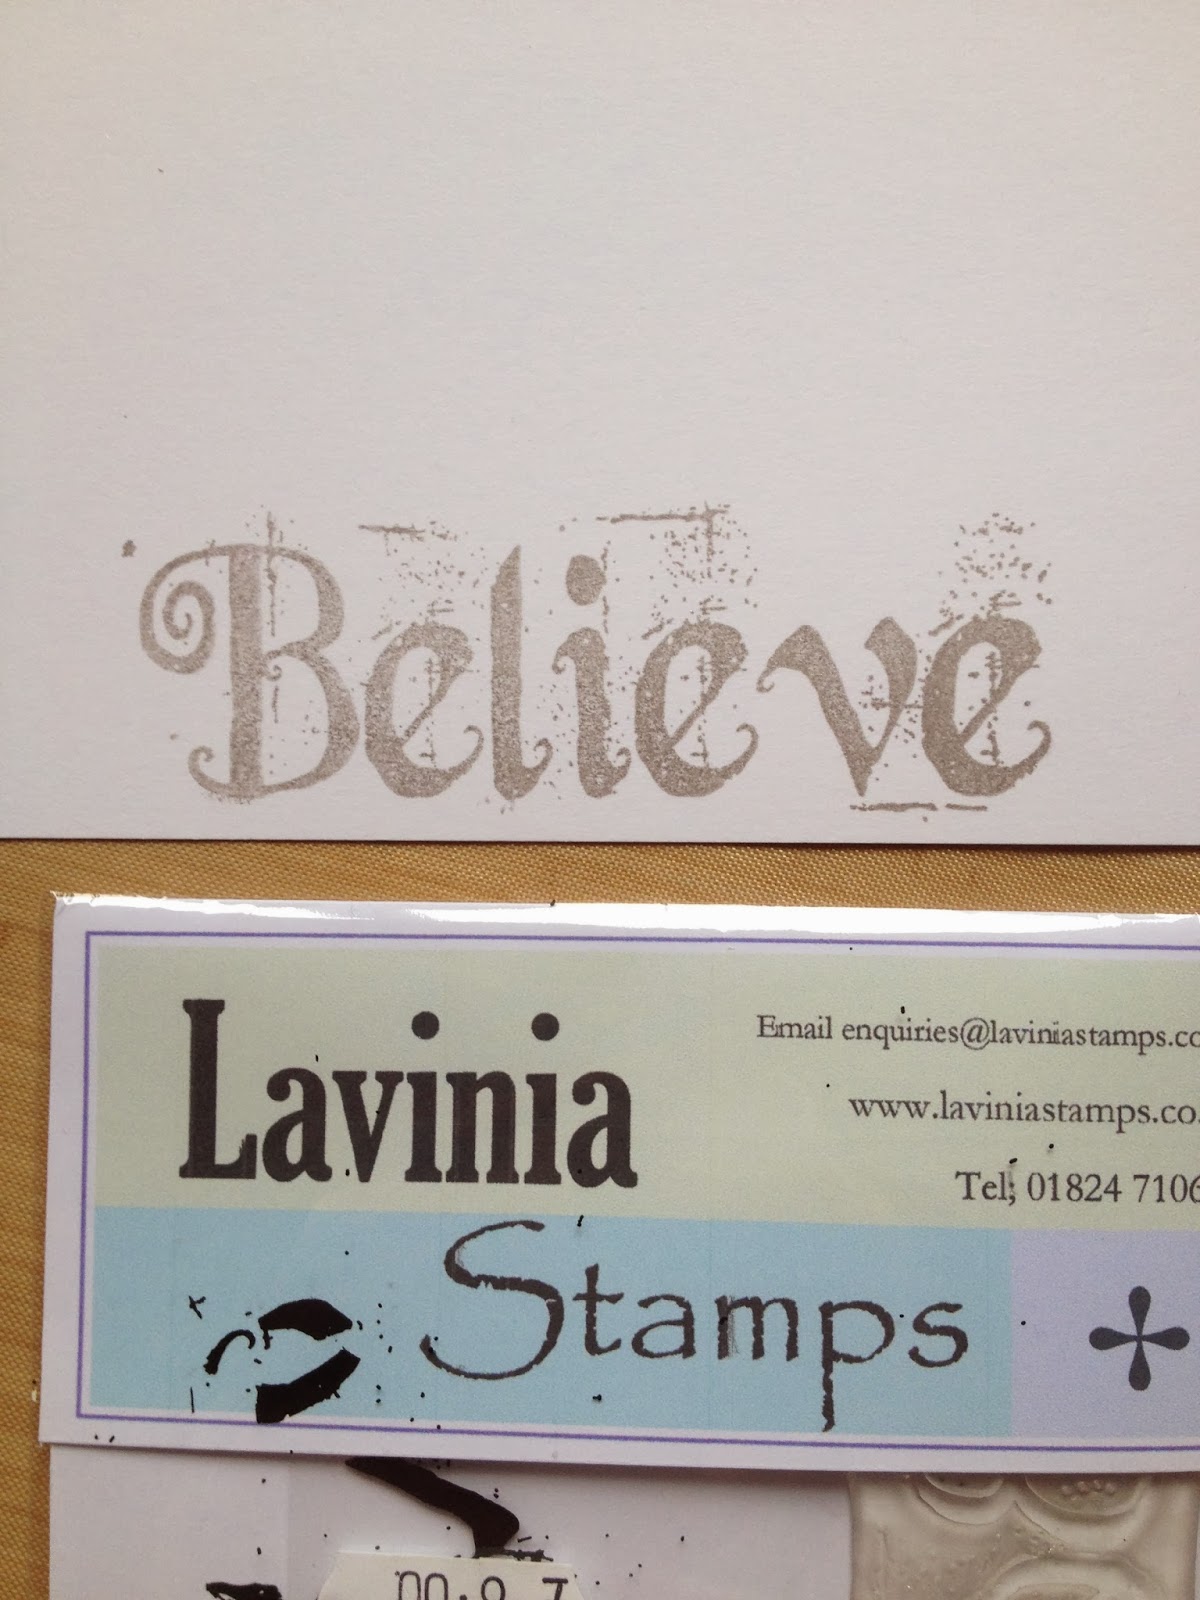
The next stage is to stamp "Believe" at the bottom of the greeting card in the starlight black ink. I love this make of stamps as they are so different to many on the market and they also seem to print out so beautifully with the Brilliance Dew Drop ink pads.


Once dry I then coloured the edges of the card with the distress inks starting with the palest, antique linen first and working through the shades. The very centre will be covered up so there is no need to waste time and ink on that. The snow flakes were then stamped around the edges in the starlight black to keep in tone.


Now for the fun part !
I started by inking the complete card with the distress inks, again starting with the palest colour first. Once I was happy with the overall colour and shading I gave the card a light spray with water, left it for about 20-25 secs and then blotted the card with kitchen paper. Its very easy to over do this part so it's perhaps best to do a little first and see how you like it once its dry as you can always give it another quick spray. Once you are happy with this stage its onto the embossing round the edges. This is quick and easy, just hold the versa-mark ink pad at an angle and apply small amounts to the edges then sprinkle with the aged ivory embossing enamel. This is quite thick compared to embossing powder so you will need to apply sufficient ink for it to stick to the card. Then emboss with the heat gun. Once cool apply the treasure gold metallic wax with your finger to the areas you want to shine and buff with a soft cloth after about 10mins when dry.


I love how this picks up the different textures on the reindeer, and you can add little bits of the wax to  give the effect of shading around the image.


 Now its just putting the card together, firstly I stuck the reindeer to the gold card with double sided tape and then added the brads to the corners. Then the mounted image was stuck to the card also using double sided tape.


So there you have it, quite a grown up card in a way but still on the magical side and fun to make as it's great to see how the image is transformed from the gooey pot of grunge paste at the start.

I hope you have enjoyed todays entry, do add any comments at the bottom of the page and I hope this will inspire you to give this technique a try.
Thank-you for stopping and reading this blog and I hope you will pop back soon, until next time, take care and Happy Crafting whatever it may be  Jane x


Sunday, 8 December 2013

Cherry and Almond Cake

Well a Happy Sunday to you all and I hope you are all feeling relaxed and reasonably organised for the pending "Christmas Celebrations". Todays entry is for those of you who fancy making a cake but either don't like the traditional fruit cake at christmas or just feel like a change.


 Ingredients

7 inch round loose bottomed cake tin
5oz Self-raising Flour
3oz Plain Flour
3 Tablespoons Ground Almonds
6oz Glace Cherries ( french if possible as these are nice and dark)
6oz butter at room temperature
6oz Caster Sugar
3 Beaten Eggs (large)
2 Tablespoons Demerara Sugar for Topping

Pre-heat oven to 180C


Method
Firstly grease and line the cake tin with baking parchment or greaseproof paper both the sides and bottom.Sift the 2 flours into a bowl then stir in the ground almonds and the cherries. In a separate bowl beat the butter and sugar until creamy and light and then gradually beat in the eggs a little at a time. Then carefully fold in the dry ingredients taking care not to leave any pockets of unmixed flour. Once thoroughly mixed turn into prepared cake tin and level the top of the mix. Sprinkle over the Demerara sugar  and bake for 1-1.25hrs. If the top of the cake starts to colour quickly cover with a piece of tin-foil. Test with a skewer before removing from the oven. Leave to cool in the tin before turning out. The almonds in this cake not only give a nice flavour they also help to keep the cake moist. If you wanted to have the cake as a centre piece you could place halved glace cherries on the top before sprinkling with the Demerara sugar.

So there you have it a fairly simple to make cherry cake which is easy to slice and a delight to eat. Happy baking and I look forward to seeing you back here soon for some more crafting goodies and makes. Take care and thanks for stopping by Jane x