Sunday, 4 May 2014

'SEWING' A Transformed Gift Bag.

Hi Everyone and a very Happy Bank Holiday to you all, hopefully you haven't got to go to work and that you are having a well earned long weekend. Todays crafty offering is a little different but I hope you like it and that it might give you a few ideas for jazzing up a gift bag and also personalising it for the recipient.

I would like to enter this for the Frilly and Funky fortnightly challenge titled " On The Runway" Sewing or Fashion. To view the DT creations and the other entries click on the link; Frilly and Funky


This bag is decorated on all 4 sides so there are a lot of different components,  I shall give details for the dies, inks and waxes used and how I made the main elements on each side.


The bag I started with was a 14cm x 14cm x 9cm brown paper gift bag which is available at most craft stores. This I cut open at the sides so that the bag would then lay flat to allow me to sew my chosen fabric to the front, back and sides along the top and edges.


I then reformed the bag and reinforced the cut sides with a piece of card on the inside. This was stuck with double sided tape.


Next I embossed a sheet of Paperartsy Crunchy Waxed Kraft Paper with the Tim Holtz Texture Fades Pattern and Stitches A2 folder. This was then cut and torn to fit onto 2 of the sides. Once in place the raised edges were hi-lighted with some Treasured Gold Wax in Renaissance.

A picture of an old sewing pattern was downloaded, stuck onto some card that resembled stripped fabric and the edges were cut with pinking shears and inked using Distress ink in Vintage Photo.

Now onto the main elements.


Starting at the top, the tape measure was stamped in black onto white card, then cut out. 4 small lengths of ribbon were then stuck onto a textured piece of brown card, an eyelet was used to attach the tape and the card and then a length of bakers twine tied to the top.

The mdf tag was given a coat of white gesso and then when fully dry a coat of Paperartsy Fresco Chalk Acrylics in Blush. The sentiment "You're Sew Special" was stamped in black archival and then heat embossed with clear embossing powder. The edges were stamped with a flourish stamp by Graphic 45 in vintage photo and then brushed with Perfect Pearls Mica in Heirloom Gold. A length of boucle wool was then threaded through the hole in the tag.

The picture in the centre was embroidered in cross stitch onto cream Aida. The frame was cut from some hammered card, edges cut with pinking shears and then rubbed with Decoart Metallic Lustre in black shimmer and the Renaissance Treasured Gold. Once dry this was then buffed with a soft cloth. I then crocheted a length of chain stitches to hang the picture with and attached a hook from a hook and eye set.

The thread card was stamped onto kraft card with versa-mark ink and heat embossed with white embossing powder. Once cut out the silk thread was then wound round the card and fastened.

The dressmakers dummy was cut using Tim Holtz Movers and Shapers mini sewing room die. This was cut twice, once in black felt and then in natural calico. The top and bottom were cut from the calico dress and then stuck onto the felt. I then sewed 2 layers of gathered lace to form a skirt and threaded some tiny beads onto some invisible thread for the necklace.

The flower was cut from Tim Holtz Tattered Floral die and the centre petals were cut using a flower punch. The outer layer of petals were cut from Grunge Paper, embossed with an embossing folder, inked with Distress inks in Dusty Concord and Victorian Velvet. Once the ink was dry I applied a little Treasured Gold in Ruby and Sapphire to the embossed parts. The leaf was cut with the Mini Tattered Leaf die, inked in Iced Spruce and Peeled paint and the edges rubbed with Treasured Gold in Olive Bronze. The flower is held together with a metal brad.

The millinery ticket was stamped onto some rose bud patterned paper using Tim Holtz Stampers Anonymous Adverts in Walnut Stain. this was then stuck onto a torn piece of T.H. Kraft-Core no 23 and the whole thing was lightly inked with vintage photo.

A pair of scissors were stamped and heat embossed in black and cut out and a piece of trellis was cut from cream card using the new T.H. die.

Now onto the assembling.


Using Walnut Stain ink I randomly stamped some text onto the fabric. The hook for the picture was sewn in place and then the picture is held with a glue dot. The Sylko tag was taken from an old cotton reel and the buttons are just odd ones found in the wonders of a "Button Box" ( A child's delight!)


The tape measure was just tucked into the top of the wax paper and then 2 press fasteners used to secure. A few pearl beads were threaded onto come cotton.


The pattern was attached with double sided tape and a brad was fastened in the top corner. the trellis was then stuck with foam pads to give some depth. The flower, leaf and dummy were all fastened with wet glue. The tag was tied to the handle and held steady with a glue dot.


The patterned paper was stuck on the bottom edge, hand sewn on one side and left unfastened on the other side so as the scissors could be tucked in. Cotton lace was gathered and hand sewn at the top and the ticket was attached with double sided tape.


So there you have it, a completely transformed gift bag. How much fun it would be to fill with lots of little sewing goodies for someone's birthday present. I hope you have enjoyed todays entry and that it fits the brief to be entered for the challenge.

If you have any questions or comments on this make please feel free to leave them at the bottom of the page and I will endeavour to get back to you asap. Hope you all have a great weekend and hopefully see you back here soon for some more crafty time. Take care and thanks as always for popping by, see you soon  Jane x


Sunday, 20 April 2014

Monochrome Tag

Happy Easter Sunday to one and all, it's a really dark damp day here in Kent so I've spent some time in the craft room. We've had heavy rain and claps of thunder so typical weather for Easter. Anyway todays offering I'd like to enter for Clarity's monthly challenge titled Monochrome. For this I have used Distress ink and stain in just the Tumbled Glass.


ITEMS USED
Distress ink and Stain in Tumbled Glass
Brick and Square Honeycomb Stencil by Clarity
Stamps by Clarity; Word chain no 5, Edelweiss, Cow Parsley and Quirky Gate
Grunge Paste
Theuver Card by Clarity
Glossy Accents
Versa-mark ink pad
Clear Embossing Powder
Small mdf heart
White cotton seam binding
Bakers  Twine
Treasure Gold in Sapphire


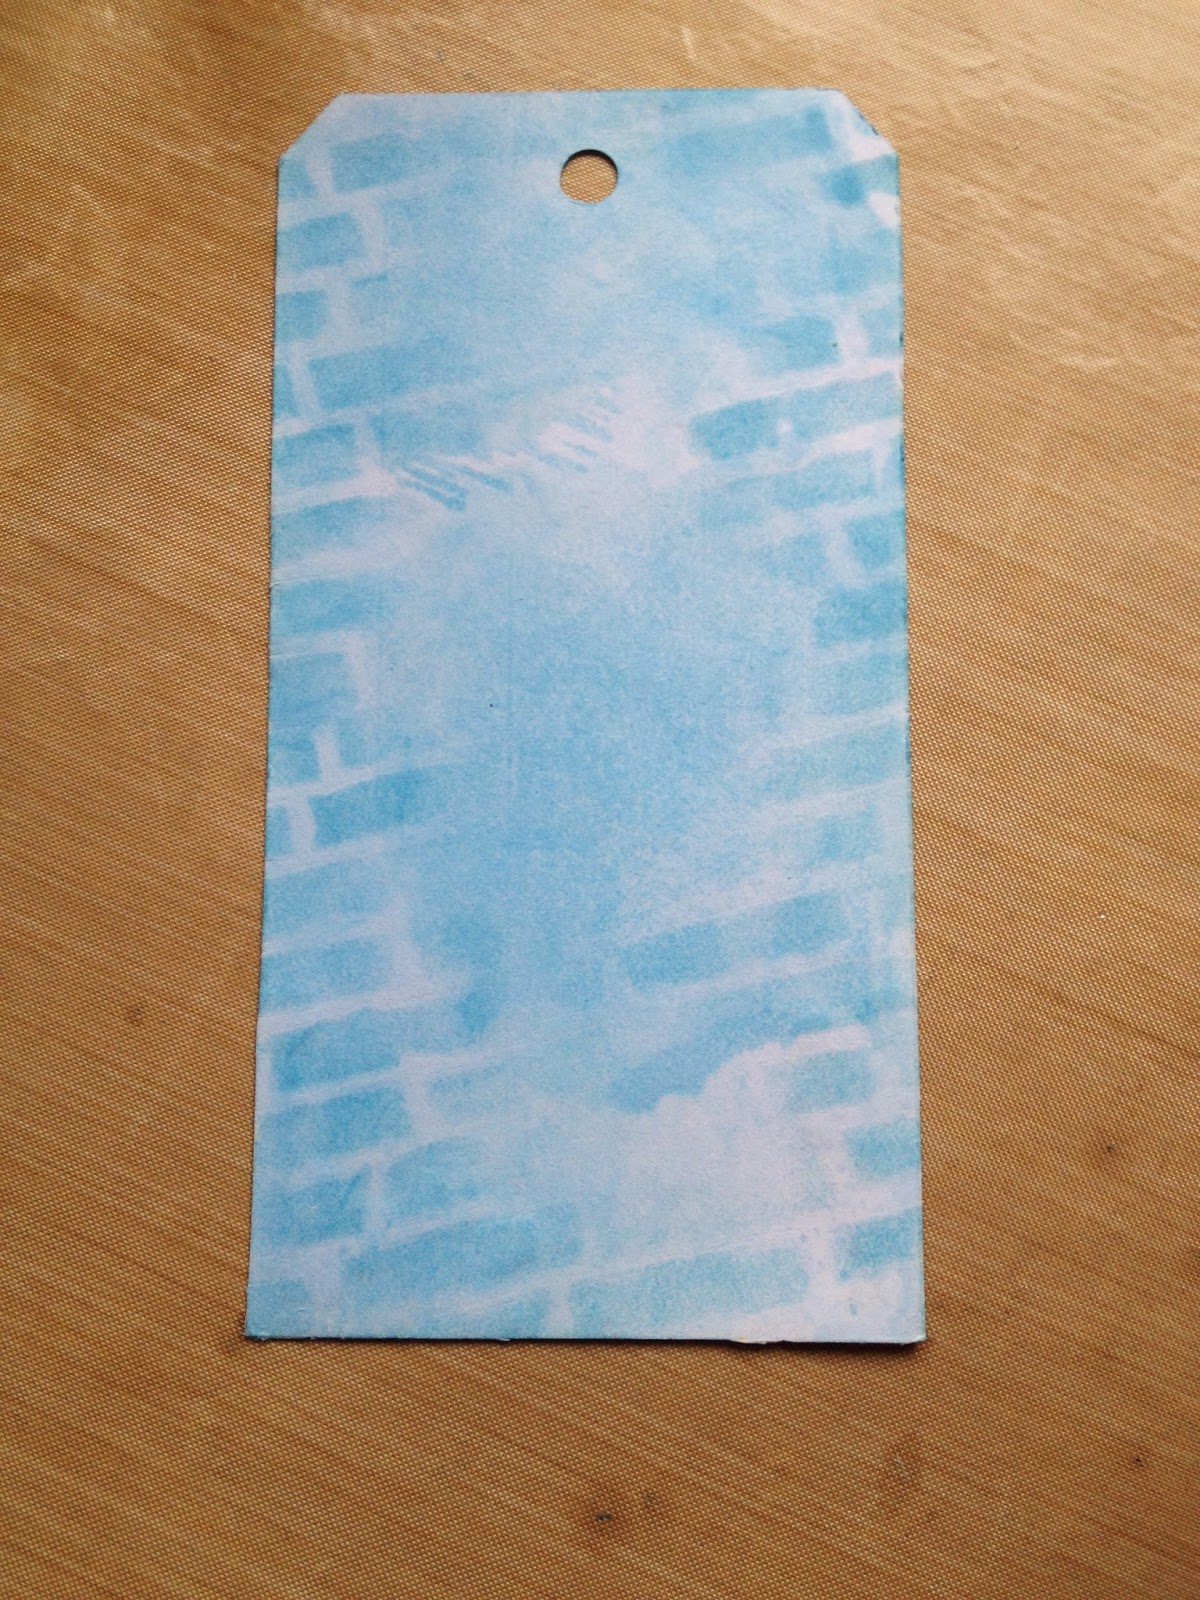
Firstly I cut a tag from theuver card and coloured the background by applying the distress stain to the craft mat, spritzing with water and swiping the tag through several times backwards and forwards.


I then applied the distress ink through the brick mask using a make-up sponge. Next I stamped the 3 Edelweiss at the bottom and the Cow Parsley to the edges. Once the ink was dry the grunge paste was applied through the Honeycomb stencil. This was left to dry for about 30 mins and the edges of the tag were distressed using a pair of scissors and then distress ink applied using a blending tool. The grunge paste will absorb the ink so more was applied to these areas. 

The treasured gold wax was then lightly applied with my finger to the raised honeycomb areas and once dry buffed with a soft cloth.


I then added the glossy accents to the centres of the edelweiss. 

Next stamp the word Imagine onto some card in the versa-mark ink and sprinkle with the clear embossing powder and heat. Lightly apply some distress ink so as to just colour the card slightly. Then place the brick stencil over the embossed image and apply ink with a sponge, once the ink is dry a light rub over the embossed image will make the word pop. This was then cut to size and the edges stamped with the cow parsley so as to tie the whole thing together.


The quirky gate was then stamped in the tumbled glass onto card and then cut out with a craft knife.

The cotton tape was coloured using the distress stain and ink onto the craft mat and sprayed with water, dragging the tape through the wet solution and scrounging it up as you go. This was left to dry in a bundle but you can dry it with a heat gun if you are in a hurry. This does stain the fingers slightly so not a job to do before going out for a nice meal!

Last component the heart, this I applied several layers if ink to and then sanded it between applications as I wanted some areas of shading. This took on a slightly greener hue where it had been sanded the most.


This was then embossed with clear embossing powder twice to give a glossy finish and a different texture.


Now it's down to sticking the parts together. the gate and the word plaque were both stuck on with pin flair glue as I wanted some height to these items, the bakers twine was threaded through the hole in the heart and then tied onto the tape at the top.


One tag and one ink pad, but using different textures and mediums you can achieve a range of colours.

Thank-you as always for popping by and I hope you all enjoy the rest of your Easter whatever you may be doing. Comments and messages are always appreciated and if you have any questions I will answer then asap. Take care and see you soon  Jane x


Monday, 14 April 2014

Spring Colours


Hi Everyone, I hope you all had a good weekend and that you were lucky enough to have the gorgeous sunshine on Sunday that we had here in Kent. It was lovely getting out into the garden to get on with some much needed weeding and dividing of some of the perennials.

Anyway less of the waffling and onto todays crafty offering. This I would like to enter into Lavinia Stamps Blog Challenge titled "Spring Colours".

Items used
Lavinia Stamps; Fairy House, Fairy Mia, Slender Mushrooms, Small hearts and Fairy Dust is like verse.
Spellbinders Die Ribbon Banners Lg
Imagination Crafts Stencil Bay Leaf
15cm x 15cm card blank
White card for stamping
Contrasting card for mounting
Versa-mark ink pad
Ranger Seafoam White Embossing Powder
Clear UTEE
Distress Inks in Squeezed Lemonade, Iced Spruce, Peeled Paint, Milled Lavender, Wild Honey, Victorian Velvet, Tumbled Glass and Pumice Stone
Brilliance Ink Pad in Pearlescent Olive
Perfect Pearls Mica in perfect pearl
10cm Square mask 

To begin with ink up some white card with the Distress inks using all the colours except the Pumice Stone. I used a brush but a blending tool or cut and dry would all work.


Then stamp the fairy house in versa-mark and emboss with the white powder.


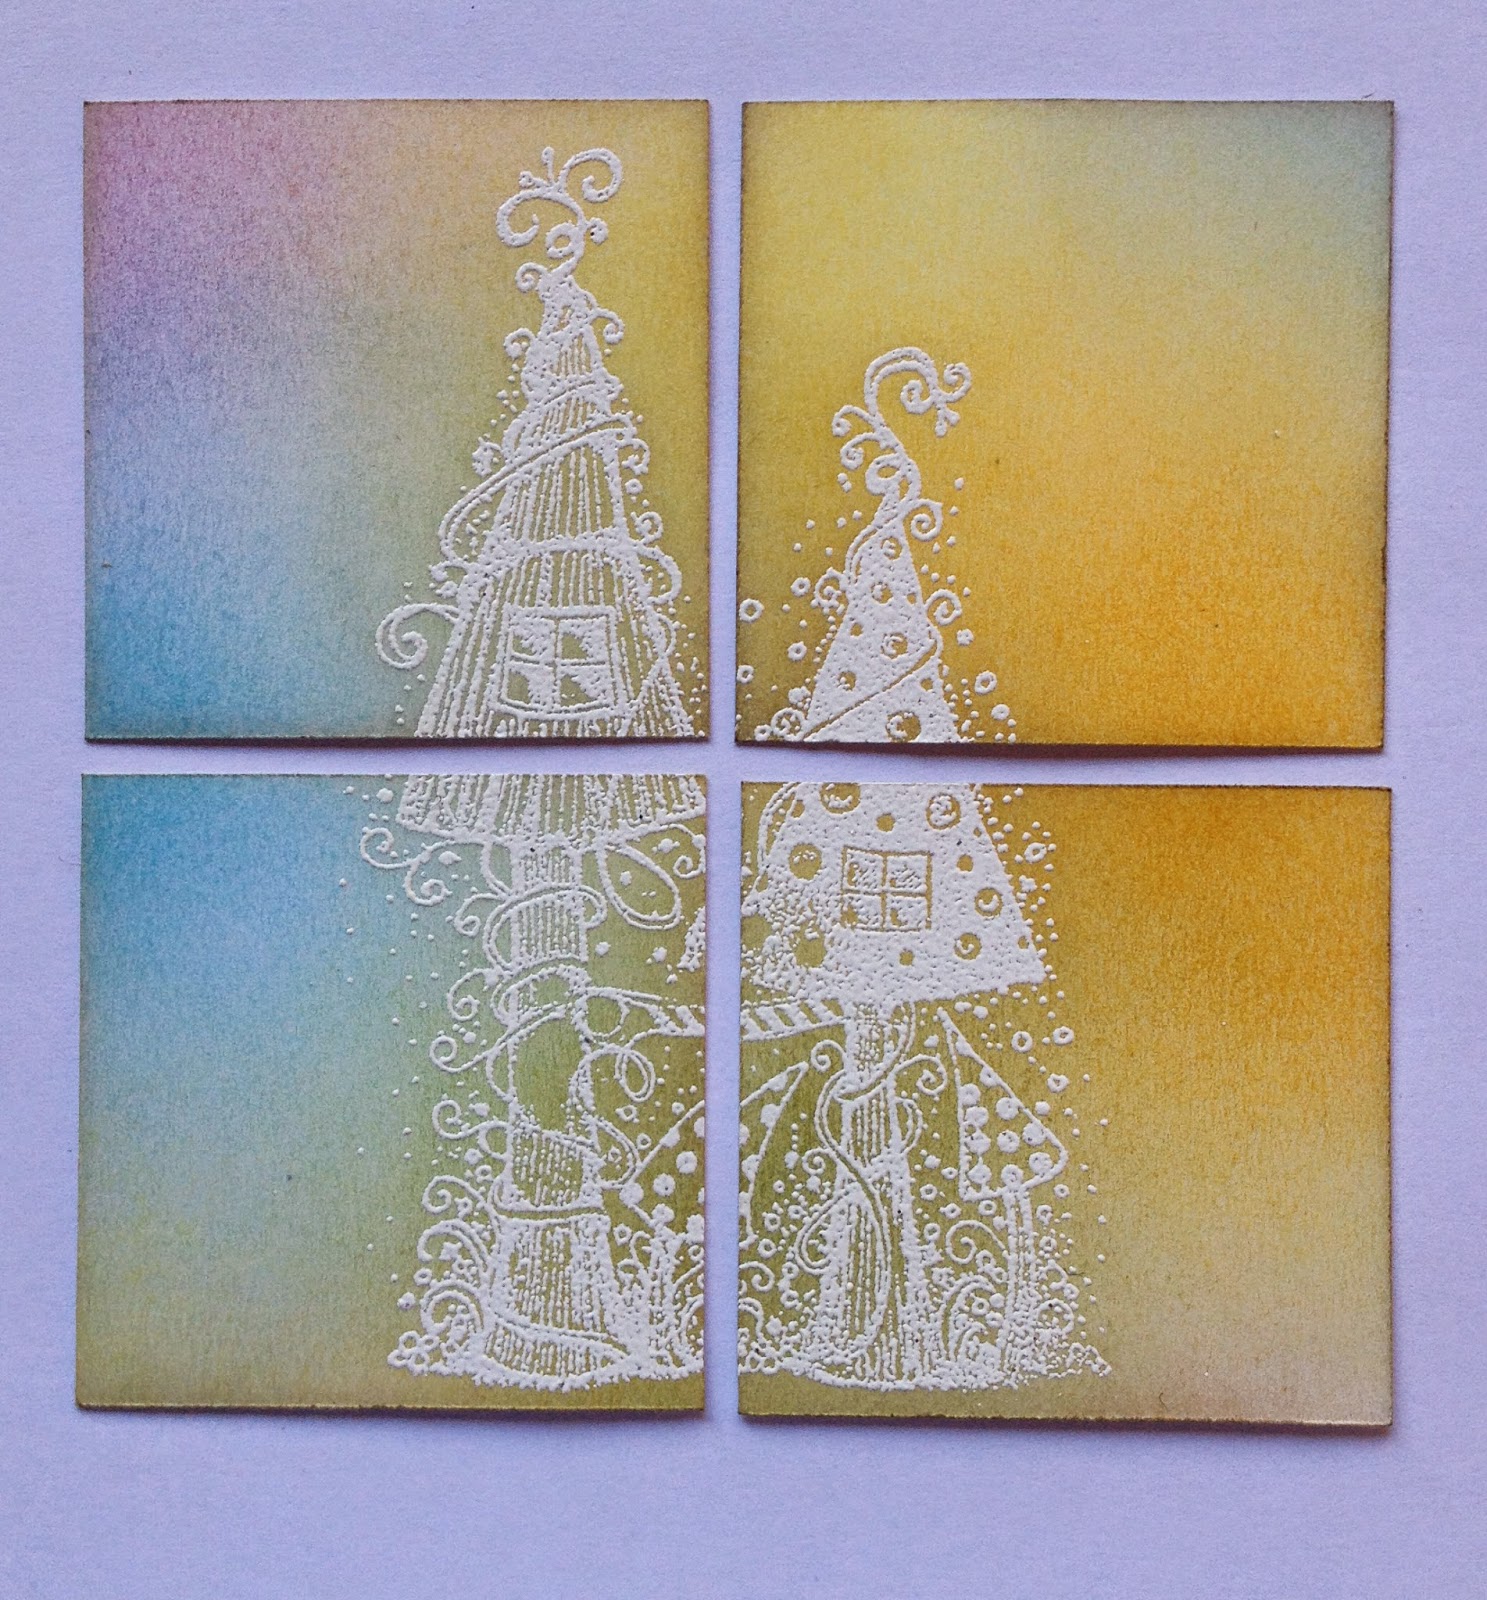
This image was then cut into a 9cm square, which was then cut into 4 equal tiles as in the picture below.


These were then very lightly inked with the pumice stone ink and the excess wiped from the embossed image. this helps the image "pop" slightly.

These 4 tiles were then mounted onto a contrasting colour card. 

The remaining inked card was then stamped with the fairy verse and the slender mushrooms in versa-mark and embossed in the white EP. The verse was die cut with the ribbon die and a matching die cut using the contrasting card. These were stuck together so as to form a shadow behind the verse.

The slender mushrooms were then cut out and inked with the versa-mark and embossed with the Utee, this was repeated so as to give a good coverage and give the impression of a glazed tile. This was also mounted onto the contrasting card and a hole was punched for some ribbon to be threaded through.


OK now it's time to start on the card blank, firstly using the square mask lightly ink the centre of the card with the squeezed lemonade.


Remove the mask and then cut a paper mask the same size as the centre aperture of the mask used. This will then be used to cover the area that has been inked. To keep this in place I use the sticky part of a post-it note pad folded in half under the paper mask.

Once the centre is covered the fairy was stamped in the top lefthand corner using the pearlescent olive ink. The small hearts were randomly stamped using the milled lavender D.I. These were then brushed with Perfect Pearls mica powder to give a subtle shimmer.

Next using the bay leaf stencil the flower stems were inked through using the peeled paint and the victorian velvet.


Now all thats left to do is to stick the 4 mounted parts of the fairy house in the centre and then attach the verse and little glazed tile. Job done!


Well I hope you liked todays card making session, one that would be very easy to adapt to any type of stamped image, whether it be for a male or female, young or the not so young---

Thank you as always for stopping by and reading this post and any comments, questions or queries are always much appreciated. Until next time we meet take care and have a good week, Jane x


Friday, 4 April 2014

Good Luck Card for a Dear Friend


Hi Everyone and a very happy Friday to you all. Todays card I made for a very dear friend who is leaving her job soon as the travelling to London has started to take its toll, so she has decided to work nearer home to be able to spend more time with her family. I would also like to enter it for The Sunday Stampers Challenge as the theme is 'Browns' and it fits the bill nicely.

As there is a fair amount of die cutting in this project I will just go into detail for the parts that need explaining like the background, flowers and ivy leaves.


ITEMS USED

Stamps; Studio 490 Flower Art, Heartfelt Creations Sun Kissed Fleur, Good Luck greeting
Old book pages
White card for stamping + odd pieces in various colours for die cutting
Dies; Tim Holtz Trellis, Bird and cage movers and shapers, Sizzix Vine 2, Memory Box Garden Sprig.
Distress Inks in Vintage Photo, Iced Spruce, Walnut Stain and Antique Linen.
Versa-mark ink pad
Black and Clear Embossing Powder.
Brilliance ink pad in Coffee Bean
Distress Stains in Brushed pewter, Antique Bronze, Gathered Twigs, Seedless Preserves, Picket Fence and Fired Brick.
Card For mounting from Craftwork Cards Sweet Pea Collection.
Distress Stickles in Vintage Photo
Glossy Accents
Cosmic Shimmers Antique Gold Mica Powder
Treasure Gold in Olive Bronze and Renaissance
DecoArt Metallic Lustre in Black Shimmer
Sizzix Embossing Folders

To start with the background white card was stamped with the large grid stamp from the Flower Art set in Iced Spruce. It was then brushed all over with the Antique Linen and the Vintage Photo. Once dry it went through the embossing folder and then the raised parts were coloured using a blending tool and the Iced Spruce and the Walnut Stain around the edges. The trellis and the ribbon were then attached.


I then added a contrasting ribbon to the centre of the green ribbon and some Olive Bronze wax to the edges of the trellis and odd parts of the raised background.

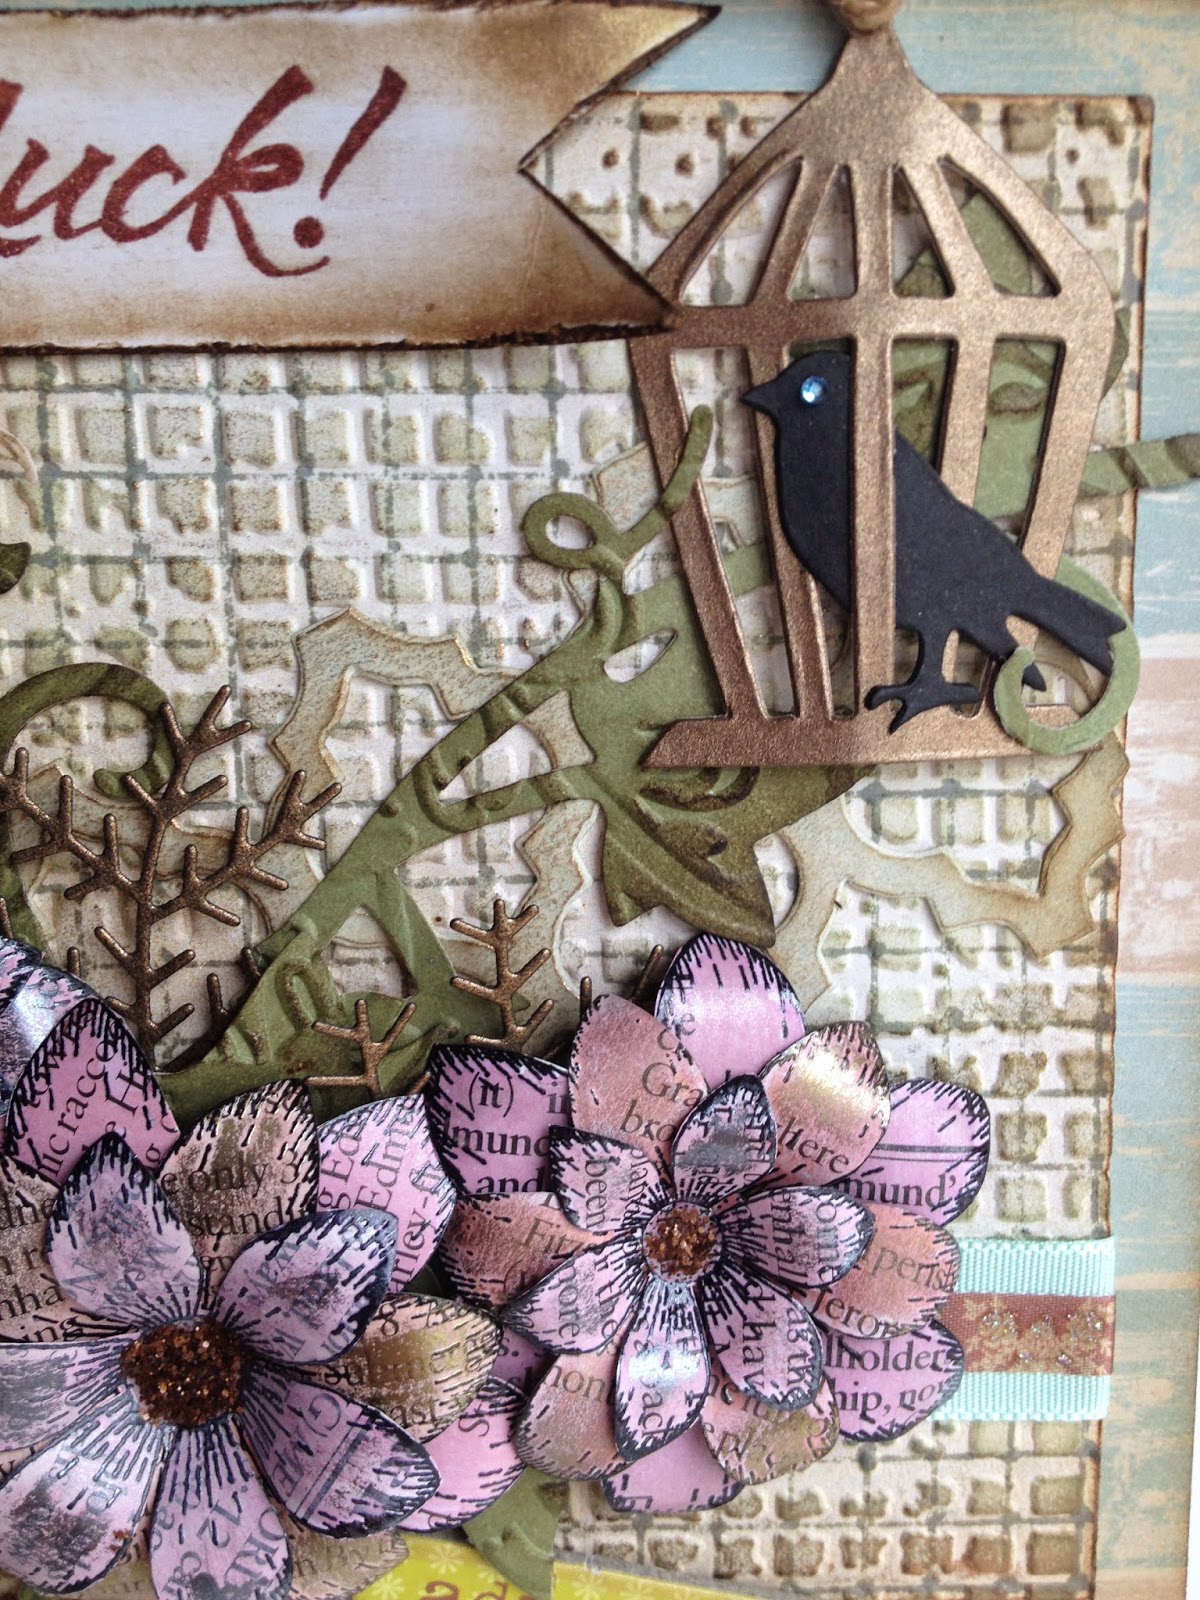
Next I stamped the Flowers onto the book pages in versa-mark and embossed with the black EP. These were then coloured with the Distress Stains mixing the colours as I went on a white tile.


You can achieve some lovely colours when you mix them together.  The picture below shows one using Antique Bronze, Seedless Preserves and Gathered twigs.


Although its hard to see in this photo the metallic does give a wonderful shimmer.


I stamped and coloured many more flowers than I needed but they are now in a box ready for another project. The flowers were cut out with scissors, there is a die for these but they really are quite easy to cut by hand.
I then decided on how I would layer the flowers up before applying the metallic lustre and treasured gold to parts of the petals. These were then buffed when dry and the flowers assembled using a wet glue. The centres were then filled with Glossy Accents and when that was completely dry I added some Stickles.

The card that I used to mount the work on was from Craftwork Cards and this had some Walnut Stain added to the edges just to draw the eye in. 


Next I did the die cutting, The ivy leaves were cut, then embossed with the Far out Florals folder, then using a blending tool inked with Walnut Stain. The picture below shows the before and after vine and I feel for this project it needed that extra texture.


The greeting was stamped onto white card in the Coffee Bean ink , then embossed with the clear EP and the ladybird was coloured with a red pencil. This was then cut with a craft knife and the edges distressed with a pair of scissors and inked with the Vintage Photo. Whilst the ink was still wet I brushed on some mica powder to add a slight shimmer as it catches the light.


Ok all components now ready its just down to assembling, I used Pinflair glue for this as I wanted some parts to have a bit of depth to them. The Dragon fly was cut from a punch and the word adventure was from an old K & Company chipboard set I had but felt it fitting in well.


Well I hope you all have a wonderful weekend, perhaps some quality crafting time to be had! Whatever you do have fun, thanks as always for stopping by and hopefully we will get together again soon. Until next time take care, Jane x

Please feel free to leave any questions or comments below, its always lovely to hear from you and I will answer any queries asap. 


Monday, 31 March 2014

Crocheted Square with Raised Heart

Just thought I'd pop by with a little quick entry and for a real change it's my first ever crochet pattern!


I recently followed a pattern in a book that my Mother-in-Law purchased that had a bow design made out of the bobbles. This turned out well and then the grey matter said "Hey we could play with this". So off I went to find a pad of squared paper and a pencil, and that is how this heart was created.

The stitch for those of you who do not know how it's done is very easy and I will take you through it in a second step by step.

The pattern I've included at the end of this blog and its the design as I drew it on the squared paper. The red squares are the bobbles and the blank squares are double crochet. You start with 28 chain and then work a double crochet into the 2nd chain in from the hook, and then 1 double crochet is worked into every chain stitch after that making 27 stitches, at the end of each row make 1 chain before turning. That is the foundation row( 1st row) the 2nd and 3rd rows are just 1 double crochet worked into each stitch. Row 4 the pattern begins with 1 bobble stitch worked into the 14th stitch being the centre.

Right now for the bobble stitch, start to work a treble stitch but stop once there are just 2 stitches left on the hook as in the picture.


Then do this again, so there is 3 stitches on the hook.


And again so you have 4 stitches on the hook.


And now a 4th time so you will end up with 5 stitches on the hook.


Now put the yarn round the hook----


And pull it through all 5 stitches.


So you have worked 4 open trebles before drawing the thread through all 5 stitches. The bobbles are formed on the underside of the work incase you wondered why there was no bobble visible!

I used 4ply cotton and a 3.50mm hook and the square measures 13cm x 13cm.

Here is the pattern and I hope you find it fairly easy to follow. In actual fact it probably is easier to follow if you are someone who picks up their work and does a couple of rows and then puts it down as you can just make a pen mark by the side of the row that you are on. All odd numbered rows are just double crochet so it's quite easy.


Ok I'm off now to cook some supper, happy crocheting and hopefully I'll see you back here soon for some more creative ideas. Have a good week and take care, many thanks as always for stopping by and don't forget if you have any comments, questions or queries do leave them at the bottom of the page and I will get back to you asap. Bye for now Jane x


Thursday, 27 March 2014

*DREAM* Mixed media Canvas


Well Todays entry is a mixed media canvas that I'm entering for the Sunday Stampers Challenge titled Dream. To see Hels Sheridans stunning example and all the other entrants click on the link   
There is a wonderful blog candy to be won this week as its her 300th anniversary.

Ok, so I had a little play time yesterday and I had been promising myself a messy session with some paint and stencils and this is what I produced. I will give a list of the paints, dies, stamps etc that I used and then a brief summary of how it was made.

ITEMS USED
Canvas measuring 5"x7"
Stamps by Graphic 45 and 7 Gypsies
Acrylic paint from PaperArtsy in Blush and Nougat
White Gesso
Tim Holtz Dies Fleurs di Lis & Eiffel Tower and Trellis from the new Frameworks series
Spellbinders Brackets Die
Stencils by Imagination Crafts called Bay Leaf and Dylusions Alphabet Border Small
Tag from InkyDoodles MDF Shapes Bag
Grunge Paste by PaperArtsy
Distress Inks in Iced Spruce and Vintage Photo
Distress Stains in Brushed Pewter, Tumbled Glass and Seedless Preserves
Brilliance ink pads in Graphite Black and Starlight Black
Perfect Pearls Mist in Blue Patina
Cosmic Shimmers Mist in Plum Tart
Creative Expressions Vintage Plum Gilding Wax
Cosmic Shimmers Mica Powder in Antique Blue
Treasured Gold Wax in Sapphire, Olive Bronze and Pewter
Decoart Metallic Lustre in Black Shimmer
Sizzix embossing folder
Paper scraps, lace, corrugated card, dry wall tape, black peel-off letters, hemp string, odd transfers, gems,2 eyelets and thin suede cord for hanging
The rose and leaves had been previously made and dipped into UTEE in the Melt Pot


To begin with I drilled the 2 holes in the top of the canvas and then gave it a coat of gesso. Then I stuck on the various papers, lace etc with a mix of 1part white glue and 1part water. Next using the grunge paste and stencils added the texture. This was then given a coat of gesso and then when this was dry a coat of blush acrylic paint.
The tag was also given a coat of gesso and a coat of blush. The letters were then stuck onto the tag and the edges stamped with iced spruce and brushed with the mica power. Finally the edges were sanded to reveal the wood.


Next a sprayed the canvas with the perfect pearls, the cosmic shimmers and a little water and tilted and twisted the canvas so that the colours mixed and blended between the different layers.

Once dry I then added the stamping to the canvas, Paris was first stamped in the starlight black and then over stamped in the graphite black to give some shadowing.

Making sure this was completely dry I then added extra colour using the Distress Stains. This was applied with a brush and my little finger! Touches of colour were also added to the die cut trellis so as to make it blend in rather than stand out too much.


The Eiffel Tower was embossed with the Sizzix folder and then rubbed with the sapphire treasured gold. The 2 brackets were rubbed with the black shimmer and all were buffed when dry.


The rose had some sapphire wax added to the edges of the petals and the leaves had some olive bronze added to the tips. These to were buffed when dry.

The ticket was given a coat of nougat and then stamped in the graphite black.


The canvas was then given touches of the vintage plum gilding wax and the pewter and sapphire treasured gold to the stencilled areas and the corrugated card to help make them stand out.

Then it was down to the assembling, after trying various designs, the transfers were applied before everything was secured in place with some pinflair glue. The gems were then added and the eyelet's were placed in the holes at the top and the suede cord threaded through and knots tied in each end.


A good evenings work I felt, little finger has a deep plum tone to it today but other than that there is no evidence of a messy, inky, painty session what so ever!!

I hope you can join me again soon for another crafty session, thanks as always for finding the time to stop by and read this blog. Any comments or questions are always appreciated and will be answered asap. Enjoy the rest of your week and take care, Jane x


Sunday, 23 March 2014

Easter Card with a Country Feel

Good Morning to you all and I hope everyone has had a calm and creative week. Todays entry is a fairly quick Easter card with a rural, country feel. The main set of stamps are a fairly new set from InkyDoodles and then I have used odd individual stamps from other sets which are all listed.


ITEMS USED
Stamps Sets by InkyDoodles; You are My Sunshine,  Primitive Blessings,  Just For You mini set and Happiness is.
A Post-it note mask of the scarecrow
15cm x 15cm blank card
White smooth card for stamping on
Scraps of craft card and patterned papers in colours of choice
Pencils for colouring
Clarity Cloud Mask
Black Archival Ink Pad
Clear Embossing Powder
Adirondack ink in Juniper
Distress Inks in Brushed Corduroy, Antique Linen, Weathered Wood and Bundled Sage
Small flower punch
Tim Holtz Bigz Tag and Book Plates Die
Brilliance Pearlescent Thyme ink pad
Pinflair Glue
Small length of ribbon and a few gems

To begin with stamp the scarecrow in the black archival onto the blank card and the white smooth card and then emboss with clear embossing powder. Whilst the stamp is inky stamp the scarecrow's hat, dungarees and patches onto your chosen patterned paper.


Cut out the clothing and stick the patches onto the dungarees. Colour the inside of the sleeves, the scarecrow's hands and the supporting stick on the card with pencils as these parts will not be covered up with the paper layering. I use pencil for this as I find Pro-markers bleed through the card and then spoil the inside. The shirt, face and underside of the hat were then coloured in on the stamped card. You could use pens for this as the underside will be glued down.
The scarecrow stamped onto the smooth card was then cut out, but don't worry about the hair, straw at the bottom of the trousers or the stick hands and inside of the sleeves as that part will show on the card. ( it makes life a bit easier!)

Next its onto the background.


The scarecrow was covered up with the ready made Post-it mask and the bottom half of the card was brushed with the juniper ink to give a slightly different tone to the sky. Then the clouds were inked using the Clarity Mask, Weathered Wood and Antique Linen inks. You really don't need much ink on the sponges to get a really good impression of the clouds. 

Once you are happy with your sky it's then onto the ground. I tore a piece of copier paper into a curved hill shape and starting at the bottom and working up the card apply less ink to each hill as you are getting further away. Make sure the base of the scarecrows stand is anchored with a small hill so that he doesn't look like he's floating!


Now the background is complete it's down to adding all the little extras and embellishments.

Stamp the eggs where you feel happy with them and whilst inked up stamp them onto some craft card and cut out. The chickens were then stamped onto the card and the feathers and beaks were coloured in with pencil. Stamp the same number of chickens onto your chosen papers and emboss with clear powder which helps to define the edges once cut out. 

Happy Easter was stamped onto white card and also embossed with the clear powder. The frame was cut using the Tags and Book Plates die and the greeting was attached to the centre. Ribbon was then threaded through the 2 holes each side. 

The heart and bird on the greeting were stamped from the Primitive Blessings set and the flowers punched out in co-ordinating colours. The bird on the scarecrows sleeve was stamped from the mini set, cut out and the claws were draw onto the sleeve with a black micron pen.
The dungarees were dabbed with a little brushed corduroy ink to dirty them up a bit before being stuck in place. Now its time to stick all the bits together, I used the pin flair glue as I wanted each of the images to have a raised effect and this holds up well if applied in a good mound.


The bottom edge of the card was stamped with the leaf from the Happiness is stamp set using the pearlescent thyme ink.


One Easter card with a jolly theme without a bunny in sight! Mind you, it would be easy enough to add one to this scene as it would fit in quite nicely! I really like the country check feel of this card but you could also go soft and flowery which would also look lovely. A great set of stamps and very versatile, which is what crafters are always looking for.

Well I hope you enjoyed todays entry and please feel free to leave any comments or queries at the bottom of the page and I will endeavour to reply asap. Thank-you as always for stopping by today and hopefully we can get together again soon for another crafty few minutes. Take Care and have a good week, Jane x 

Wow, Hubby has just bought me in a coffee, no biscuit though!