Thursday, 12 June 2014

Beaded Fairy Dust


Hi everyone and what an amazing day we've had here in Kent, so hot! Tried doing some housework but it was too warm, ( well that's my excuse) so decided to do some playing with a piece of calico. It's hard to capture the texture of the paints and the stamping on camera but I think with the different stages you will get the general feel of how it turned out.

ITEMS USED
Piece of natural coloured calico about 13cm square with some iron-on interfacing on the back
Lavinia Stamps
PaperArtsy Fresco Chalk Acrylics in Blush, Nougat, Snowflake, Pansy and  Spanish Mulberry 
Distress inks in walnut Stain and Victorian Velvet
Angelina Fibres
Archival in Jet Black and Watering Can
Mica Powders in Perfect Pearls and Black Pearl
Brilliance Ink in Pearlescent Olive and Crimson and Starlight Black
Few small beads and 1 pearl bead
Invisible Thread

To begin with I brayered the acrylic paints onto the material in no particular pattern until I had the background I was happy with.


I then stamped the path in Spanish Mulberry paint and then over stamped in walnut stain ink. The fairy was stamped in Watering Can but I did not ink all of the wings of the stamp as I didn't want them to show on the calico once I had fixed the fibre wings in place.

The toad stalls were stamped in the olive and crimson pearlescent ink and then brushed with perfect pearls mica.
The small mushrooms were stamped in starlight black and then brushed in the black pearl mica.
The fairy dust was stamped in the snowflake paint.

Next I ironed some Angelina Fibres between 2 pieces of baking parchment and then stamped the wings in Jet black ink twice to form the 2 pairs.


This was a mixture of pink and blue fibres and were then cut out with scissors.

The calico was then cut to size and the edges frayed.


The beads were then sewn on with the invisible thread along with the wings and the pearl bead.


The edges of the card were lightly brushed with victorian velvet ink and then the ivy stamped in the 2 corners in pearlescent olive. These were then brushed with the perfect pearls mica and a pearl gem stuck where the stems cross over.

The sentiment was then stamped onto white card in the pearlescent crimson and cut out with a die.

The material was then stuck in the centre of the card using pin flair glue and the sentiment stuck in the top lefthand corner and a mauve gem  placed on top.


I would like to enter this card for the Lavinia Stamp Challenge titled " Add some beads or gems"

I hope you all have great weekend and please pop back here soon for some more crafty ideas. Thank-you for stopping today and I hope you have found a tiny piece that has interested you, please leave any comments or queries at the bottom of the page as I do love to hear your views.
Until next time, take care and enjoy your crafting time  Jane x.


Saturday, 7 June 2014

Altered Frame


Today I am sharing the different stages of altering an old veneered frame that has had a small cross stitch sampler in it for about 25yrs. The frame was looking very tatty and the embroidery was in need of a wash so it seemed the perfect time to get to work on it.

I was inspired to alter this frame having read Sue Carrington's altered box on the Paperartsy Blog, to view this blog click on the link http://blog.paperartsy.co.uk/2014/06/altered-box-with-lynne-perrella-stamps.html


This is how the frame looked before I set to work on it, I stripped off the veneer and sanded the wood to remove any residue of glue. I then gave it a coat of French Roast, then a coat of Toad Hall followed by some small random areas of French Roast.


I then brushed some areas with Americana Weathered wood where I wanted a cracked effect and once this was dry added a coat of Mermaid all over. A light sanding was given to a couple of patches to reveal a little more of the under colours.

I then applied Grunge Paste through the Bird and Branch Stencil by Tando Creative to the bottom righthand corner. Next I spread a little Grunge Paste through some netting with my finger on 3 random spots.

Once this was dry I made a light wash with bundled sage Distress Stain and water to add a slight colour to the leaves and stems of the flowers. The flowers were coloured in the same way using seedless preserves Distress Stain. 

I applied some walnut stain Distress Ink to the edges of the frame and then randomly stamped the diamonds in Archival Watering Can, the trellis in walnut stain and the ' don't eat the daisies' in black soot Distress Ink.


I also did some stamping on the edges so as to tie it all together.


To finish the whole frame off I applied areas of Treasure Gold Wax in Olive Bronze and Sapphire and then buffed up with a soft cloth.


Now all that's left to do is press the cross stitch, place it back in the frame and hang it on the spare bedroom wall.

I would like to enter this for the PaperArtsy Weekly Challenge.

Today I went to the Craft Barn at Nutfield where they were hosting their yearly Extravaganza and Leandra Franich from PaperArtsy was demonstrating some wonderful background papers using the Fresco Chalk Acrylics, learnt some great techniques and if anyone is thinking of going along tomorrow I highly recommend it.

Thanks for stopping by and please feel free to leave any questions or comments at the bottom of the page. Hope you all have a great weekend, take care and hopefully see you back here soon Jane x


Thursday, 29 May 2014

Vintage Seaside Tag

Hello, and a very happy thursday to you all. Well where has May gone? I can't believe it's the 29th already. Todays blog is just a quickie as I wanted to enter this tag into Frilly and Funkies fortnightly challenge and time is running out!

To view all the DT's beautiful pieces click on the link ;  http://frillyandfunkie.blogspot.co.uk/2014/05/vintage-seaside-challenge.html


To begin with I printed part of a seaside photo that was taken at Rock in Cornwall several years ago looking across to Padstow. This was printed onto 250gsm card and then cut into a tag using the Tim Holtz die. I then extended the sand area by painting on some watered down Distress stain in Gathered Twigs. The sky and clouds were created with a cloud stencil and using Distress Ink in Antique Linen and Adirondack in Juniper.

The top was stamped with "Postcard" using the hole of the tag as the o and then a row of beach huts were stamped so that the tops were in the sky line. This were all stamped in Sepia Archival and then coated in clear embossing powder and heated.


The flags on the top of the huts were coloured in using pro-markers.


I then stamped a matching row of beach huts onto white card and coloured these in again using pro marker pens. I stamped 2 larger beach huts also in sepia, coloured them in and cut them out. I discarded the flags on the top of the larger huts and cut these out of material to give some added texture. The bunting was cut from white card using a Memory Box die and these were coloured using the same colours as the small huts.

I then stamped Memories from a 7 Gypsies set of stamps on to a card ticket that had been painted with PaperArtsy acrylic paint in nougat, then given a coat of Americana Weathered Wood and then once dry a coat of white acrylic paint. Once dry and crackled I inked the edges and slightly smudged the word memories with Vintage Photo Distress Ink. I then rubbed in a little Treasure Gold wax in Renaissance to hi-light the cracking. 


The tag, bunting and all the cut out huts were aged at the edges using Pumice Stone Distress Ink. The sand area was lightly rubbed with some Distress Stickles in Vintage Photo.

The names of various shell fish were added to the sea area using letter rub-ons and the flying birds were stamped in the sky using Watering can Archival ink.

I frayed a small piece of burlap/hessian and stuck this onto the tag using Glossy Accents. The huts were all stuck in place with glossy accents and the ticket and bunting were attached with foam pads for extra depth.

Finally the fishing net was attached to the bottom corner, this was a piece of netting saved from a bundle of satsumers---- I had a feeling it might have a use one day!


A length of natural rope/ thick string was added to the top of the tag.


I would like to enter this tag for The Frilly and Funkie Vintage Seaside Challenge.

Thanks as always for stopping by and reading todays entry, hopefully you'll pop back again soon. I always love to read your comments and messages so please feel free to leave them at the bottom of the page and if you have any questions on todays tag post them at the bottom and I will answer them asap. Until next time, take care and enjoy your crafting time whatever it is you do. Jane x


Friday, 23 May 2014

Playing With Inkabilities

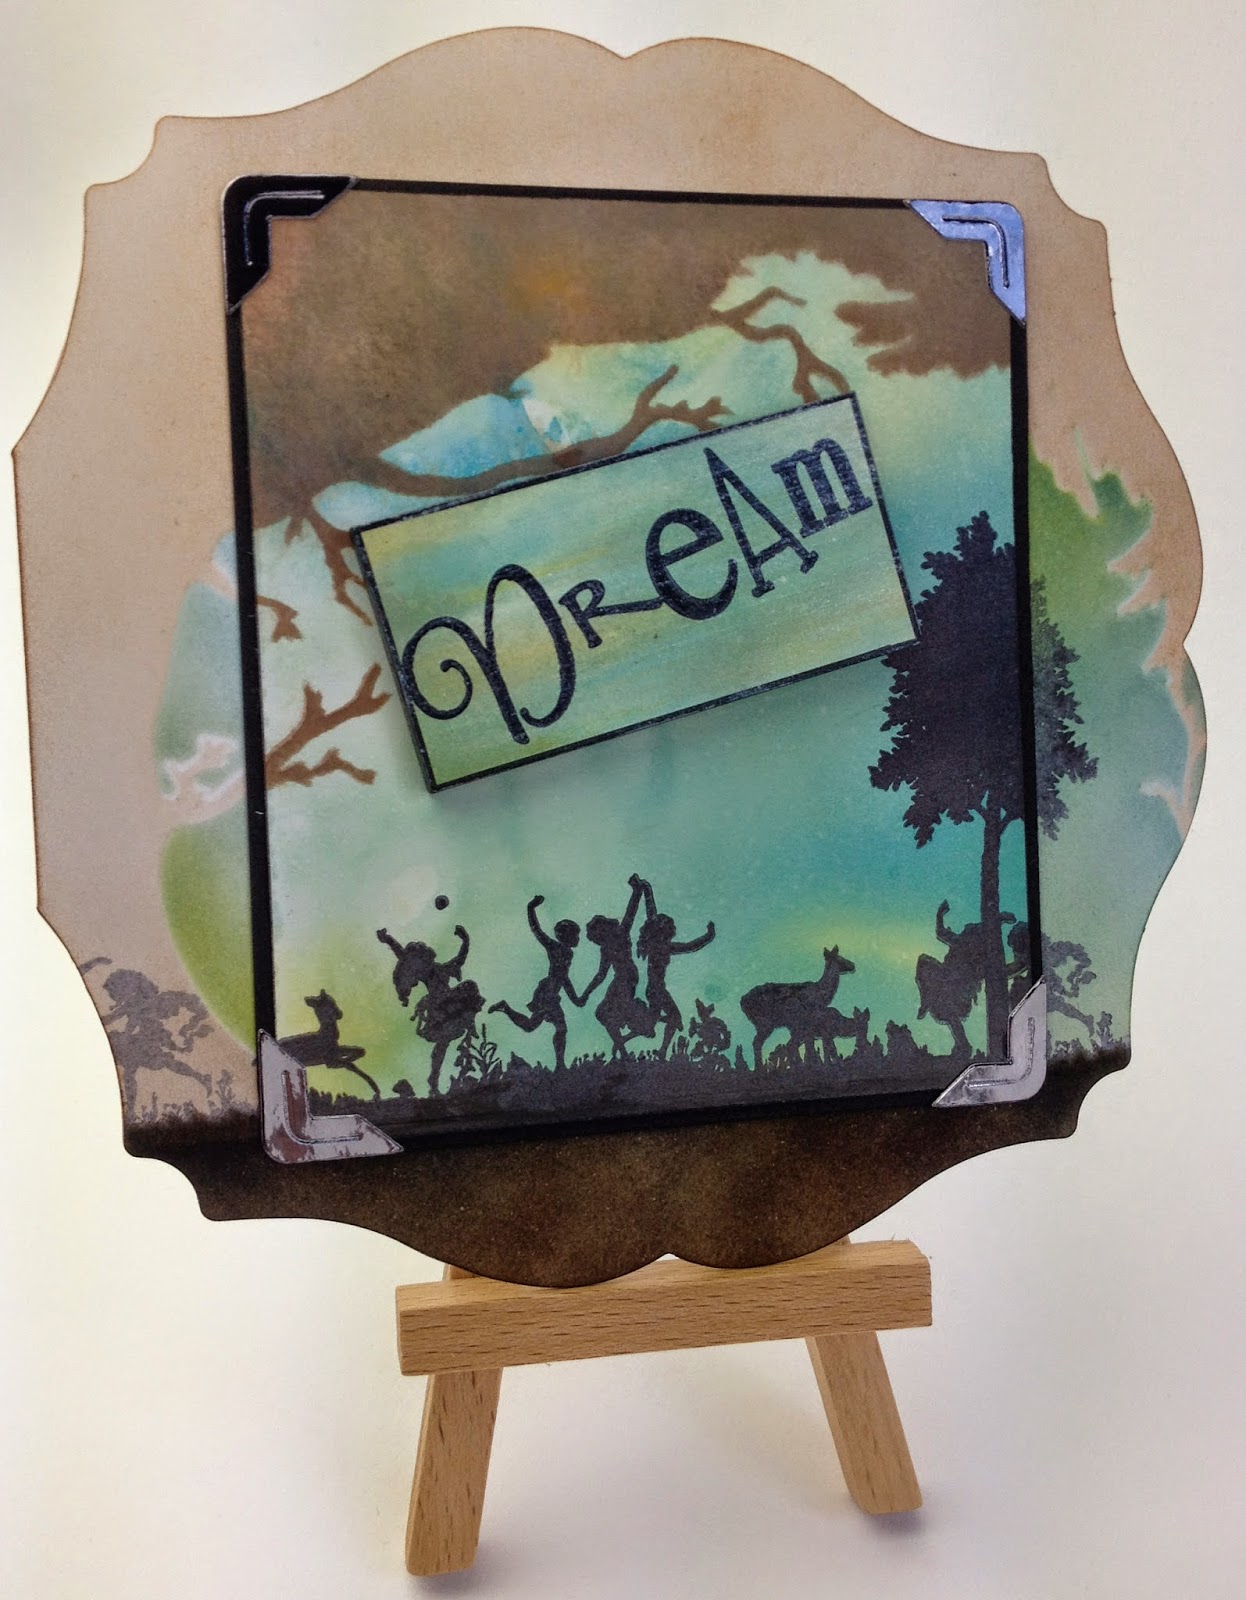
Well having had a few wonderful days in Ireland with our daughter and family it's now back to the normal routine of working, chores and crafty-playtime! After a quick tidy up of the craft room I felt a reward was needed so I reached for some old favourites--- Inkabilities by Ranger, sadly I think these are no longer produced so if you can track some down they are well worth investing in.


The centre picture had the background made with the Inkabilities and the card was coloured with Distress Inks.

Items Used

Clarity A6 Double sided coated card
Black card for mounting
Stencil and Stamps by Clarity
Stampbord
Inkabilities in Citrus, Beach Ball Yellow, Sailboat Blue and Awning Green
Black Archival Ink
Distress Inks in Tea Dye, Vintage Photo, Walnut Stain, Tumbled Glass, Crushed Olive, Faded Jeans
Versa-Magic Chalk Inks in Sea Breeze, Sage and Mango Madness
PaperArtsy Metallic Glaze
Cosmic Shimmers Antique Black Mica Powder
Pilot Pigment ink Pen
4 Corners cut using Tim Holtz Die ATC and corners

To begin with I coloured the coated card stock by placing drops of the ink onto a sheet of cellophane, then spritz with water and swipe the card through the ink several times till you are happy with the coverage.


I decided to go with the top left hand one for this project. Then using the centre part of the stencil I inked in the tree and branches using tea dye, vintage photo and walnut stain. I then stamped the children and the tree in black archival. Whilst the black ink was still damp I brushed it with the mica powder to give a slight sheen.


I then mounted the art work onto some black card and secured the pre-cut corners with some pva glue.


Next I coloured the card for which the picture would form the centre piece. I decided where the picture would sit and then matched the stencil so as to aline the art work. The tree frame was coloured with the same distress inks as before but kept much lighter. The bluey, greeny background was created using Distress inks in tumbled glass, faded jeans and crushed olive. The base was coloured with walnut stain and vintage photo. 

I then used 2nd generation black archival to stamp the tree and the children dancing with the animals so as to continue the design. 


The main picture was then secured in place with double sided tape.

Then it was just the stampbord with the word "Dream" left to do, I decided where I wanted this to sit and then proceeded to colour the stampbord in similar shades. This was achieved with the chalk ink pads and some cut and dry foam. Once I was happy with the colours I then stamped the word dream from the word chain no 5 set in black archival ink. Leave this to dry thoroughly and then hi-light the edges with the black pen.


This was then given a coat of metallic glaze.


Although its hard to pick this up in a photo the glaze really does give a subtle glimmer and an added texture to the whole piece.

This was then secured in place with some pva glue.


I would like to enter this card for the Claritystamp Challenge titled "It's all in the Words".


I hope if you are lucky enough to own some Inkabilities that this might give you a nudge to get them out and have a play and if you don't already have some if you spot some for sale you might give them a try.

Wishing you all a wonderfully relaxing Bank holiday weekend if you are here in the UK, and if  you are somewhere else and reading this I hope you have a lovely weekend whatever you may be doing. Thanks as always for stopping by, please leave any comments at the bottom of the page and if you have any questions I shall endeavour to answer them asap. 

Until next time take care and enjoy your crafting time, Jane x


Sunday, 11 May 2014

Fun With The Gelli Plate


Hi Everyone, had some fun with the gelli plate yesterday experimenting with PaperArtsy Fresco Chalk Acrylics---- and I really love the way the paint drys. Its hard to describe so here is a close up of an area.


Ok, here's what I did. Firstly I put 3 colours of the chalk acrylic on the gelli plate, mermaid at the top, blush in the middle and guacamole at the bottom. I left this to completely dry and it took about 4 mins. Small areas where the paint was thinner seemed to form a slight resist which gives a different dimension and texture. Then I applied a coat of Liquitex acrylic in parchment and working swiftly dabbed the bottom part with some hessian and the top area with some bubble wrap, then pulled the print.

Then using the summer garden stencil by Claudine Hellmuth I applied a coat of PaperArtsy Grunge Paste through one of the flowers. This was then left to dry for about 30mins.


Next I stamped the fairy wings twice from Lavinia Stamps Mia fairy onto acetate using jet black Archival ink. Once this was dry ( takes a little longer to dry on the acetate ) I coloured the wings with cranberry Alcohol Ink on the underside. Then using a Quickie Glue Pen applied some glue to the wings and then some rose coloured glitter. Once dry I cut these out with some scissors.

The grunge paste flower was then coloured with Distress Ink in Victorian Velvet, Adirondack in Aubergine and Versa-Magic chalk ink in Pink Petunia. Whilst the ink was still damp I brushed the petals with Cosmic Shimmers Mica Powder in Antique Red.

The stem was coloured with Distress ink in Iced Spruce and the leaf in Bundled Sage and Peeled Paint.

The fairy was stamped onto the card in Brilliance Starlight black. The poppy seed heads from Lavinia were stamped in 2nd generation Versa-magic Chalk ink in sage and then brushed with Perfect Pearls mica powder.

The small toad stalls also from Lavinia were stamped in 2nd generation Distress ink in Walnut Stain and these were brushed with Cosmic Shimmers Mica in Antique Gold.

The Happy Birthday sentiment was embossed with a Sizzix folder on some Tim Holtz Kraft-Core, cut out using a woodward punch and then rubbed with some Treasured Gold Wax in Ruby.

The bow was cut using the Tim Holtz Bow Tied Die and the 4 corners were cut from the Spellbinders Lattice collection. The corners were lightly rubbed with Treasured Gold in Pewter to hi-light the raised areas.

Now for the final steps, the edges of the print were inked in Iced Spruce before mounting onto some card the same as was used for the 4 corners. 

I inked 2 of the stars on the Lavinia small stars stamp in Brilliance Moonlight White and randomly stamped these in the sky area 5 times. These were then brushed with perfect pearls mica powder.

Using the quickie glue pen dots of glue were added around the fairy's hands and then sprinkled with white glitter to resemble fairy dust. The 4 corners were then stuck in place and the bow and sentiment were stuck using pin flair glue. Finally the pair of wings were stuck using glossy accents.


I would like to enter this card for the following challenges;

Lavinia Stamps Challenge titled "Birthday Girl"
and
Hels Sheridan's Sunday Stampers titled "Pink"

Thank you as always for stopping by and I hope you have enjoyed todays crafting session. If you have any comments or questions about this make please feel free to leave them at the bottom of the page as I do love to hear what you think as thats how we all learn, and the crafting community is always generous with its help and knowledge.

Hope you all manage to grab a few minutes creative time over the next few days and hopefully I'll see you back here soon. Take Care, Jane x


Sunday, 4 May 2014

'SEWING' A Transformed Gift Bag.

Hi Everyone and a very Happy Bank Holiday to you all, hopefully you haven't got to go to work and that you are having a well earned long weekend. Todays crafty offering is a little different but I hope you like it and that it might give you a few ideas for jazzing up a gift bag and also personalising it for the recipient.

I would like to enter this for the Frilly and Funky fortnightly challenge titled " On The Runway" Sewing or Fashion. To view the DT creations and the other entries click on the link; Frilly and Funky


This bag is decorated on all 4 sides so there are a lot of different components,  I shall give details for the dies, inks and waxes used and how I made the main elements on each side.


The bag I started with was a 14cm x 14cm x 9cm brown paper gift bag which is available at most craft stores. This I cut open at the sides so that the bag would then lay flat to allow me to sew my chosen fabric to the front, back and sides along the top and edges.


I then reformed the bag and reinforced the cut sides with a piece of card on the inside. This was stuck with double sided tape.


Next I embossed a sheet of Paperartsy Crunchy Waxed Kraft Paper with the Tim Holtz Texture Fades Pattern and Stitches A2 folder. This was then cut and torn to fit onto 2 of the sides. Once in place the raised edges were hi-lighted with some Treasured Gold Wax in Renaissance.

A picture of an old sewing pattern was downloaded, stuck onto some card that resembled stripped fabric and the edges were cut with pinking shears and inked using Distress ink in Vintage Photo.

Now onto the main elements.


Starting at the top, the tape measure was stamped in black onto white card, then cut out. 4 small lengths of ribbon were then stuck onto a textured piece of brown card, an eyelet was used to attach the tape and the card and then a length of bakers twine tied to the top.

The mdf tag was given a coat of white gesso and then when fully dry a coat of Paperartsy Fresco Chalk Acrylics in Blush. The sentiment "You're Sew Special" was stamped in black archival and then heat embossed with clear embossing powder. The edges were stamped with a flourish stamp by Graphic 45 in vintage photo and then brushed with Perfect Pearls Mica in Heirloom Gold. A length of boucle wool was then threaded through the hole in the tag.

The picture in the centre was embroidered in cross stitch onto cream Aida. The frame was cut from some hammered card, edges cut with pinking shears and then rubbed with Decoart Metallic Lustre in black shimmer and the Renaissance Treasured Gold. Once dry this was then buffed with a soft cloth. I then crocheted a length of chain stitches to hang the picture with and attached a hook from a hook and eye set.

The thread card was stamped onto kraft card with versa-mark ink and heat embossed with white embossing powder. Once cut out the silk thread was then wound round the card and fastened.

The dressmakers dummy was cut using Tim Holtz Movers and Shapers mini sewing room die. This was cut twice, once in black felt and then in natural calico. The top and bottom were cut from the calico dress and then stuck onto the felt. I then sewed 2 layers of gathered lace to form a skirt and threaded some tiny beads onto some invisible thread for the necklace.

The flower was cut from Tim Holtz Tattered Floral die and the centre petals were cut using a flower punch. The outer layer of petals were cut from Grunge Paper, embossed with an embossing folder, inked with Distress inks in Dusty Concord and Victorian Velvet. Once the ink was dry I applied a little Treasured Gold in Ruby and Sapphire to the embossed parts. The leaf was cut with the Mini Tattered Leaf die, inked in Iced Spruce and Peeled paint and the edges rubbed with Treasured Gold in Olive Bronze. The flower is held together with a metal brad.

The millinery ticket was stamped onto some rose bud patterned paper using Tim Holtz Stampers Anonymous Adverts in Walnut Stain. this was then stuck onto a torn piece of T.H. Kraft-Core no 23 and the whole thing was lightly inked with vintage photo.

A pair of scissors were stamped and heat embossed in black and cut out and a piece of trellis was cut from cream card using the new T.H. die.

Now onto the assembling.


Using Walnut Stain ink I randomly stamped some text onto the fabric. The hook for the picture was sewn in place and then the picture is held with a glue dot. The Sylko tag was taken from an old cotton reel and the buttons are just odd ones found in the wonders of a "Button Box" ( A child's delight!)


The tape measure was just tucked into the top of the wax paper and then 2 press fasteners used to secure. A few pearl beads were threaded onto come cotton.


The pattern was attached with double sided tape and a brad was fastened in the top corner. the trellis was then stuck with foam pads to give some depth. The flower, leaf and dummy were all fastened with wet glue. The tag was tied to the handle and held steady with a glue dot.


The patterned paper was stuck on the bottom edge, hand sewn on one side and left unfastened on the other side so as the scissors could be tucked in. Cotton lace was gathered and hand sewn at the top and the ticket was attached with double sided tape.


So there you have it, a completely transformed gift bag. How much fun it would be to fill with lots of little sewing goodies for someone's birthday present. I hope you have enjoyed todays entry and that it fits the brief to be entered for the challenge.

If you have any questions or comments on this make please feel free to leave them at the bottom of the page and I will endeavour to get back to you asap. Hope you all have a great weekend and hopefully see you back here soon for some more crafty time. Take care and thanks as always for popping by, see you soon  Jane x


Sunday, 20 April 2014

Monochrome Tag

Happy Easter Sunday to one and all, it's a really dark damp day here in Kent so I've spent some time in the craft room. We've had heavy rain and claps of thunder so typical weather for Easter. Anyway todays offering I'd like to enter for Clarity's monthly challenge titled Monochrome. For this I have used Distress ink and stain in just the Tumbled Glass.


ITEMS USED
Distress ink and Stain in Tumbled Glass
Brick and Square Honeycomb Stencil by Clarity
Stamps by Clarity; Word chain no 5, Edelweiss, Cow Parsley and Quirky Gate
Grunge Paste
Theuver Card by Clarity
Glossy Accents
Versa-mark ink pad
Clear Embossing Powder
Small mdf heart
White cotton seam binding
Bakers  Twine
Treasure Gold in Sapphire


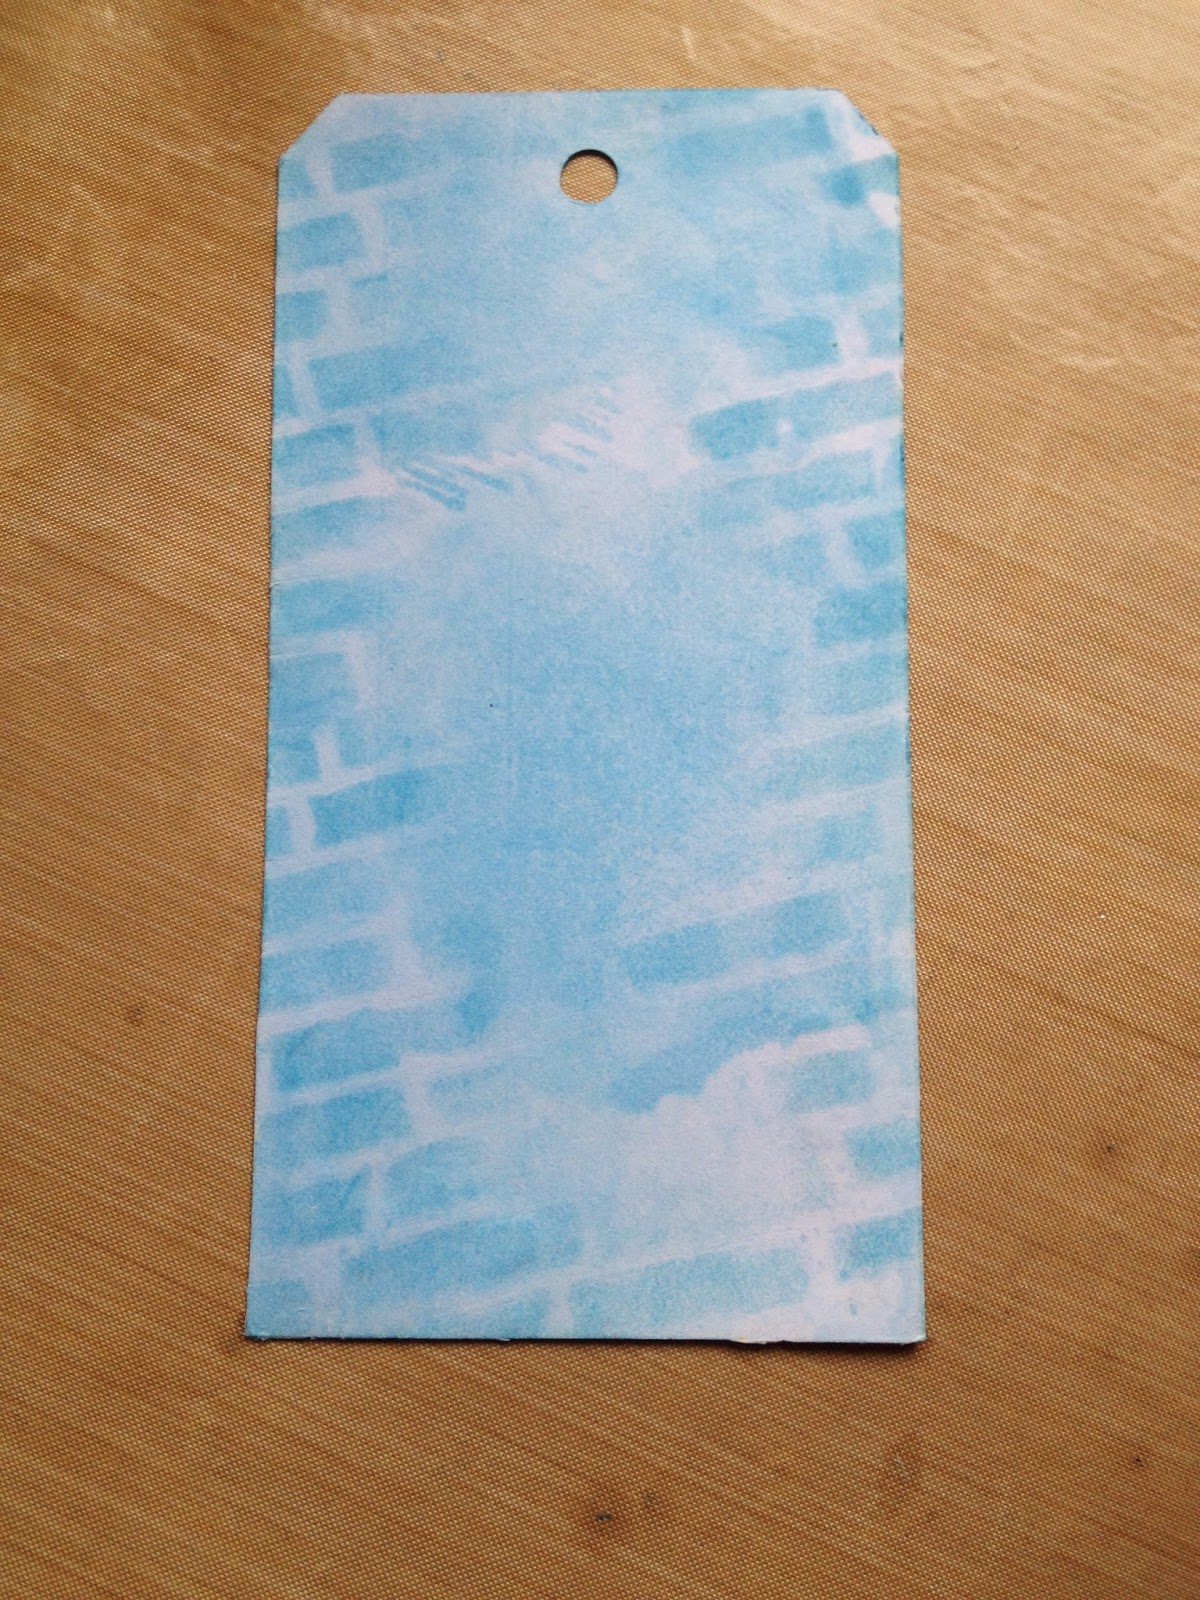
Firstly I cut a tag from theuver card and coloured the background by applying the distress stain to the craft mat, spritzing with water and swiping the tag through several times backwards and forwards.


I then applied the distress ink through the brick mask using a make-up sponge. Next I stamped the 3 Edelweiss at the bottom and the Cow Parsley to the edges. Once the ink was dry the grunge paste was applied through the Honeycomb stencil. This was left to dry for about 30 mins and the edges of the tag were distressed using a pair of scissors and then distress ink applied using a blending tool. The grunge paste will absorb the ink so more was applied to these areas. 

The treasured gold wax was then lightly applied with my finger to the raised honeycomb areas and once dry buffed with a soft cloth.


I then added the glossy accents to the centres of the edelweiss. 

Next stamp the word Imagine onto some card in the versa-mark ink and sprinkle with the clear embossing powder and heat. Lightly apply some distress ink so as to just colour the card slightly. Then place the brick stencil over the embossed image and apply ink with a sponge, once the ink is dry a light rub over the embossed image will make the word pop. This was then cut to size and the edges stamped with the cow parsley so as to tie the whole thing together.


The quirky gate was then stamped in the tumbled glass onto card and then cut out with a craft knife.

The cotton tape was coloured using the distress stain and ink onto the craft mat and sprayed with water, dragging the tape through the wet solution and scrounging it up as you go. This was left to dry in a bundle but you can dry it with a heat gun if you are in a hurry. This does stain the fingers slightly so not a job to do before going out for a nice meal!

Last component the heart, this I applied several layers if ink to and then sanded it between applications as I wanted some areas of shading. This took on a slightly greener hue where it had been sanded the most.


This was then embossed with clear embossing powder twice to give a glossy finish and a different texture.


Now it's down to sticking the parts together. the gate and the word plaque were both stuck on with pin flair glue as I wanted some height to these items, the bakers twine was threaded through the hole in the heart and then tied onto the tape at the top.


One tag and one ink pad, but using different textures and mediums you can achieve a range of colours.

Thank-you as always for popping by and I hope you all enjoy the rest of your Easter whatever you may be doing. Comments and messages are always appreciated and if you have any questions I will answer then asap. Take care and see you soon  Jane x