Monday, 9 September 2013

Hobby/ Craft Room

Hi again, hope you are all well. Today has been the first day of kitting out our new hobby room. We pulled down our old garden shed about a year ago as it was falling apart due to the back basically rotting away. Once the shed was completely cleared we were left with a larger site than we had originally thought.

So the thinking caps went on and we decided that as we both have hobbies that entail paint, glue and a lot of mess so a garden room that was insulated and had electricity with a small garden storage shed on the side would fit the bill very nicely.

After trawling various web sites for a design that appealed to us both we settled on one and talks started with a firm and planning permission was applied for as the apex shaped roof height was higher than  normally allowed.

Weeks passed, neighbours received letters from the planning departments and no-one objected, but low and behold permission was not granted as we live in a green-belt area!!!

So back to the drawing board and we finally decided on a smaller design with a flat roof and a separate shed. This was built a couple of months ago, but due to other things going on we hadn't got round to kitting it out yet.


A couple of weekends ago our Daughter and 2 of our Grandchildren came to stay and the new craft room was turned into  a shop, which was great fun.

Not quite sure what they will think the next time they visit !


So after drawing up loads of mock plans for furnishing the inside we have finally took delivery of the work benches, chairs, storage unit and a glass display cabinet for Robs models that he makes and paints.


Both items here were flat packs from Ikea and went together amazingly well. The storage unit will have drawers in 2 of the cubicles ( making then tomorrow) and the work benches will be going in next.


It looks pretty stark at the moment but once all the wool, card-making stash, sewing machine etc are all installed and everything has had a good coating of glitter I'm sure it will become much more homely.


Rob ordered this rack for his acrylic paints, it came as a flat pack and went together very easily and I quickly dashed off and gathered up some of the Ranger Alcohol Inks and Stickles bottles!

They fit beautifully and it would sit either on a shelf above a table/ work bench or if there was space just to the side on the table.

I also thought it would look lovely decorated in some of ones favourite papers, paints etc.
It was purchased from www.sphereproducts.co.uk and I think I might be sending for one also.

Must finish now and cook some dinner, will update you on progress and look forward to sharing some of the things that are made in our new Hobby Room.

Thanks again for stopping by and if you have any favourite must have items in your craft/hobby room do leave a comment at the bottom of the page.
Jane x

Sunday, 1 September 2013

Gilding Flakes using Judi-Kins Embossing Powder

Hello again, and I hope you are all having a relaxing Sunday afternoon. We've just been blackberrying and I thought I would tell you about a product which I purchased over a year ago and have just got round to using!!!

Maybe some off you are already aware of this product but for those of you who are not its called Judy-Kins  Embossing Powder  Sticky Stuff EP260, and its an embossing powder that stays sticky after its been heated. So then you can apply gilding flakes, glitter, foil and probably many other things too.

I like using gilding flakes but there have been several occasions where I have just wanted a small addition and not wanted to use the double sided adhesive clear sheets, or wanted a stamped image in the gilding flakes.


So this is where this embossing powder comes in, you stamp the image as normal using versa mark or the make of clear ink that you have, and then sprinkle the Judi-Kins over the image as you would with any other embossing powder, and then shake off the excess.


The grains of powder are slightly more course than the every day embossing powders, but nowhere near as thick as UTEE.


When heating the stamped image with your heat gun take care as this powder melts much quicker, so be prepared to move the heat gun onto the next part of the image sooner than you would be used to.


Then cover the embossed image with gilding flakes and push then onto the card stock to make sure they adhere as you would do normally.


Next rub the excess off in the normal way using a course sponge or whatever your preferred method is.


And there you have it, a stamped image coated in gilding flakes.


I hope this has been of help to some of you, and if anyone has used this product and has any tips or other suggestions please leave a comment at the bottom of the page.


Thank-You for popping by and reading todays entry, I am just finding my way around the site at the moment so hopefully I will be adding new bits and pieces as I get to grips with it all. Enjoy the rest of your Sunday. Bye for now Jane x


Sunday, 25 August 2013

Distress Stain Coloured Paper

Well a very Happy Sunday to you all, hope you have better weather than us here in Kent where it is very grey and damp.


Today I thought I would explain how I colour ordinary printer/copier paper for making flowers and leaves for my cards and crafting projects like the ones in the photo.
If you are going out somewhere nice and want clean hands do this another day!!


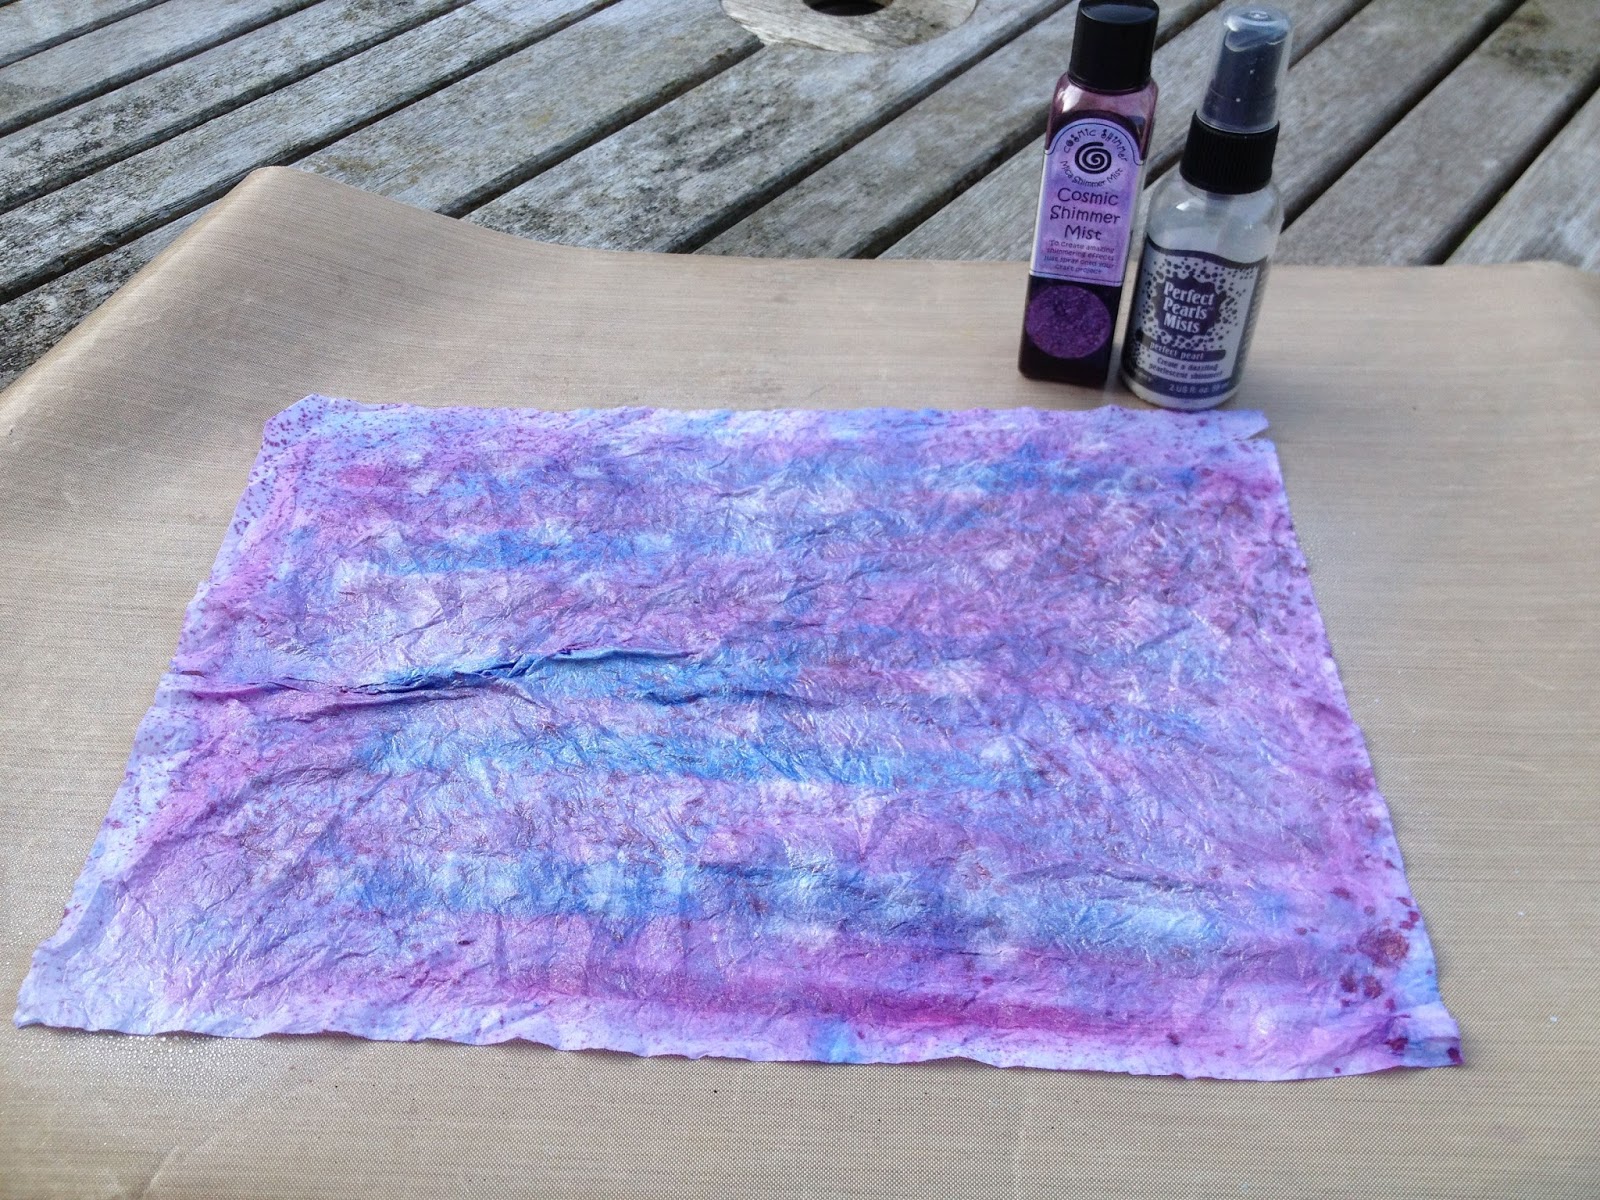
To start with you need just a  sheet of ordinary copier paper which I spritzed with a little water just to prevent the inks drying immediately. Then I dragged over some Ranger Distress Stains, I started with Seedless Preserves.

Next spritz again with some water and add another colour, in this case I used Tumbled Glass and Salty Ocean. then spritz again with some water, I know it looks a mess but stick with it!
You can experiment with different colour combinations and get some amazing effects.


Now screw the paper up into a ball, if this is hard to do, spritz with a little more water. It should now look like the picture on the left. Next you need to carefully unravel the ball and lay it flat on your craft mat.


At this point if the paper is drying out just spritz again with a little more water, the more water you use the more the colours blend.


I then sprayed with Cosmic Shimmers Mist in Plum Twist and also Perfect Pearls Mist in Perfect Pearl and screw up in a ball again.

Now flatten out to dry, I usually leave this to air dry but if you are in a hurry you can use a heat gun.

You will notice the colours dry lighter than they first appear.


Once dry you are now ready to use however you wish, whether you die cut and layer your flowers or stamp with a design and then cut out by hand as in the picture. The paper has a lovely texture with all the wrinkles in it. 
 Here I stamped a second flower on a scrap of card and coloured the centre with pro markers , then brushed on some clear crackle paint and left to dry before cutting out and sticking in the centre.


Well I hope you have enjoyed reading this blog and will pop by another time, enjoy the rest of the weekend.
TTFN Jane x


Wednesday, 21 August 2013

Hello Everyone

Well a very warm welcome to all our new blog readers. We very much hope you enjoy our varied and hopefully sometimes informative blogs. Today I thought I would start with a simple and easy to make Christmas gift tag. Yes I know its only August and I also hate people banging on about Christmas for months on end but the reason behind this is so that when you are out and about in various coffee houses you can collect one of the components.


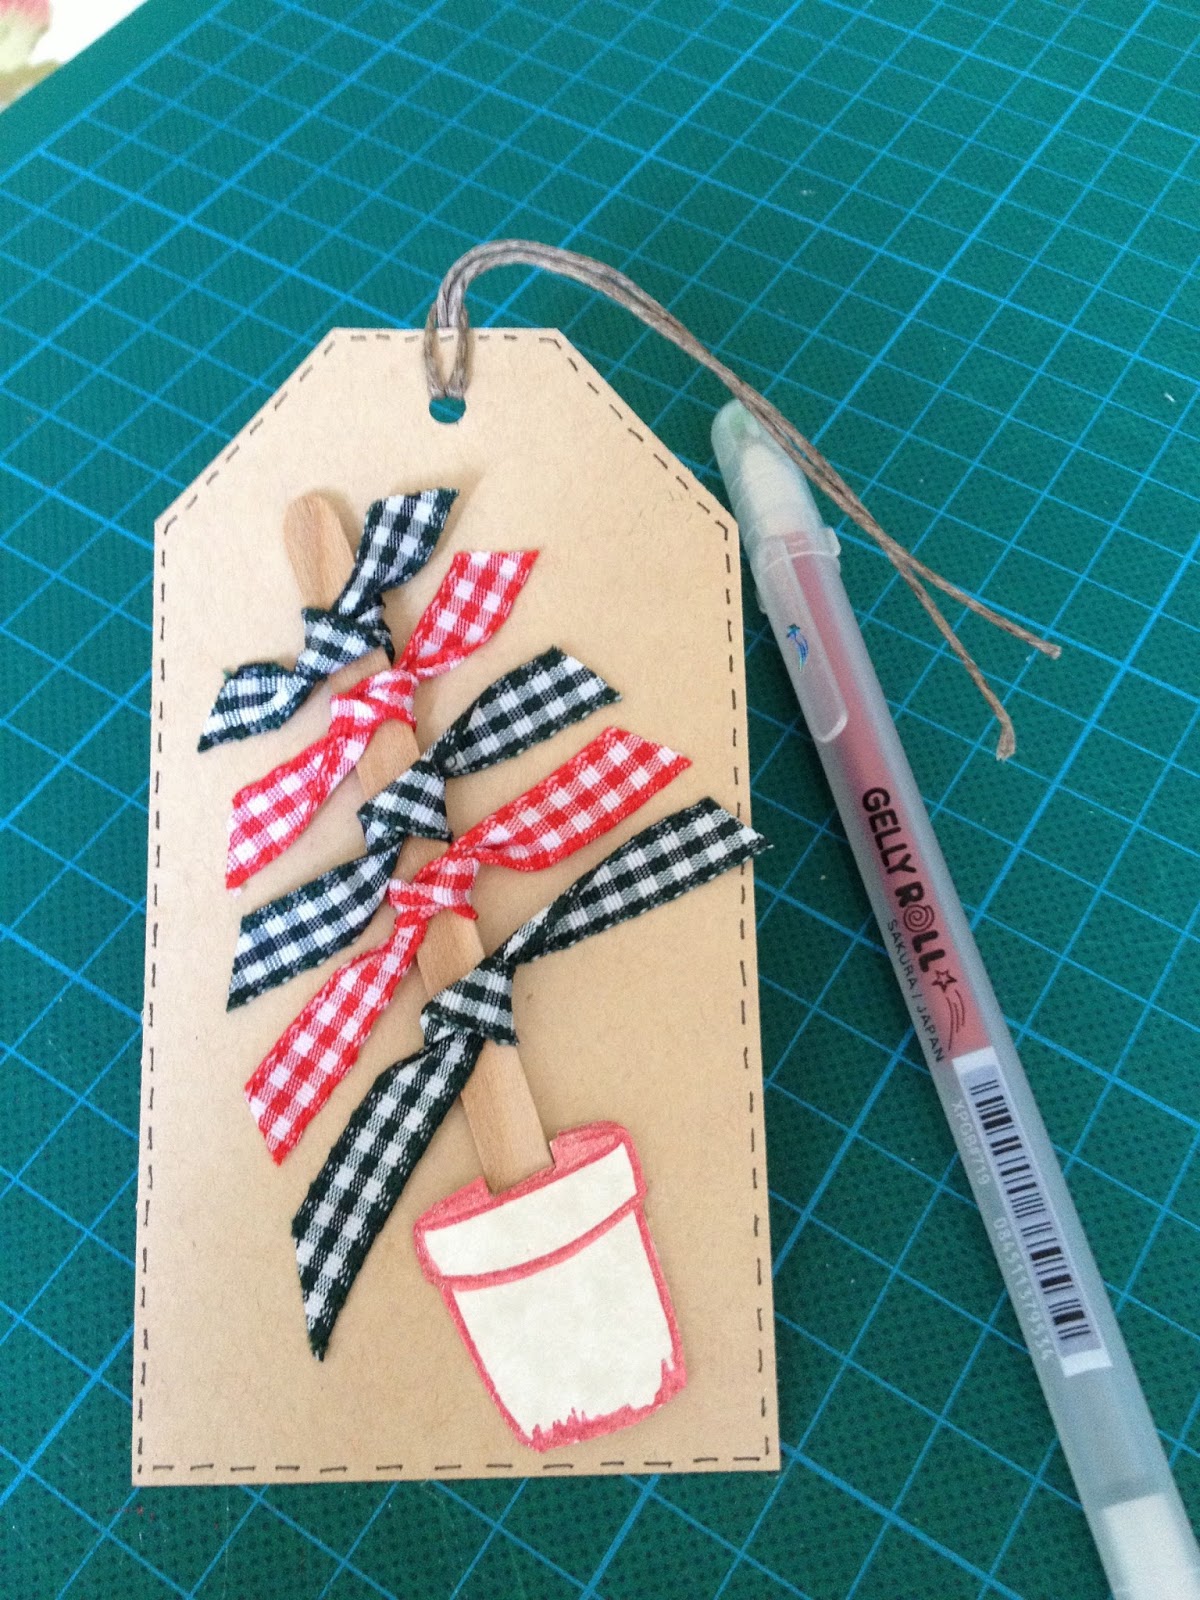
Ok, so you need the magic coffee/tea stirrers. These vary slightly in size depending on where you drink your daily latte from but that doesn't matter.


Next you will need some luggage labels which can be purchased from most stationers and also some post offices stock them. some ribbon of your choice, I've used red and dark green gingham but you could buy ribbon that matched your wrapping paper. An oddment of card, this could be the back of an old birthday card, or a cereal packet to make the pot and a little glue, I used pva as that is what was to hand but a glue stick would work fine.
Cut the wooden stick in half, it will measure somewhere between 7-8cm now, tie lengths of ribbon on to the stick, the rounded end of the stick at the top. The shortest ribbon at the top and longest at the bottom. Don't at this stage cut the ribbon to the exact shape. Next draw a flower pot on the scrap of card and cut out. I used a jelly roll pen but you could use whatever you have a glitter pen or a silver or gold pen. ( raid the kids pencil case)

Now its time to assemble: glue the stick with the ribbons onto the tag and then glue the pot on top of the cut end of the stick to cover any raw edge. Once the glue has set cut the ribbons to shape, you might find that you need a touch of glue under the ends of ribbon to keep them in place. ( I had to glue the red ones but the green were fine, I have no idea why!!) Then if you fancy adding the fake stitching around the edge its just small dashes but don't use a ruler as it looks much better if they are not all straight.

So there you have it, a christmas tag which you can customise that won't brake the bank and you don't need a huge stash of crafty goodies to produce.
TTFN
Jane x