Friday 13 December 2013

Reindeer Card Using Grunge Paste

Happy Friday 13th folks! Hope you are all having a good day and not being plagued by any old superstitions. Well todays card will probably be  the last christmas card I blog this year as the time seems to be galloping on but I will hopefully do one on something different time permitting.

Ok so here's todays card, this using various techniques but I feel it's worth that little extra time spent on as it's got a lovely variety of textures.


Items Used
White square card blank 
White card for centre image of good thickness i.e. 230mg
Gold or contrasting colour card for layering
4 Metal Brads
Distress inks in Brushed corduroy, antique linen and walnut stain
Brilliance ink pad in starlight black
Grunge Paste
Tando Creative Reindeer stencils
Lavinia Believe stamp
Snow flake stamp ( found in many sets)
Stampendous Frantage Aged Ivory embossing enamel
Treasure Gold in Renaissance
Water in a spritz bottle
Versa-mark ink pad


To start with I secured the reindeer stencil onto the white card with low tack masking tape spread the grunge paste through the stencil with a craft palette knife. This I left to dry over night although I think this would be ready to use after about an hour.


The next stage is to stamp "Believe" at the bottom of the greeting card in the starlight black ink. I love this make of stamps as they are so different to many on the market and they also seem to print out so beautifully with the Brilliance Dew Drop ink pads.


Once dry I then coloured the edges of the card with the distress inks starting with the palest, antique linen first and working through the shades. The very centre will be covered up so there is no need to waste time and ink on that. The snow flakes were then stamped around the edges in the starlight black to keep in tone.


Now for the fun part !
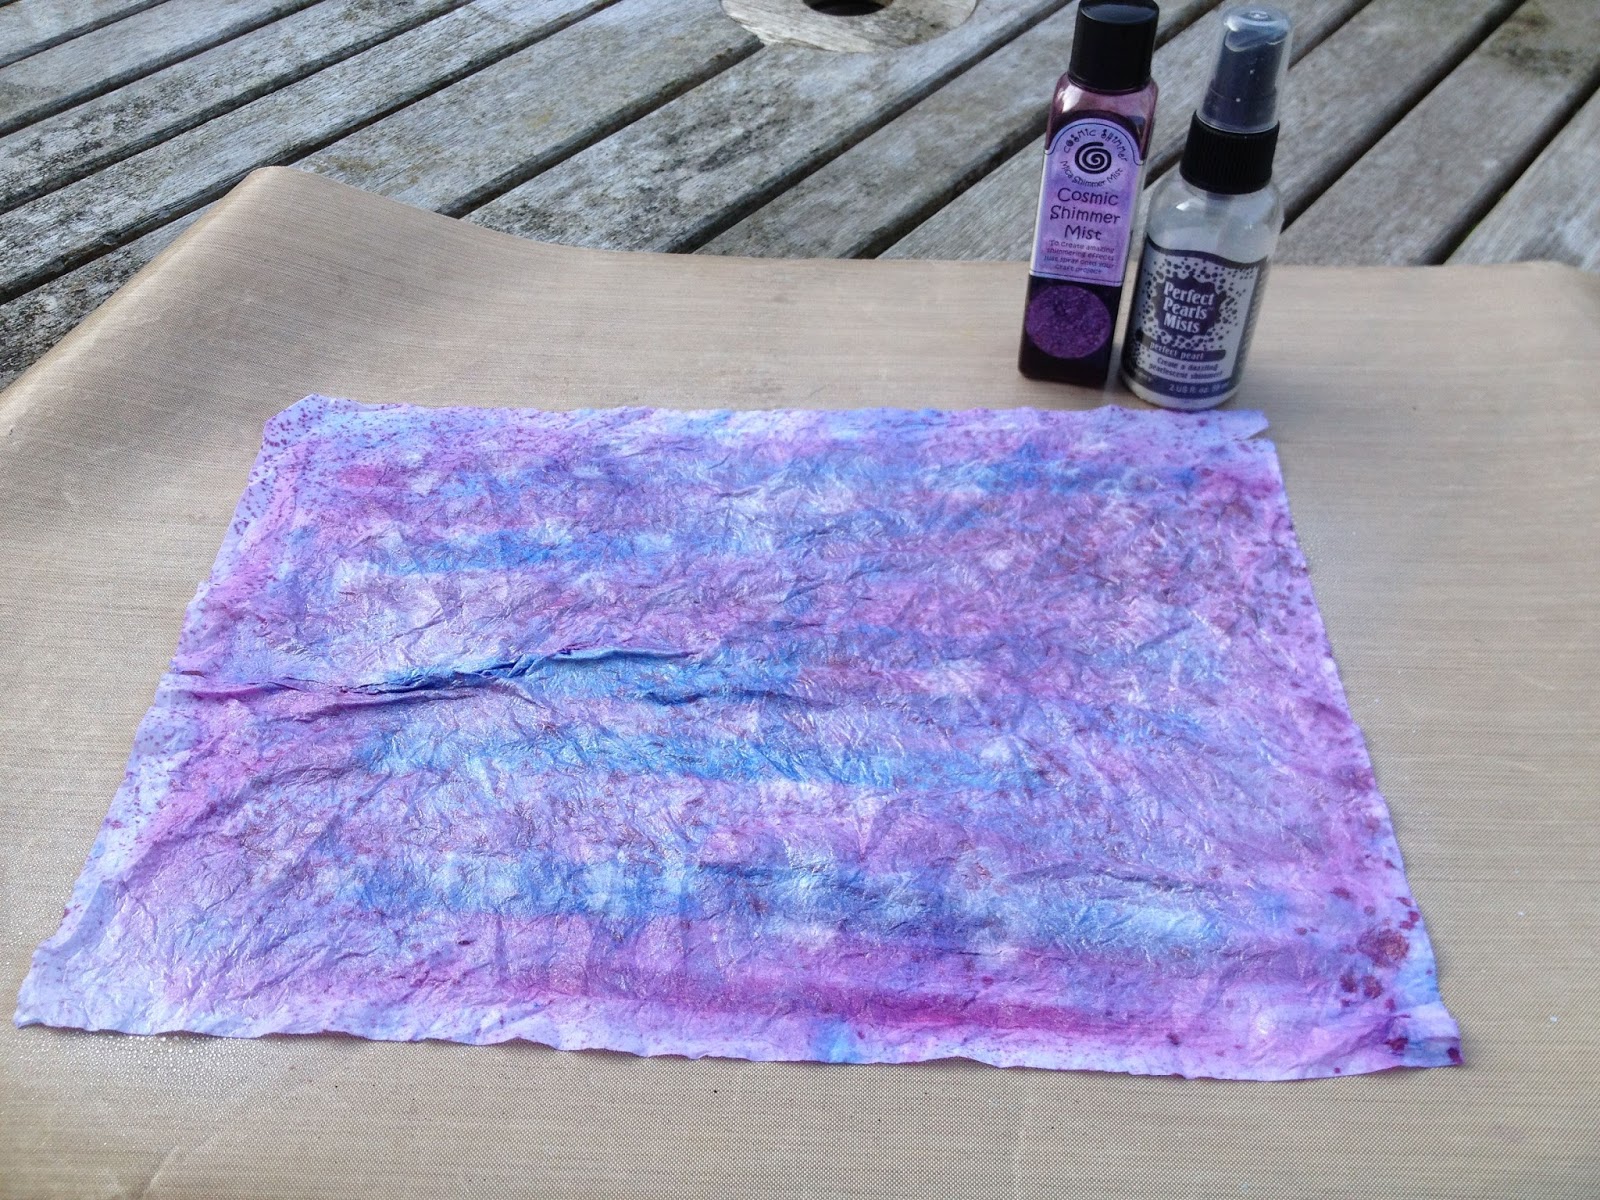
I started by inking the complete card with the distress inks, again starting with the palest colour first. Once I was happy with the overall colour and shading I gave the card a light spray with water, left it for about 20-25 secs and then blotted the card with kitchen paper. Its very easy to over do this part so it's perhaps best to do a little first and see how you like it once its dry as you can always give it another quick spray. Once you are happy with this stage its onto the embossing round the edges. This is quick and easy, just hold the versa-mark ink pad at an angle and apply small amounts to the edges then sprinkle with the aged ivory embossing enamel. This is quite thick compared to embossing powder so you will need to apply sufficient ink for it to stick to the card. Then emboss with the heat gun. Once cool apply the treasure gold metallic wax with your finger to the areas you want to shine and buff with a soft cloth after about 10mins when dry.


I love how this picks up the different textures on the reindeer, and you can add little bits of the wax to  give the effect of shading around the image.


 Now its just putting the card together, firstly I stuck the reindeer to the gold card with double sided tape and then added the brads to the corners. Then the mounted image was stuck to the card also using double sided tape.


So there you have it, quite a grown up card in a way but still on the magical side and fun to make as it's great to see how the image is transformed from the gooey pot of grunge paste at the start.

I hope you have enjoyed todays entry, do add any comments at the bottom of the page and I hope this will inspire you to give this technique a try.
Thank-you for stopping and reading this blog and I hope you will pop back soon, until next time, take care and Happy Crafting whatever it may be  Jane x


Sunday 8 December 2013

Cherry and Almond Cake

Well a Happy Sunday to you all and I hope you are all feeling relaxed and reasonably organised for the pending "Christmas Celebrations". Todays entry is for those of you who fancy making a cake but either don't like the traditional fruit cake at christmas or just feel like a change.


 Ingredients

7 inch round loose bottomed cake tin
5oz Self-raising Flour
3oz Plain Flour
3 Tablespoons Ground Almonds
6oz Glace Cherries ( french if possible as these are nice and dark)
6oz butter at room temperature
6oz Caster Sugar
3 Beaten Eggs (large)
2 Tablespoons Demerara Sugar for Topping

Pre-heat oven to 180C


Method
Firstly grease and line the cake tin with baking parchment or greaseproof paper both the sides and bottom.Sift the 2 flours into a bowl then stir in the ground almonds and the cherries. In a separate bowl beat the butter and sugar until creamy and light and then gradually beat in the eggs a little at a time. Then carefully fold in the dry ingredients taking care not to leave any pockets of unmixed flour. Once thoroughly mixed turn into prepared cake tin and level the top of the mix. Sprinkle over the Demerara sugar  and bake for 1-1.25hrs. If the top of the cake starts to colour quickly cover with a piece of tin-foil. Test with a skewer before removing from the oven. Leave to cool in the tin before turning out. The almonds in this cake not only give a nice flavour they also help to keep the cake moist. If you wanted to have the cake as a centre piece you could place halved glace cherries on the top before sprinkling with the Demerara sugar.

So there you have it a fairly simple to make cherry cake which is easy to slice and a delight to eat. Happy baking and I look forward to seeing you back here soon for some more crafting goodies and makes. Take care and thanks for stopping by Jane x

Friday 25 October 2013

Winter - Sunday Stampers Challenge Entry and Giveaway

Hi Everyone, gone all Christmasy with todays entry, the shops are getting all stocked up with their Goodies so I thought I might join them. This is also my entry for The Sunday Stampers Challenge this week and the theme is Winter, details of the challenge can be found here ink on my fingers


List of Items Used

Stamps :Tim Holtz Mini holidays 2 set
Inkydoodles Text Background
Clarity remountable Christmas Baubles
Paperartsy Jofy 28
Dovecraft T'is the Season wooden sentiments
Distress Inks :Fired Brick, Evergreen Bough, Walnut Stain,
Vintage Photo, Pine Needles
Tim Holtz movers and shapers Mini Snowflake die set
Cosmic Shimmers black pearl mica powder
Treasure Gold metallic wax in Ruby
Black card
White glitter card
Scraps of white card
String or ribbon of choice
Versamark ink pad
Clear Embossing powder
Emossing folder
Dark Red acrylic paint


Firstly start by cutting out a star from the black card, mine measured roughly 4 inches across from point to point. This was then passed through an embossing folder and I have made several using different designs and they all look good. I then stamped the holly leaves on the scraps of white card in the pine needles distress ink, made a light wash on a ceramic tile with the same ink and brushed it onto the leaves to give a paler tone for the insides. These were then cut out and put to one side.  


The stars were then given a wash made from a dark red acrylic paint which had been well watered down. Whilst the paint wash was still wet I dabbed it over with some kitchen paper to reveal the black card in places and help dry it out. Once these were completely dry I brushed over little areas with versa-mark ink using a small paint brush and then sprinkled on the black pearl mica powder. The excess was then brushed off with a dry clean brush. To complete the star I then gently  rubbed over small areas of the metallic wax with my finger and buffed this up when dry with a dry cloth, giving a lovely finish.


The next step is to create the background of the card , this was done by placing areas of fired brick and evergreen bough on the card with either a blending tool or blending brushes. This was then over stamped using a mixture of stamps and the walnut stain ink. Gradually build up the stamping to create an interesting layered effect as you can see in the picture below. The edges were then distressed using the vintage photo ink and a blending tool to give the aged and worn look. This was then lightly spritz with water, left for a couple of seconds and dabbed dry with some kitchen paper.

Now onto the final stages, the snowflakes were cut using the white glitter card and the Movers and Shapers dies. The wooden Joy was given 2 coats of clear embossing powder to help make it pop on the card. I punched a hole in the top of the star and threaded some string through and then mounted the star onto the card. The 3 snowflakes were next stuck onto the star followed by the joy sentiment.


The ready prepared holly leaves were then attached to the top of the card and the berries were punched circles cut from some tiny scraps of red card, if you do not have any red card use either white card and colour it red or  the craftwork cards candi in red or some red gems if you fancy adding little sparkle.


So there you have it a fairly easy card to construct but can be adapted to the stamps you have in your stash. I hope you have enjoyed this tutorial and if you would like to be in with a chance to win the finished card please leave a comment at the bottom of the page and a number will be picked at random from the list of entries. The closing date for the free giveaway will be Friday 1st Nov at 6pm so any comments left after that time will not be entered. The winner will be announced on the blog after the closing date so good luck to all who enter. I'll sign off for now, hope you all have a good weekend, take care and have a great time creating something wonderful, thanks for stopping by  Jane x


Saturday 19 October 2013

SPECIAL My entry for The Sunday Stampers Challenge

Hi Everyone, and a very Happy Weekend to you all. My blog entry today is also my contribution for Hels Sheridans Sunday Stampers Challenge, to follow her blog and weekly challenges click on the link ink on my fingers

List of Items used
Packaging card 15cm x 12cm
 White Gesso
Grunge Paste by Paper Artsy
Distress Stains in salty ocean, broken china, bundled sage, pewter and scattered straw
Archival black ink pad
Walnut stain Distress ink pad
scraps of craft card and white card
Aqua markers on various colours
Versa mark ink pad and clear embossing powder
Stamps : Jofy 12 by Paper artsy, Petal set by Clarity stamps and Text Background and words by Inkydoodles
Glossy Accents by Ranger
Treasure Gold gilding wax in Indigo, Pewter and Renaissance
Flower Charm by Tim Holtz
Scraps of wool

Firstly I gave the card a coat of white gesso, and once this was dry I applied the grunge paste through the mask in the top right hand corner. Unfortunately  I do not know the name or make of this mask as it's one I have had years and no longer have the packaging but I vaguely remember it being a german make ?
Next I applied various coats of washes using the distress stains, these were dabbed onto a ceramic tile and mixed with a light spray of water till I reached the tones I was happy with. Once all was dry I stamped the flower and petals in archival and the text background in walnut stain. The 3 petals with special on were scraps of white card coloured at the same time as the background, then the petal shape stamped on followed by the word special both in archival black ink.


The 3 individual petals were then heat embossed with clear embossing powder twice to give a smooth glossy effect.

The words You Are So were stamped onto the craft card in walnut stain and then distressed round the torn edges. Whilst still damp the edges were then curled using the point of a thin knitting needle.

The tag was stamped with the centre of the flower stamp from the Jofy 12 set in black archival and the edges distressed with the walnut stain also.

The centres of the 2 flowers were coloured with aqua markers and then once dry glossy accents were applied.

The flower petals with the small flowers inside were also coloured with aqua markers and the blue petals with the spirals in had a little of the distress stains brushed on just to give a deeper colour.

The leaves in the bottom right hand corner were embossed with clear embossing powder and then the centres were made paler by gently brushing over with a wet paint brush and then dabbing with some kitchen paper to dry.


The deeper blue to the embossed design was obtained by gently rubbing with the indigo wax using my little finger and then after a couple of minutes buffing up with a soft cloth.


The 3 special petals were cut out and glued on at a slight angle to the stamped image on the picture. The metal flower embellishment then had the wool secured through the centre hole and was then stuck onto the picture with glue.


The edges of the tag and words had a small amount of the treasure gold wax in renaissance applied, the wool was then attached to the tag before securing them all to the picture with glue.


The flourish in the top right hand corner was then given a thin coat of the treasure gold wax in the pewter and the indigo. This just helps to hi-light the fact that this is a raised image.


This was also buffed with a soft cloth once dry, this only takes a couple of minutes to dry but is essential otherwise you will just rub it off again. I have only used my finger to apply this wax, but if you use a brush then a solvent would be needed to clean the brush afterwards as it is not water soluble. Having said that it comes off my finger with a quick wipe with a baby wipe and a wash with soap and water.


Well thats my entry for today and the Sunday Stamper Challenge, hope you have enjoyed todays project and until next time, take care and happy crafting,  Jane x


Tuesday 15 October 2013

Lemon and Lime Tray Bake

Hi Everyone, hope you are well and feel like a change today as I thought I would share one of our favourite tray bakes with you, as I made one yesterday and it is still fresh in my mind ( and tummy!!)


Its a really simple cake to make and excellent for afternoon tea, fetes, cake stalls at school fairs or fund raising events as it cuts into around 20 pieces depending on how large you want them.

Ingredients

225gr self-raising flour  ( 8oz)
225gr caster sugar         ( 8oz)
175gr butter or soft marg  ( 6oz)
3 eggs
1.5 teaspoons baking powder
finely grated rind of 1 lemon and 1 lime
6 tablespoons milk ( this amount may vary depending on the size of eggs)


Topping
Juice if 1 lemon and 1 lime
175gr granulated sugar ( 6oz)

Method
Line a 10"x 8" deep tray ( about 3") with greaseproof/ bakewell paper or tin foil, this is to prevent the syrup sticking to the sides and bottom of the tin at the end.

Weigh the ingredients for the cake and place all of them into a bowl and beat well with an electric mixer. If you prefer you can beat the sugar and butter together with a wooden spoon and then add the other ingredients in the normal way. The amount of milk needed to obtain a dropping off the spoon consistency may vary depending on the size of the eggs, this last time I used just 4 spoons of milk.

Turn into the lined tin and bake for 30-35mins in an oven preheated to 180C.

Once cooked remove from the oven but leave in the tin. Mix together the granulated sugar and the 2 juices and poor over the surface of the hot cake. This will dribble down the sides of the cake but it will get absorbed.

Leave the cake in the tin until almost cold, turn out and cut into as many pieces as you require.
Eat and enjoy.
Thanks for reading todays entry, hope you will give this quick and easy cake a try sometime, until next time take care Jane x

Monday 9 September 2013

Hobby/ Craft Room

Hi again, hope you are all well. Today has been the first day of kitting out our new hobby room. We pulled down our old garden shed about a year ago as it was falling apart due to the back basically rotting away. Once the shed was completely cleared we were left with a larger site than we had originally thought.

So the thinking caps went on and we decided that as we both have hobbies that entail paint, glue and a lot of mess so a garden room that was insulated and had electricity with a small garden storage shed on the side would fit the bill very nicely.

After trawling various web sites for a design that appealed to us both we settled on one and talks started with a firm and planning permission was applied for as the apex shaped roof height was higher than  normally allowed.

Weeks passed, neighbours received letters from the planning departments and no-one objected, but low and behold permission was not granted as we live in a green-belt area!!!

So back to the drawing board and we finally decided on a smaller design with a flat roof and a separate shed. This was built a couple of months ago, but due to other things going on we hadn't got round to kitting it out yet.


A couple of weekends ago our Daughter and 2 of our Grandchildren came to stay and the new craft room was turned into  a shop, which was great fun.

Not quite sure what they will think the next time they visit !


So after drawing up loads of mock plans for furnishing the inside we have finally took delivery of the work benches, chairs, storage unit and a glass display cabinet for Robs models that he makes and paints.


Both items here were flat packs from Ikea and went together amazingly well. The storage unit will have drawers in 2 of the cubicles ( making then tomorrow) and the work benches will be going in next.


It looks pretty stark at the moment but once all the wool, card-making stash, sewing machine etc are all installed and everything has had a good coating of glitter I'm sure it will become much more homely.


Rob ordered this rack for his acrylic paints, it came as a flat pack and went together very easily and I quickly dashed off and gathered up some of the Ranger Alcohol Inks and Stickles bottles!

They fit beautifully and it would sit either on a shelf above a table/ work bench or if there was space just to the side on the table.

I also thought it would look lovely decorated in some of ones favourite papers, paints etc.
It was purchased from www.sphereproducts.co.uk and I think I might be sending for one also.

Must finish now and cook some dinner, will update you on progress and look forward to sharing some of the things that are made in our new Hobby Room.

Thanks again for stopping by and if you have any favourite must have items in your craft/hobby room do leave a comment at the bottom of the page.
Jane x

Sunday 1 September 2013

Gilding Flakes using Judi-Kins Embossing Powder

Hello again, and I hope you are all having a relaxing Sunday afternoon. We've just been blackberrying and I thought I would tell you about a product which I purchased over a year ago and have just got round to using!!!

Maybe some off you are already aware of this product but for those of you who are not its called Judy-Kins  Embossing Powder  Sticky Stuff EP260, and its an embossing powder that stays sticky after its been heated. So then you can apply gilding flakes, glitter, foil and probably many other things too.

I like using gilding flakes but there have been several occasions where I have just wanted a small addition and not wanted to use the double sided adhesive clear sheets, or wanted a stamped image in the gilding flakes.


So this is where this embossing powder comes in, you stamp the image as normal using versa mark or the make of clear ink that you have, and then sprinkle the Judi-Kins over the image as you would with any other embossing powder, and then shake off the excess.


The grains of powder are slightly more course than the every day embossing powders, but nowhere near as thick as UTEE.


When heating the stamped image with your heat gun take care as this powder melts much quicker, so be prepared to move the heat gun onto the next part of the image sooner than you would be used to.


Then cover the embossed image with gilding flakes and push then onto the card stock to make sure they adhere as you would do normally.


Next rub the excess off in the normal way using a course sponge or whatever your preferred method is.


And there you have it, a stamped image coated in gilding flakes.


I hope this has been of help to some of you, and if anyone has used this product and has any tips or other suggestions please leave a comment at the bottom of the page.


Thank-You for popping by and reading todays entry, I am just finding my way around the site at the moment so hopefully I will be adding new bits and pieces as I get to grips with it all. Enjoy the rest of your Sunday. Bye for now Jane x


Sunday 25 August 2013

Distress Stain Coloured Paper

Well a very Happy Sunday to you all, hope you have better weather than us here in Kent where it is very grey and damp.


Today I thought I would explain how I colour ordinary printer/copier paper for making flowers and leaves for my cards and crafting projects like the ones in the photo.
If you are going out somewhere nice and want clean hands do this another day!!


To start with you need just a  sheet of ordinary copier paper which I spritzed with a little water just to prevent the inks drying immediately. Then I dragged over some Ranger Distress Stains, I started with Seedless Preserves.

Next spritz again with some water and add another colour, in this case I used Tumbled Glass and Salty Ocean. then spritz again with some water, I know it looks a mess but stick with it!
You can experiment with different colour combinations and get some amazing effects.


Now screw the paper up into a ball, if this is hard to do, spritz with a little more water. It should now look like the picture on the left. Next you need to carefully unravel the ball and lay it flat on your craft mat.


At this point if the paper is drying out just spritz again with a little more water, the more water you use the more the colours blend.


I then sprayed with Cosmic Shimmers Mist in Plum Twist and also Perfect Pearls Mist in Perfect Pearl and screw up in a ball again.

Now flatten out to dry, I usually leave this to air dry but if you are in a hurry you can use a heat gun.

You will notice the colours dry lighter than they first appear.


Once dry you are now ready to use however you wish, whether you die cut and layer your flowers or stamp with a design and then cut out by hand as in the picture. The paper has a lovely texture with all the wrinkles in it. 
 Here I stamped a second flower on a scrap of card and coloured the centre with pro markers , then brushed on some clear crackle paint and left to dry before cutting out and sticking in the centre.


Well I hope you have enjoyed reading this blog and will pop by another time, enjoy the rest of the weekend.
TTFN Jane x


Wednesday 21 August 2013

Hello Everyone

Well a very warm welcome to all our new blog readers. We very much hope you enjoy our varied and hopefully sometimes informative blogs. Today I thought I would start with a simple and easy to make Christmas gift tag. Yes I know its only August and I also hate people banging on about Christmas for months on end but the reason behind this is so that when you are out and about in various coffee houses you can collect one of the components.


Ok, so you need the magic coffee/tea stirrers. These vary slightly in size depending on where you drink your daily latte from but that doesn't matter.


Next you will need some luggage labels which can be purchased from most stationers and also some post offices stock them. some ribbon of your choice, I've used red and dark green gingham but you could buy ribbon that matched your wrapping paper. An oddment of card, this could be the back of an old birthday card, or a cereal packet to make the pot and a little glue, I used pva as that is what was to hand but a glue stick would work fine.
Cut the wooden stick in half, it will measure somewhere between 7-8cm now, tie lengths of ribbon on to the stick, the rounded end of the stick at the top. The shortest ribbon at the top and longest at the bottom. Don't at this stage cut the ribbon to the exact shape. Next draw a flower pot on the scrap of card and cut out. I used a jelly roll pen but you could use whatever you have a glitter pen or a silver or gold pen. ( raid the kids pencil case)

Now its time to assemble: glue the stick with the ribbons onto the tag and then glue the pot on top of the cut end of the stick to cover any raw edge. Once the glue has set cut the ribbons to shape, you might find that you need a touch of glue under the ends of ribbon to keep them in place. ( I had to glue the red ones but the green were fine, I have no idea why!!) Then if you fancy adding the fake stitching around the edge its just small dashes but don't use a ruler as it looks much better if they are not all straight.

So there you have it, a christmas tag which you can customise that won't brake the bank and you don't need a huge stash of crafty goodies to produce.
TTFN
Jane x