Showing posts with label Lavinia Stamps. Show all posts

Monday, 20 July 2015

Secret Poppy

After spending far too long on Pinterest the other evening, I was reminded of a technique I've not used for some time, so thinking cap on, off to the craft room I went and got the paint out.


I started with a piece of white card 10cm square and painted it with Fresco Chalk paint in slate. Once dry wiped it over with an anti-static bag and stamped the images in versa-mark and embossed with clear powder.


The stamps I used were all from Lavinia's range; secret garden, fuchsia, small path and the foliage stamp from the magazine freebie set.

Next I painted the whole piece again in a mix of Hint of Mint and Guacamole, then when just touch dry wiped it over with a piece of damp kitchen paper. This reveals the clear embossed art work underneath.


I had also stamped the gate on another piece of painted card so that I could open the gate and stick another one onto the back.


Various areas of the clear embossing were then lightly rubbed with treasure gold in ruby and olive bronze and also metallic lustre in black shimmer.

Then I stamped the poppy in black archival ink onto some shrink plastic, once dry turned the plastic over and coloured in the stamped image with Promarker pens. This was then cut out and heated.

In the opening of the gate I stuck a piece of lightly patterned paper then mounted the whole piece onto some glossy black card. 


I cut 4 corners from the same black card and then mounted the whole piece onto a burgundy coloured card. A black pearl gem was added to the gate to form a handle.


I would like to enter this into Lavinia Stamps challenge no 7 titled 'Add a Flower'. To view the DT's wonderful samples for this challenge click on the link here.


Thanks as always for stopping by, hope this might inspire you to get 'painty' too. Take care and have a great week, Jane x


Sunday, 14 June 2015

"Any Colours You Like"

Good morning and welcome, hope everything is good in your world and that fingers crossed some of you might have some summer sunshine! ----- really not quite sure where it's popped off too.

It's been a few weeks since I last blogged as I've been gardening----


and making a few items for our local care homes fete---


So, back to todays entry which is a card I've made for Lavinia Stamps Challenge titled "Any Colours You Like". To view their DT's wonderful samples click on the link here.


For this I started with a piece of linen card which I brayered with chalk acrylics in Lake Wanaka, Haystack, Snowflake and Beach Hut.


I then stamped the fairy in the middle with Versafine black onyx and then clear embossed.


Next I made a post-it note mask of the fairy to cover up the embossed image before stamping the Spiral of Spells.


This I stamped in Versa-magic and embossed in white powder.


I then cut out the embossed image and using the spare painted card stamped stars in Versa-magic and again white embossed.


Having chosen some blue checked card to mount this onto I inked all the edges with antique Linen and Vintage Photo DI.

I had decided to use a dried poppy seed head but felt I needed something else to go with it as an embellishment--- so I cut a card tag as a template and drew around it onto some floral material twice, cut them out and frayed the edges and then lightly inked the edges with Archival Cornflower Blue. Then I chose 2 phrases from the spell and stamped these onto the tags in the cornflower blue ink.

The embossed fairy was lightly rubbed with Inka-Gold in Platinum and the poppy had touches of Treasure Gold in Olive Bronze added.


Thanks for stopping by today I hope you have a restful Sunday and can perhaps squeeze in a little crafty-time for yourself!
Any comments are always appreciated, take care, Jane x


Sunday, 5 April 2015

Using Stamps for Embroidery

I've had this set of Lavinia stamps for a few weeks and keep looking at them and thinking about using them as a base for embroidery --- had a look at Lavinia challenge blog for this month and the theme is 'Lemon and Lime' and I thought "not my usual choice of colours but hey why not"


I stamped the image onto calico that had been backed with some iron-on interfacing using a water based ink.


Following the design was actually easier than it first looked.

Once completed I cut around the image and frayed the edges slightly. I then decided to turn it into a tag.

For this I started with a Ranger large black tag and applied thin brush strokes of Fresco Chalk Acrylic in Guacamole, Chartreuse and Zesty Zing. Once dry I embossed the tag with Tim Holtz Notebook embossing folder and lightly sanded odd areas.

Then using white embossing powder and Lavinia's bubble stamps added random bubbles to the tag. The bubbles were then filled with Glossy Accents.


Next I stamped the smaller of the 2 flowers twice onto the tag in Pearlescent Olive ink and clear embossed. Then added a few toadstools using the same ink and powder. After heating the embossing the powder I applied some Treasure Gold in Olive Bronze.


Before attaching the embroidered flower I added touches of Inka Gold in Platinum to parts of the bubbles.


Although its hard to pick up in the photos there are lots of different textures to this tag which I really like.


I would like to enter this into Lavinia's Challenge titled 'Lemon and Lime'.

Thanks for looking today, if you like embroidering do have a look at your stash of stamps!!!
Have a good week, take care. Jane x


Friday, 11 July 2014

Summer's Here !!

A very happy Friday to you all and the title of this blog entry really doesn't reflect with what's  happening outside the window, ( grey and very damp!) but hey we can dream a little.


Walking around the garden earlier this week I felt I wanted to make a card that reflected the colours of the flowers in bloom at the moment i.e. nicotianas, calendars, roses and zinnias.


Items Used

Lavinia Stamps; Zen Flower 2, Poppy Pods and foliage from the magazine freebie
Distress Inks in Faded Jeans, Tumbled Glass, Lilac Shades, Victorian Velvet, Wild Honey and Pine Needles.
Piece of white card about 14cm square + smooth white card for stamping flowers on.
Pro-Markers in Lipstick Red, Pumpkin and Lime Zest.
Tim Holtz embossing folder from Pattern and Stitches A2 set
Clarity Honeycomb Stencil
Perfect Pearls in bisque
Brilliance ink in Pearlescent Thyme
Lattice die from Spellbinders
Stickles in Crystal
Length of fuchsia coloured string
Black Archival ink pad
Versa-mark ink pad
Clear and white Embossing Powder

To begin with I stamped various flowers in black ink onto white card and then embossed with the clear powder and also versa-mark ink and white embossing powder. These were then coloured in using the pro-markers and cut out. The buds were formed by using 5 petals from a flower, curling them and then sticking the tips of the petals with some pva glue. I stuck petals 1, 3 and 5 together first and the brought in petals 2 and 4, so as to form a layer.


The main flowers were made of 2 layers glued together and a piece of Craftwork Cards candi used for the centre.


I then coloured the background card using the distress inks and a brush. Once happy with the tones I added subtle areas of matching colour ink using the honeycomb stencil and a sponge.
Once dry I embossed 3 sides with the stitch embossing folder.


Next I stamped the flower stems by inking the the poppy pods stamp but not inking the actual seed head. For this I used the pine needles ink.

Then the leaves were added using the pearlescent thyme ink which gives a slight shimmer.
The white lattice die cut was then stuck to the bottom of the card and trimmed to size. The pink string was then stuck to the back and knotted at the front.


Before attaching this to the card blank I added a very small amount of corresponding coloured ink to the edges of the card just to tie it all in.

The 2 lower flowers were attached first and the the 3rd centre one, next the 2 buds/ seed heads depending how you look at them. Next I added the dots of perfect pearls and then added a smidging of the stickles to the 2 outer petals of the buds.


I would like to enter this for Lavinia Stamps monthly Challenge titled 'Summer Colours'.

Well I hope the sun pops its little head out for us all over the weekend, Have a good one whatever you may be doing and if its raining there's always ink to play with !!

If you have time to leave a comment at the bottom of the page I would appreciate hearing what you think.

Take Care and thanks as always for stopping by Jane  x


Thursday, 12 June 2014

Beaded Fairy Dust


Hi everyone and what an amazing day we've had here in Kent, so hot! Tried doing some housework but it was too warm, ( well that's my excuse) so decided to do some playing with a piece of calico. It's hard to capture the texture of the paints and the stamping on camera but I think with the different stages you will get the general feel of how it turned out.

ITEMS USED
Piece of natural coloured calico about 13cm square with some iron-on interfacing on the back
Lavinia Stamps
PaperArtsy Fresco Chalk Acrylics in Blush, Nougat, Snowflake, Pansy and  Spanish Mulberry 
Distress inks in walnut Stain and Victorian Velvet
Angelina Fibres
Archival in Jet Black and Watering Can
Mica Powders in Perfect Pearls and Black Pearl
Brilliance Ink in Pearlescent Olive and Crimson and Starlight Black
Few small beads and 1 pearl bead
Invisible Thread

To begin with I brayered the acrylic paints onto the material in no particular pattern until I had the background I was happy with.


I then stamped the path in Spanish Mulberry paint and then over stamped in walnut stain ink. The fairy was stamped in Watering Can but I did not ink all of the wings of the stamp as I didn't want them to show on the calico once I had fixed the fibre wings in place.

The toad stalls were stamped in the olive and crimson pearlescent ink and then brushed with perfect pearls mica.
The small mushrooms were stamped in starlight black and then brushed in the black pearl mica.
The fairy dust was stamped in the snowflake paint.

Next I ironed some Angelina Fibres between 2 pieces of baking parchment and then stamped the wings in Jet black ink twice to form the 2 pairs.


This was a mixture of pink and blue fibres and were then cut out with scissors.

The calico was then cut to size and the edges frayed.


The beads were then sewn on with the invisible thread along with the wings and the pearl bead.


The edges of the card were lightly brushed with victorian velvet ink and then the ivy stamped in the 2 corners in pearlescent olive. These were then brushed with the perfect pearls mica and a pearl gem stuck where the stems cross over.

The sentiment was then stamped onto white card in the pearlescent crimson and cut out with a die.

The material was then stuck in the centre of the card using pin flair glue and the sentiment stuck in the top lefthand corner and a mauve gem  placed on top.


I would like to enter this card for the Lavinia Stamp Challenge titled " Add some beads or gems"

I hope you all have great weekend and please pop back here soon for some more crafty ideas. Thank-you for stopping today and I hope you have found a tiny piece that has interested you, please leave any comments or queries at the bottom of the page as I do love to hear your views.
Until next time, take care and enjoy your crafting time  Jane x.


Sunday, 11 May 2014

Fun With The Gelli Plate


Hi Everyone, had some fun with the gelli plate yesterday experimenting with PaperArtsy Fresco Chalk Acrylics---- and I really love the way the paint drys. Its hard to describe so here is a close up of an area.


Ok, here's what I did. Firstly I put 3 colours of the chalk acrylic on the gelli plate, mermaid at the top, blush in the middle and guacamole at the bottom. I left this to completely dry and it took about 4 mins. Small areas where the paint was thinner seemed to form a slight resist which gives a different dimension and texture. Then I applied a coat of Liquitex acrylic in parchment and working swiftly dabbed the bottom part with some hessian and the top area with some bubble wrap, then pulled the print.

Then using the summer garden stencil by Claudine Hellmuth I applied a coat of PaperArtsy Grunge Paste through one of the flowers. This was then left to dry for about 30mins.


Next I stamped the fairy wings twice from Lavinia Stamps Mia fairy onto acetate using jet black Archival ink. Once this was dry ( takes a little longer to dry on the acetate ) I coloured the wings with cranberry Alcohol Ink on the underside. Then using a Quickie Glue Pen applied some glue to the wings and then some rose coloured glitter. Once dry I cut these out with some scissors.

The grunge paste flower was then coloured with Distress Ink in Victorian Velvet, Adirondack in Aubergine and Versa-Magic chalk ink in Pink Petunia. Whilst the ink was still damp I brushed the petals with Cosmic Shimmers Mica Powder in Antique Red.

The stem was coloured with Distress ink in Iced Spruce and the leaf in Bundled Sage and Peeled Paint.

The fairy was stamped onto the card in Brilliance Starlight black. The poppy seed heads from Lavinia were stamped in 2nd generation Versa-magic Chalk ink in sage and then brushed with Perfect Pearls mica powder.

The small toad stalls also from Lavinia were stamped in 2nd generation Distress ink in Walnut Stain and these were brushed with Cosmic Shimmers Mica in Antique Gold.

The Happy Birthday sentiment was embossed with a Sizzix folder on some Tim Holtz Kraft-Core, cut out using a woodward punch and then rubbed with some Treasured Gold Wax in Ruby.

The bow was cut using the Tim Holtz Bow Tied Die and the 4 corners were cut from the Spellbinders Lattice collection. The corners were lightly rubbed with Treasured Gold in Pewter to hi-light the raised areas.

Now for the final steps, the edges of the print were inked in Iced Spruce before mounting onto some card the same as was used for the 4 corners. 

I inked 2 of the stars on the Lavinia small stars stamp in Brilliance Moonlight White and randomly stamped these in the sky area 5 times. These were then brushed with perfect pearls mica powder.

Using the quickie glue pen dots of glue were added around the fairy's hands and then sprinkled with white glitter to resemble fairy dust. The 4 corners were then stuck in place and the bow and sentiment were stuck using pin flair glue. Finally the pair of wings were stuck using glossy accents.


I would like to enter this card for the following challenges;

Lavinia Stamps Challenge titled "Birthday Girl"
and
Hels Sheridan's Sunday Stampers titled "Pink"

Thank you as always for stopping by and I hope you have enjoyed todays crafting session. If you have any comments or questions about this make please feel free to leave them at the bottom of the page as I do love to hear what you think as thats how we all learn, and the crafting community is always generous with its help and knowledge.

Hope you all manage to grab a few minutes creative time over the next few days and hopefully I'll see you back here soon. Take Care, Jane x


Monday, 14 April 2014

Spring Colours


Hi Everyone, I hope you all had a good weekend and that you were lucky enough to have the gorgeous sunshine on Sunday that we had here in Kent. It was lovely getting out into the garden to get on with some much needed weeding and dividing of some of the perennials.

Anyway less of the waffling and onto todays crafty offering. This I would like to enter into Lavinia Stamps Blog Challenge titled "Spring Colours".

Items used
Lavinia Stamps; Fairy House, Fairy Mia, Slender Mushrooms, Small hearts and Fairy Dust is like verse.
Spellbinders Die Ribbon Banners Lg
Imagination Crafts Stencil Bay Leaf
15cm x 15cm card blank
White card for stamping
Contrasting card for mounting
Versa-mark ink pad
Ranger Seafoam White Embossing Powder
Clear UTEE
Distress Inks in Squeezed Lemonade, Iced Spruce, Peeled Paint, Milled Lavender, Wild Honey, Victorian Velvet, Tumbled Glass and Pumice Stone
Brilliance Ink Pad in Pearlescent Olive
Perfect Pearls Mica in perfect pearl
10cm Square mask 

To begin with ink up some white card with the Distress inks using all the colours except the Pumice Stone. I used a brush but a blending tool or cut and dry would all work.


Then stamp the fairy house in versa-mark and emboss with the white powder.


This image was then cut into a 9cm square, which was then cut into 4 equal tiles as in the picture below.


These were then very lightly inked with the pumice stone ink and the excess wiped from the embossed image. this helps the image "pop" slightly.

These 4 tiles were then mounted onto a contrasting colour card. 

The remaining inked card was then stamped with the fairy verse and the slender mushrooms in versa-mark and embossed in the white EP. The verse was die cut with the ribbon die and a matching die cut using the contrasting card. These were stuck together so as to form a shadow behind the verse.

The slender mushrooms were then cut out and inked with the versa-mark and embossed with the Utee, this was repeated so as to give a good coverage and give the impression of a glazed tile. This was also mounted onto the contrasting card and a hole was punched for some ribbon to be threaded through.


OK now it's time to start on the card blank, firstly using the square mask lightly ink the centre of the card with the squeezed lemonade.


Remove the mask and then cut a paper mask the same size as the centre aperture of the mask used. This will then be used to cover the area that has been inked. To keep this in place I use the sticky part of a post-it note pad folded in half under the paper mask.

Once the centre is covered the fairy was stamped in the top lefthand corner using the pearlescent olive ink. The small hearts were randomly stamped using the milled lavender D.I. These were then brushed with Perfect Pearls mica powder to give a subtle shimmer.

Next using the bay leaf stencil the flower stems were inked through using the peeled paint and the victorian velvet.


Now all thats left to do is to stick the 4 mounted parts of the fairy house in the centre and then attach the verse and little glazed tile. Job done!


Well I hope you liked todays card making session, one that would be very easy to adapt to any type of stamped image, whether it be for a male or female, young or the not so young---

Thank you as always for stopping by and reading this post and any comments, questions or queries are always much appreciated. Until next time we meet take care and have a good week, Jane x


Sunday, 16 March 2014

'Add Something Pink' Challenge Entry

Hi Everyone and a very happy sunny Sunday to you all. Todays blog is my entry for Lavinia Stamps monthly blog challenge titled 'Add Something Pink'. To follow the blog and see the DT lovely examples click on the link  http://blog.laviniastamps.com


ITEMS USED
Lavinia Stamps Secret Garden and Fairy House
Tornado Stencil by Andy Skinner
White greeting card measuring 15cmx15cm
White card for stamping, not too thick around 160gsm
small amount of black and pink card i.e. scraps
Smallest heart from the Inkydoodles bag of MDF Shapes
Memory Box Ivy Tendrils Die
Small flower punch
Distress Inks in Victorian Velvet, Tattered Rose, Antique Linen, Wild Honey, Iced Spruce and Pumice Stone
Versa-mark ink pad
Ranger Seafoam White Embossing Powder
Stampendous Fran-tage Aged Ivory Embossing Powder
Tim Holtz ATC & Corners Bigz Die
Pink and white Bakers Twine
Fresco Chalk Acrylics in Blush
Perfect Pearls Mica Powder in Perfect Pearl
Decoart Metallic Lustre in Black Shimmer
1 Brad


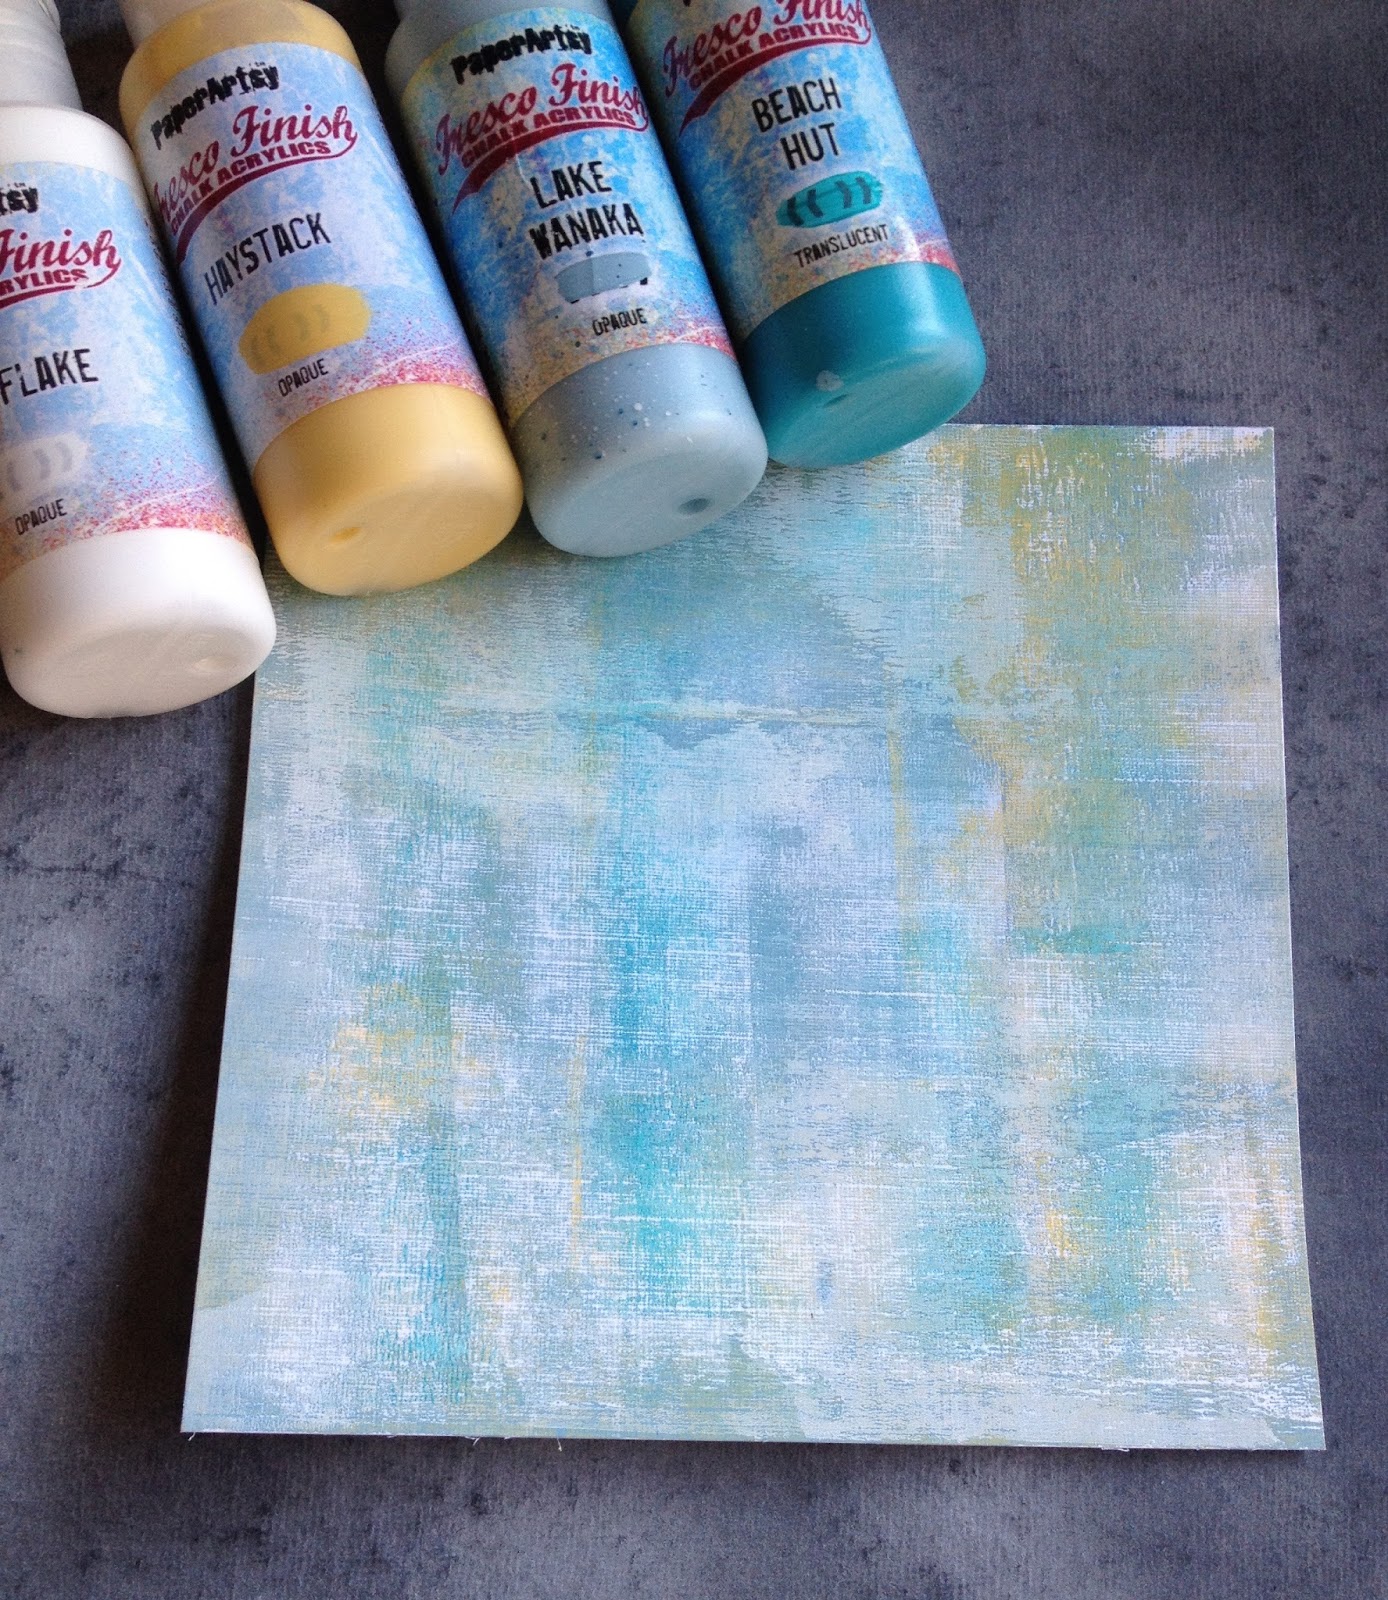
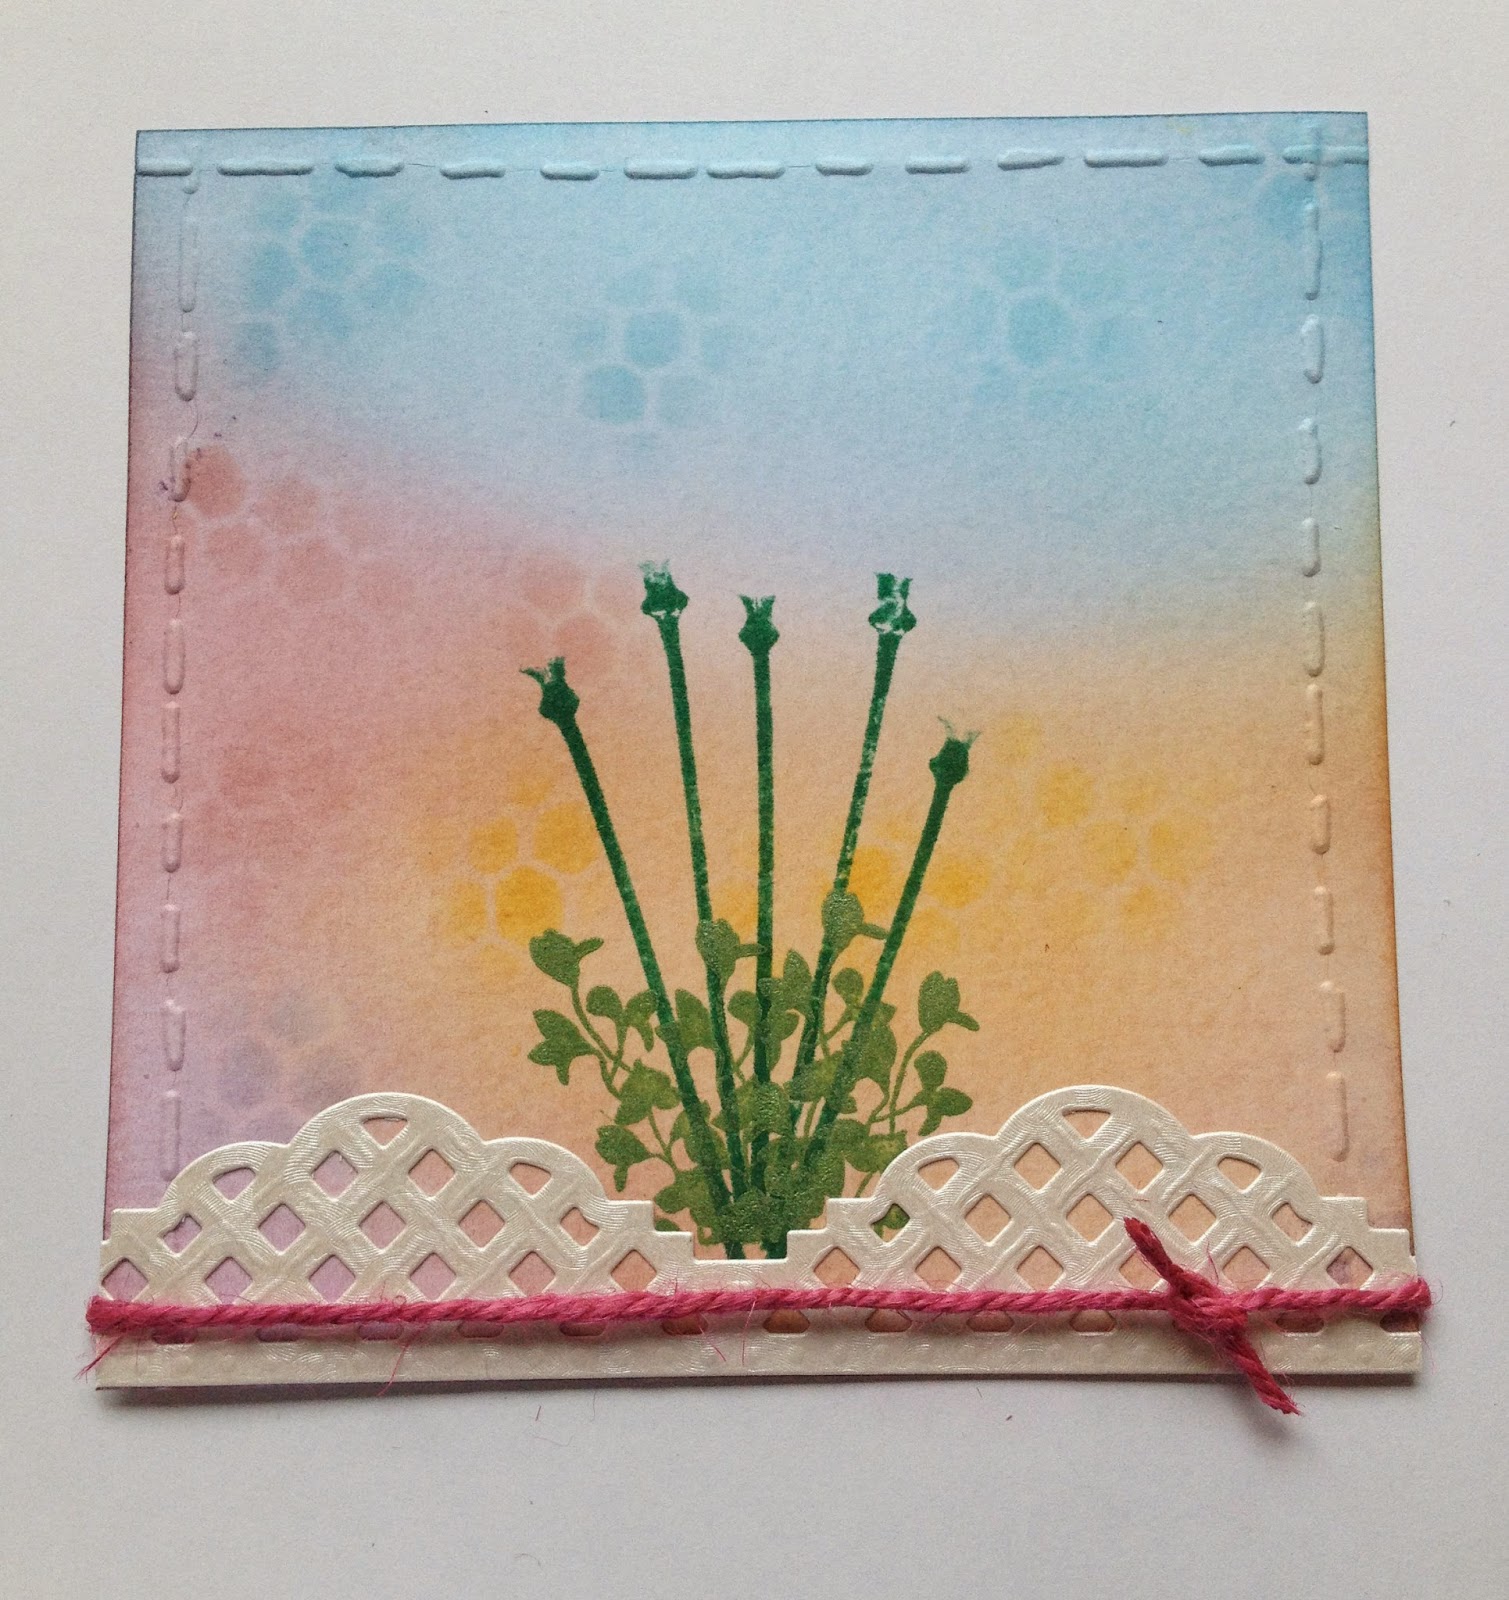
To begin with colour the greeting card with the Distress Inks using 5 of the colours but not the Pumice Stone. I started with putting a base of the Antique Linen down all over and then random patches of colour. The centre and the edges are the parts that will show when the card is complete.


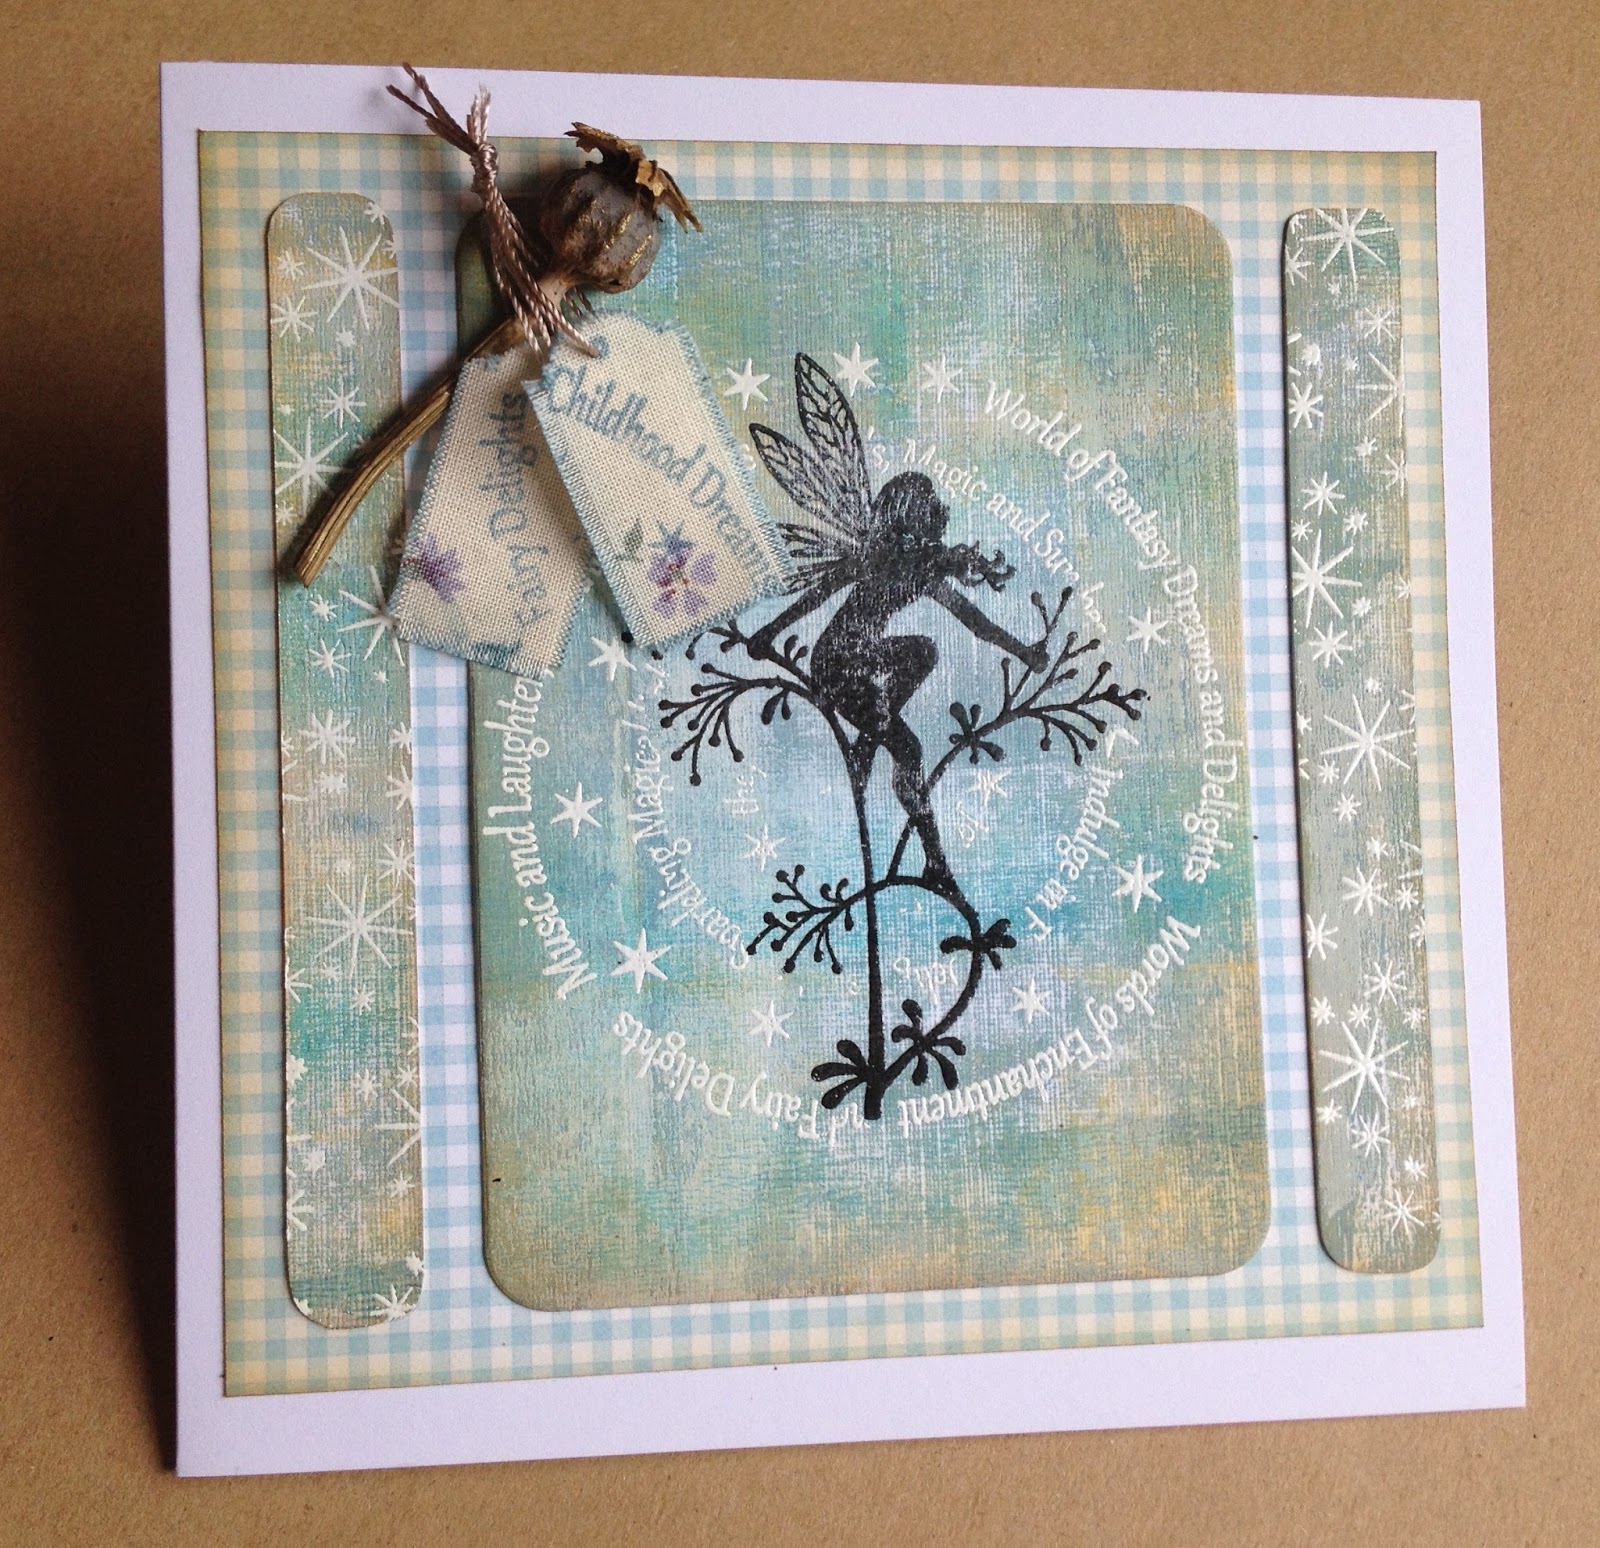
Next stamp the secret garden stamp in versa-mark in the centre if the card and sprinkle with the sea foam white embossing powder. Tap off the excess well and then sprinkle a little of the aged ivory embossing powder around the edges of the stamped image and the edges of the card before heating with the heat gun. I didn't use any ink to adhere the aged ivory powder to the card as there seemed to be sufficient dampness left from the distress inks and I have found in the past when using this EP that as it's a little courser in texture you only need a very little powder to create an effect. Once embossed using a blending tool I rubbed a tiny amount of pumice stone ink over the image to help make it pop.


Now stamp the image onto a piece of scrap paper and roughly cut out. Place this in the centre of the thin white card which has been cut to 13.5cm x 13.5cm and mark where to cut the aperture. 


What you cut away does need to be accurate as you then snip the edges of the hole ready to roll back the card. This card was then coloured with the same inks. Spritz the centre edges with a little water and then gently roll the edges of the card enlarging the aperture and refining the shape of the window.

Using the stencil add a few of the curved lines to the card in the matching colour inks. Then ink the curled edges that you have rolled back in victorian velvet.

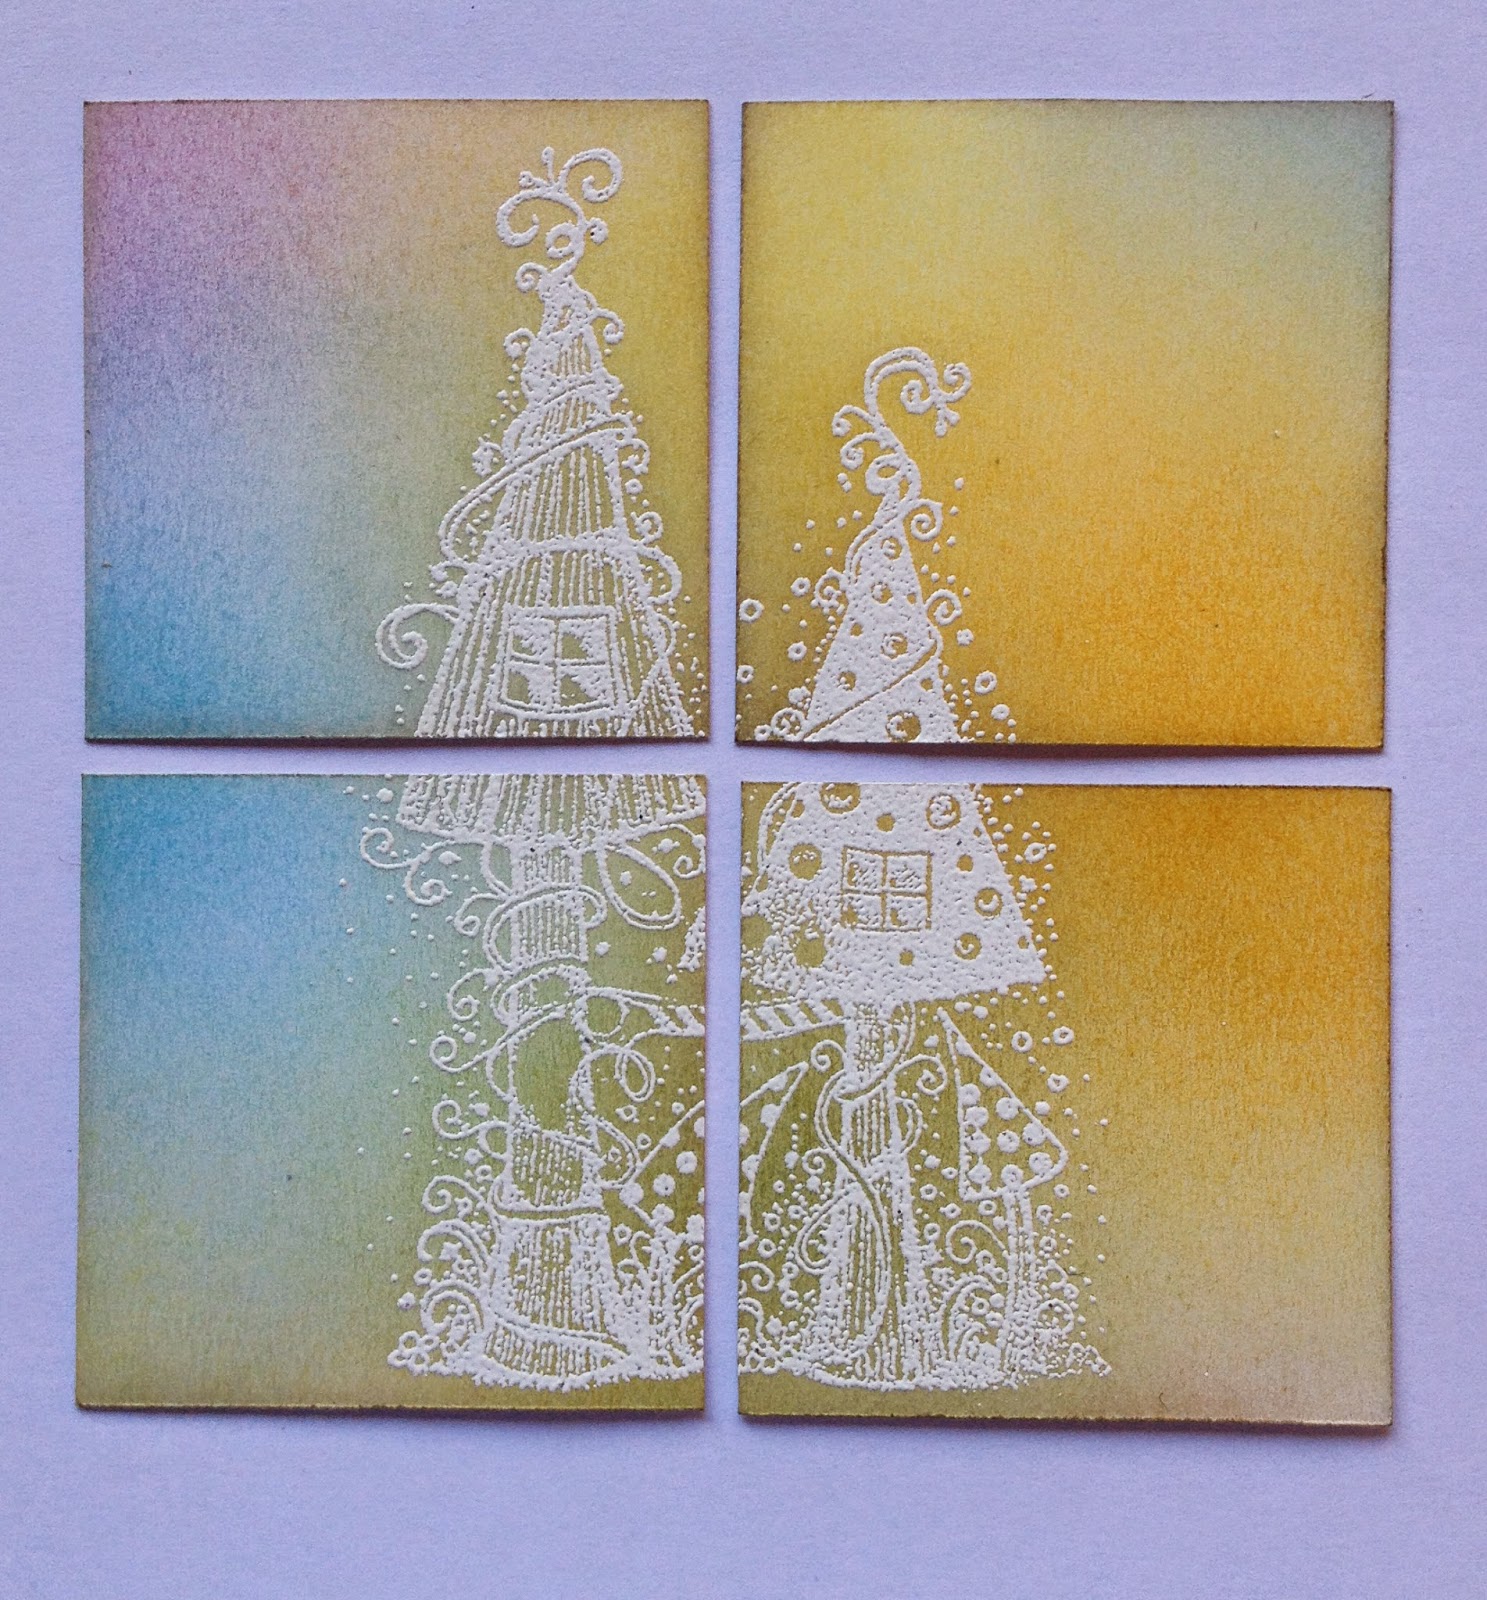
Using the edge of the fairy house stamp ink up in the versa-mark and randomly stamp the part image around the card. Sprinkle with the sea foam white EP, tap off the excess and then sprinkle the curled edge with the aged ivory. Tap off any surplus powder and then heat emboss. The aged ivory has odd specks of gold in the powder which gives a nice effect.


Tie a length of bakers twine around the aperture with a bow at the top. To secure tuck into the curled card here and there. The very edges of the card were then brushed with the mica powder to give a slight sheen.

Next onto the small heart, this was given 2 coats of the blush acrylic paint and once dry the edges were rubbed with some sandpaper back to the wood.


This was then stamped using versa-mark and the very centre of the secret garden stamp. Sprinkle with the sea foam white powder and emboss.


The 4 corners were then cut from the black card scraps and rubbed with the black shimmer lustre. Once dry they were buffed to a metallic shine. The 2 flowers were punched out from 2 different pieces of pink card scraps and fastened with a brad in the middle. I cut 1 ivy tendril from white card and this was cut into 2.

The aperture card was attached using double side tape, then the 4 corners were stuck in place using glue. The heart was threaded onto the righthand thread of bakers twine and then a knot was tied into the 2 ends. The ivy tendrils were threaded through the loops of the bow and the flower fastened with a blob of Pinflair glue.


This is not a card I would trust in the post as the centre may get crushed in the posties sack. I have to say I'm not a 'pink' girl but I have enjoyed being out of my 'comfort zone' of turquoise, blue, beige and greens!

Thank you as always for stopping by and reading todays entry, I hope there has been something of interest to you. If you have any comments, questions or queries please feel free to leave a message at the bottom of the page and I will answer them as soon as I can.

Well I'm off to do some much needed weeding while the sun is shining, I hope you have a relaxing Sunday and have a good creative week, take care Jane x


PS. There is a Mother's Day Card  Draw over on our Fb site, if you fancy entering click on the link