

Hi Everyone, I hope you all had a good weekend and that you were lucky enough to have the gorgeous sunshine on Sunday that we had here in Kent. It was lovely getting out into the garden to get on with some much needed weeding and dividing of some of the perennials.
Anyway less of the waffling and onto todays crafty offering. This I would like to enter into Lavinia Stamps Blog Challenge titled "Spring Colours".
Items used
Lavinia Stamps; Fairy House, Fairy Mia, Slender Mushrooms, Small hearts and Fairy Dust is like verse.
Spellbinders Die Ribbon Banners Lg
Imagination Crafts Stencil Bay Leaf
15cm x 15cm card blank
White card for stamping
Contrasting card for mounting
Versa-mark ink pad
Ranger Seafoam White Embossing Powder
Clear UTEE
Distress Inks in Squeezed Lemonade, Iced Spruce, Peeled Paint, Milled Lavender, Wild Honey, Victorian Velvet, Tumbled Glass and Pumice Stone
Brilliance Ink Pad in Pearlescent Olive
Perfect Pearls Mica in perfect pearl
10cm Square mask
To begin with ink up some white card with the Distress inks using all the colours except the Pumice Stone. I used a brush but a blending tool or cut and dry would all work.

Then stamp the fairy house in versa-mark and emboss with the white powder.

This image was then cut into a 9cm square, which was then cut into 4 equal tiles as in the picture below.
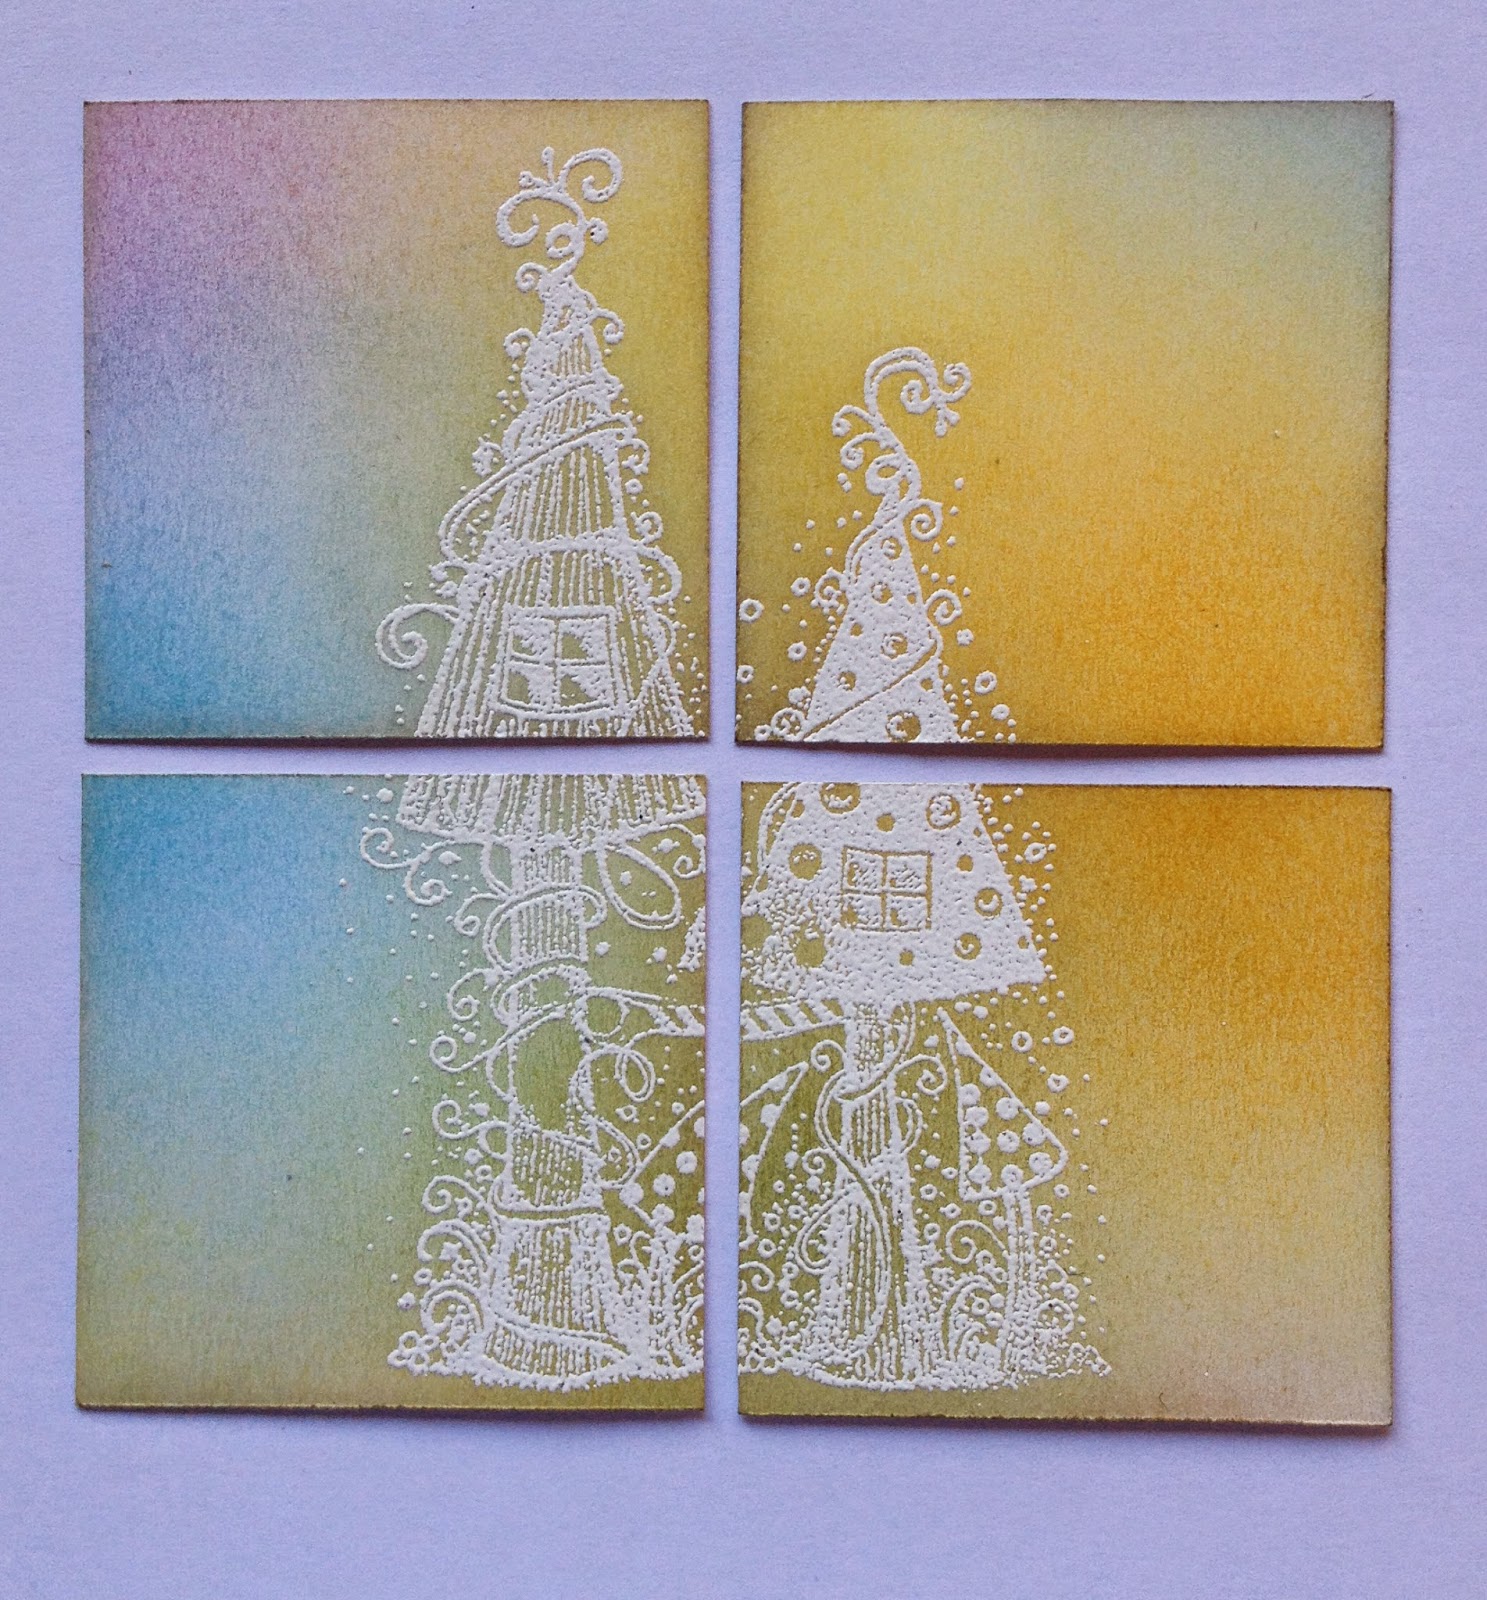
These were then very lightly inked with the pumice stone ink and the excess wiped from the embossed image. this helps the image "pop" slightly.
These 4 tiles were then mounted onto a contrasting colour card.
The remaining inked card was then stamped with the fairy verse and the slender mushrooms in versa-mark and embossed in the white EP. The verse was die cut with the ribbon die and a matching die cut using the contrasting card. These were stuck together so as to form a shadow behind the verse.
The slender mushrooms were then cut out and inked with the versa-mark and embossed with the Utee, this was repeated so as to give a good coverage and give the impression of a glazed tile. This was also mounted onto the contrasting card and a hole was punched for some ribbon to be threaded through.

OK now it's time to start on the card blank, firstly using the square mask lightly ink the centre of the card with the squeezed lemonade.

Remove the mask and then cut a paper mask the same size as the centre aperture of the mask used. This will then be used to cover the area that has been inked. To keep this in place I use the sticky part of a post-it note pad folded in half under the paper mask.
Once the centre is covered the fairy was stamped in the top lefthand corner using the pearlescent olive ink. The small hearts were randomly stamped using the milled lavender D.I. These were then brushed with Perfect Pearls mica powder to give a subtle shimmer.
Next using the bay leaf stencil the flower stems were inked through using the peeled paint and the victorian velvet.

Now all thats left to do is to stick the 4 mounted parts of the fairy house in the centre and then attach the verse and little glazed tile. Job done!

Well I hope you liked todays card making session, one that would be very easy to adapt to any type of stamped image, whether it be for a male or female, young or the not so young---
Thank you as always for stopping by and reading this post and any comments, questions or queries are always much appreciated. Until next time we meet take care and have a good week, Jane x
Very pretty and a clever card .. thank you for the tutorial as well ... I'm going to try this .. Eileen xxx
ReplyDeleteThank you and good luck with your entry into our Lavinia Stamps challenge
Beautiful card....these images are so good for making into 'tiles'......thanks for sharing with us in the Lavinia Stamps challenge.
ReplyDeleteBarbara xx
I love everything about this card, wonderful attention to detail, it's gorgeous.
ReplyDeleteThank you for entering the Lavinia Stamps challenge and good luck Karen (DT) xx