
The centre picture had the background made with the Inkabilities and the card was coloured with Distress Inks.
Items Used
Clarity A6 Double sided coated card
Black card for mounting
Stencil and Stamps by Clarity
Stampbord
Inkabilities in Citrus, Beach Ball Yellow, Sailboat Blue and Awning Green
Black Archival Ink
Distress Inks in Tea Dye, Vintage Photo, Walnut Stain, Tumbled Glass, Crushed Olive, Faded Jeans
Versa-Magic Chalk Inks in Sea Breeze, Sage and Mango Madness
PaperArtsy Metallic Glaze
Cosmic Shimmers Antique Black Mica Powder
Pilot Pigment ink Pen
4 Corners cut using Tim Holtz Die ATC and corners
To begin with I coloured the coated card stock by placing drops of the ink onto a sheet of cellophane, then spritz with water and swipe the card through the ink several times till you are happy with the coverage.

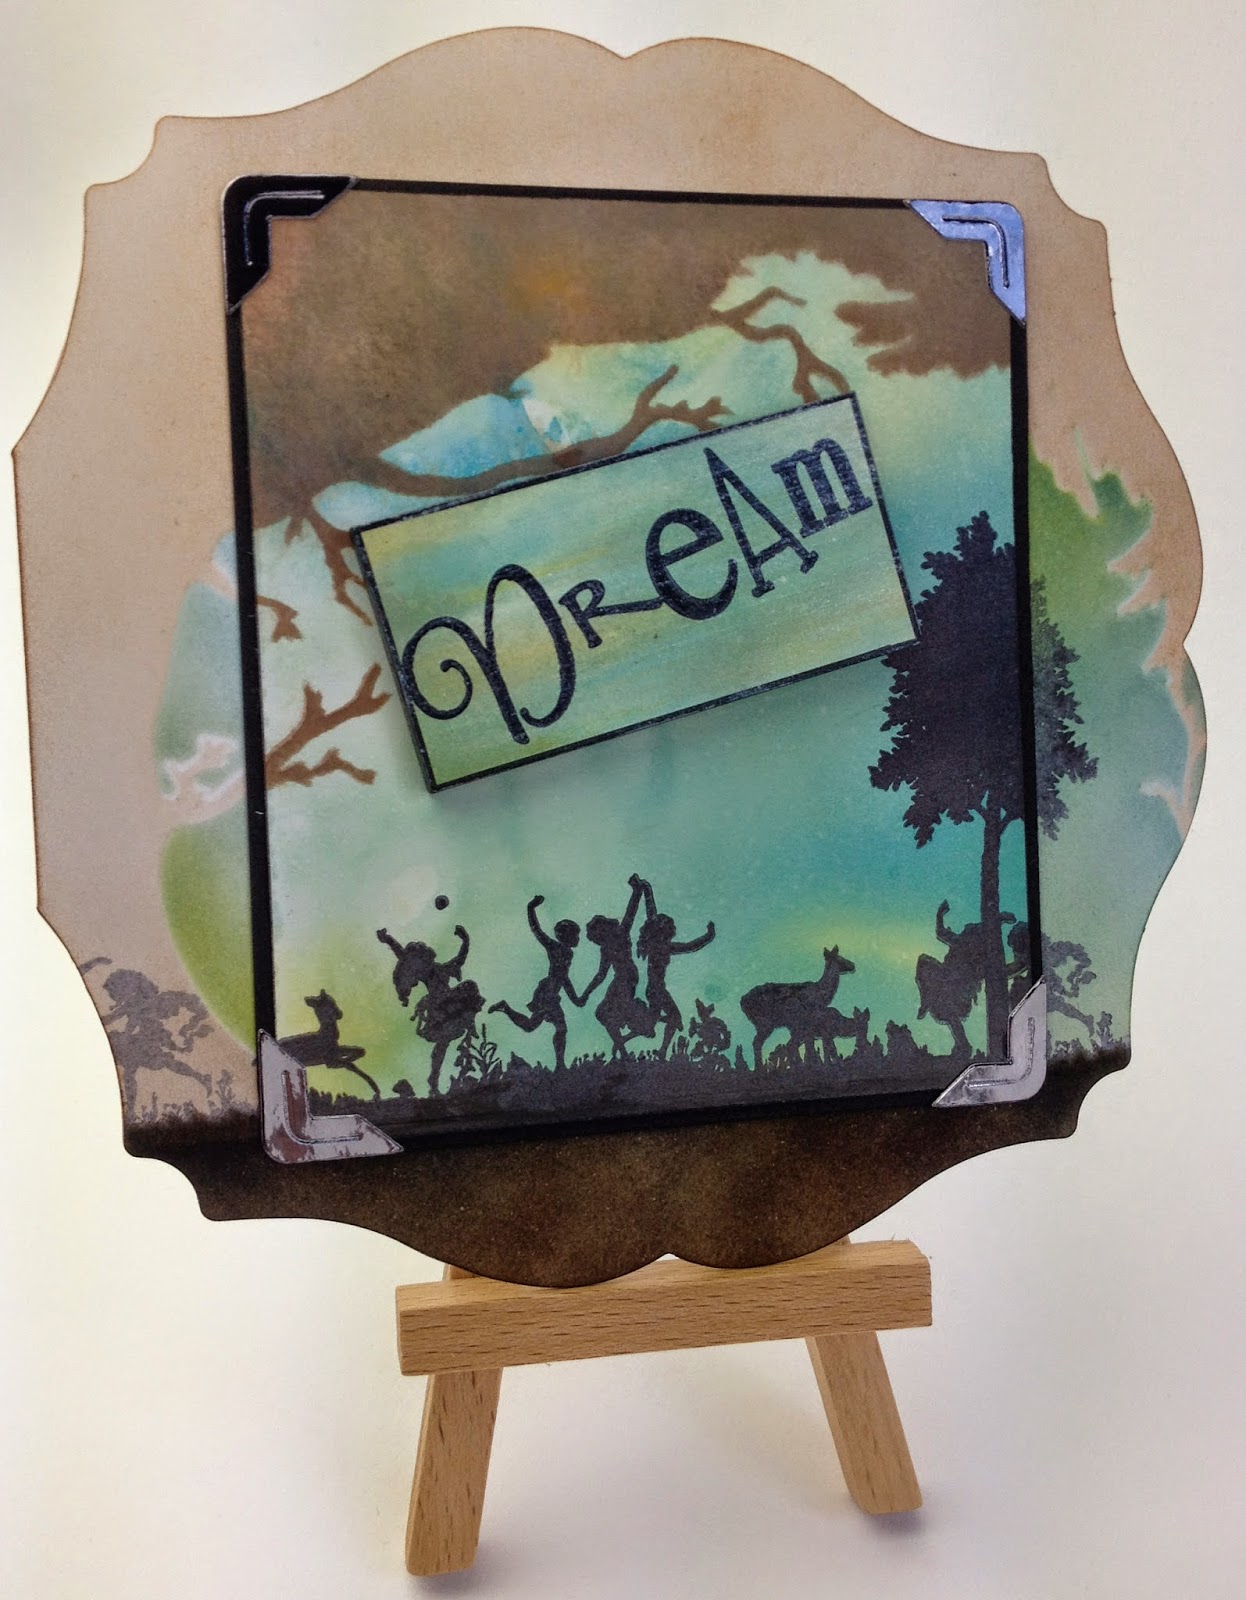
I decided to go with the top left hand one for this project. Then using the centre part of the stencil I inked in the tree and branches using tea dye, vintage photo and walnut stain. I then stamped the children and the tree in black archival. Whilst the black ink was still damp I brushed it with the mica powder to give a slight sheen.

I then mounted the art work onto some black card and secured the pre-cut corners with some pva glue.

Next I coloured the card for which the picture would form the centre piece. I decided where the picture would sit and then matched the stencil so as to aline the art work. The tree frame was coloured with the same distress inks as before but kept much lighter. The bluey, greeny background was created using Distress inks in tumbled glass, faded jeans and crushed olive. The base was coloured with walnut stain and vintage photo.
I then used 2nd generation black archival to stamp the tree and the children dancing with the animals so as to continue the design.


The main picture was then secured in place with double sided tape.
Then it was just the stampbord with the word "Dream" left to do, I decided where I wanted this to sit and then proceeded to colour the stampbord in similar shades. This was achieved with the chalk ink pads and some cut and dry foam. Once I was happy with the colours I then stamped the word dream from the word chain no 5 set in black archival ink. Leave this to dry thoroughly and then hi-light the edges with the black pen.

This was then given a coat of metallic glaze.

Although its hard to pick this up in a photo the glaze really does give a subtle glimmer and an added texture to the whole piece.
This was then secured in place with some pva glue.

I would like to enter this card for the Claritystamp Challenge titled "It's all in the Words".
I hope if you are lucky enough to own some Inkabilities that this might give you a nudge to get them out and have a play and if you don't already have some if you spot some for sale you might give them a try.
Wishing you all a wonderfully relaxing Bank holiday weekend if you are here in the UK, and if you are somewhere else and reading this I hope you have a lovely weekend whatever you may be doing. Thanks as always for stopping by, please leave any comments at the bottom of the page and if you have any questions I shall endeavour to answer them asap.
Until next time take care and enjoy your crafting time, Jane x
Great work Jane and really inspirational use of the inkabilities....thank you for sharing it with us...brilliant informative blogpost too. Have a good weekend....Jo. X
ReplyDeleteLovely Card Jane, and a great step by step. Thanks for entering the challenge and good luck.
ReplyDelete