Monday, 20 July 2015

Secret Poppy

After spending far too long on Pinterest the other evening, I was reminded of a technique I've not used for some time, so thinking cap on, off to the craft room I went and got the paint out.


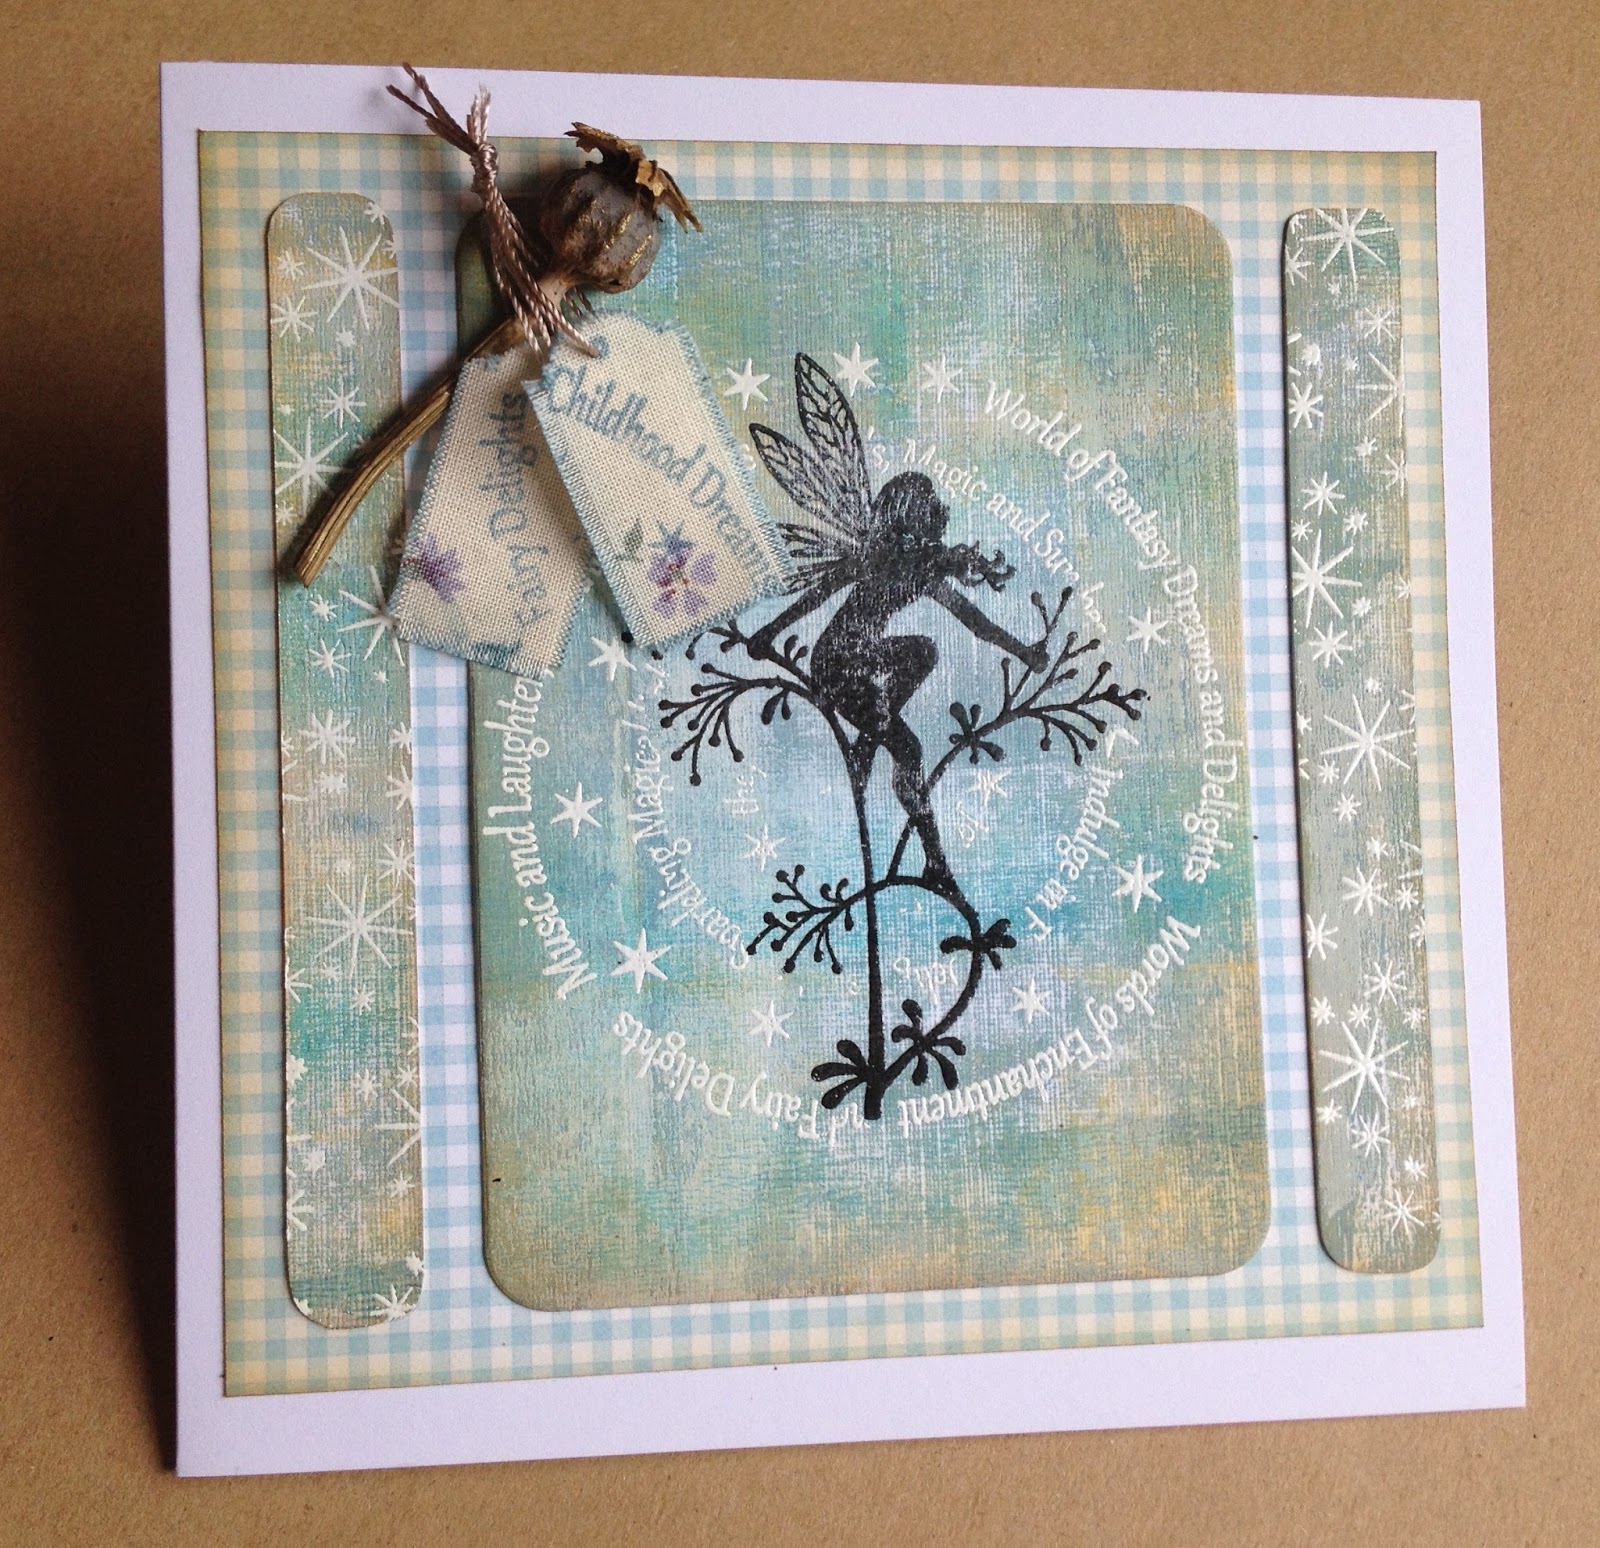
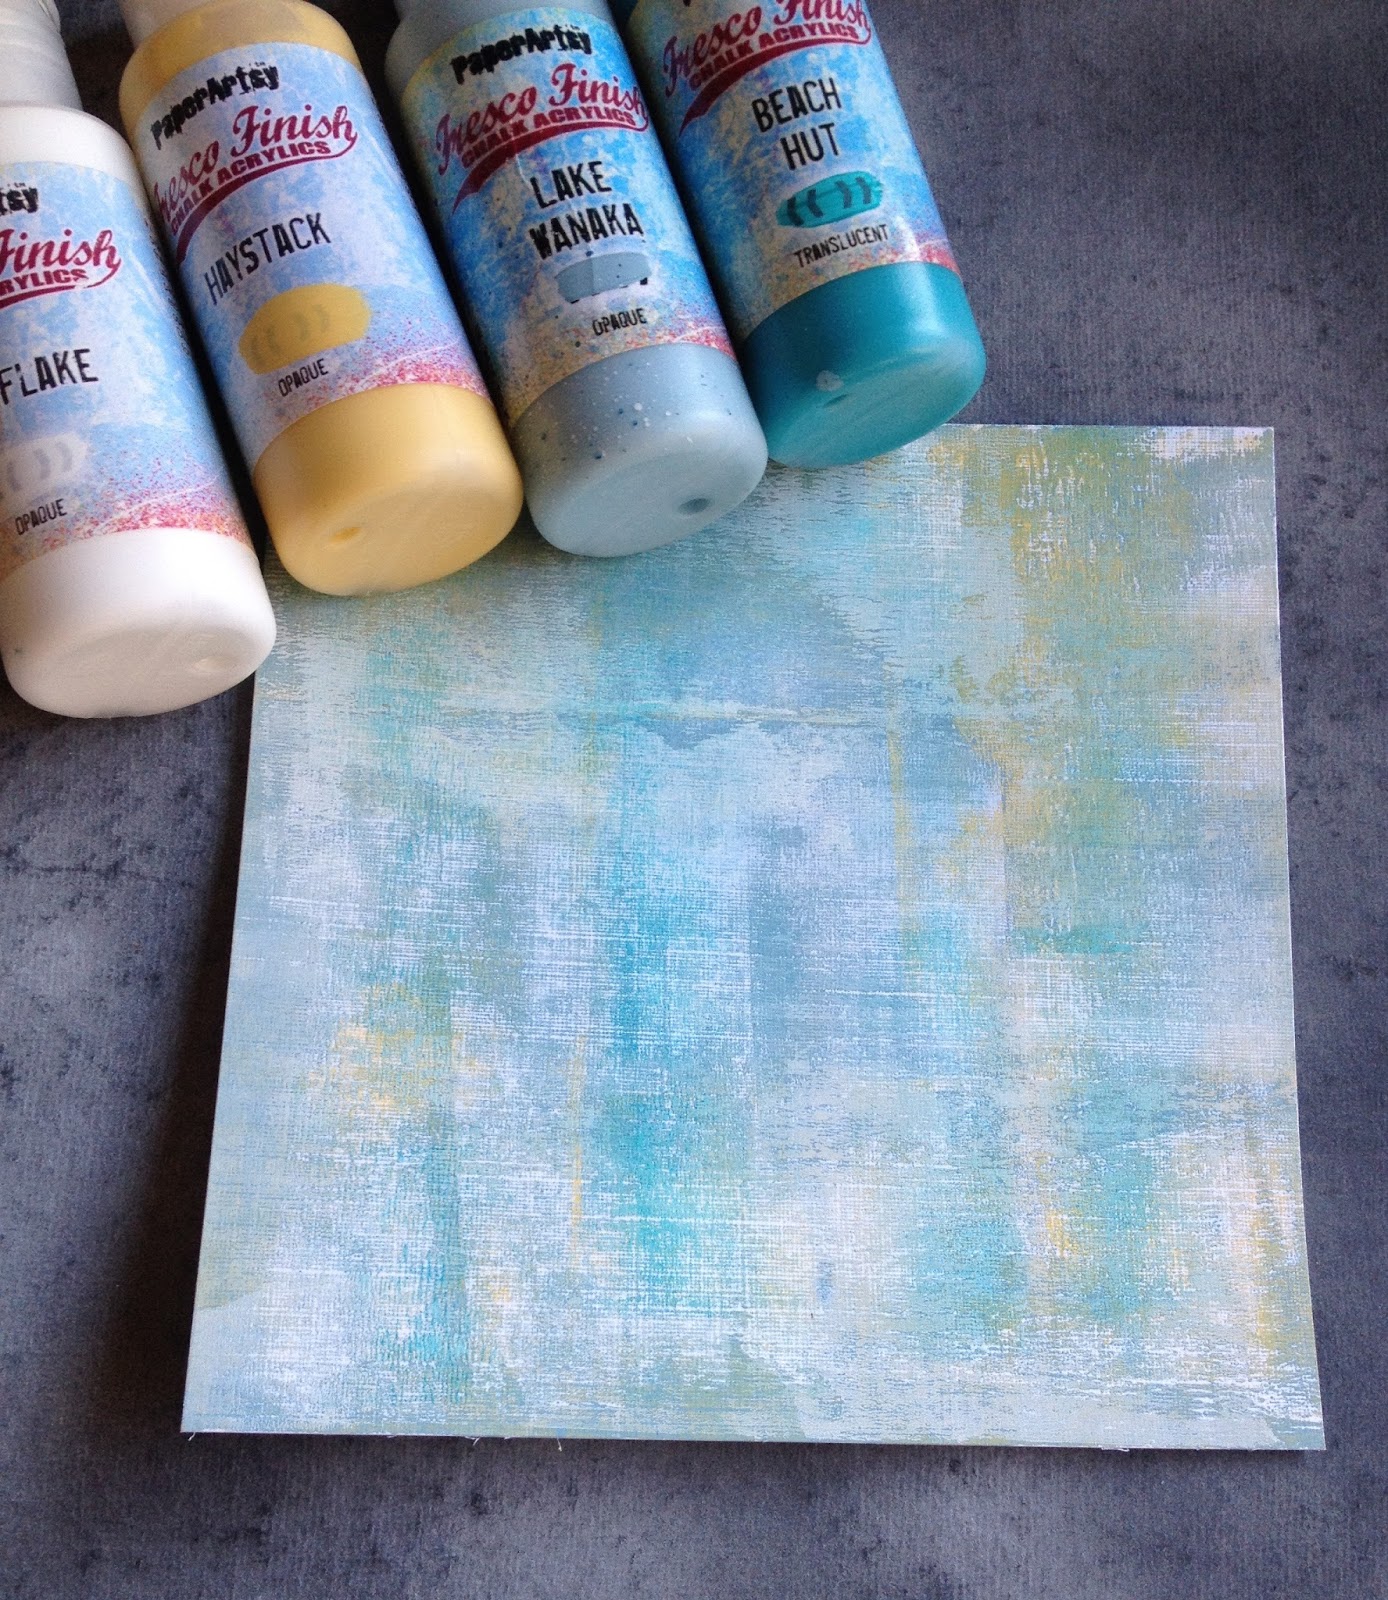
I started with a piece of white card 10cm square and painted it with Fresco Chalk paint in slate. Once dry wiped it over with an anti-static bag and stamped the images in versa-mark and embossed with clear powder.


The stamps I used were all from Lavinia's range; secret garden, fuchsia, small path and the foliage stamp from the magazine freebie set.

Next I painted the whole piece again in a mix of Hint of Mint and Guacamole, then when just touch dry wiped it over with a piece of damp kitchen paper. This reveals the clear embossed art work underneath.


I had also stamped the gate on another piece of painted card so that I could open the gate and stick another one onto the back.


Various areas of the clear embossing were then lightly rubbed with treasure gold in ruby and olive bronze and also metallic lustre in black shimmer.

Then I stamped the poppy in black archival ink onto some shrink plastic, once dry turned the plastic over and coloured in the stamped image with Promarker pens. This was then cut out and heated.

In the opening of the gate I stuck a piece of lightly patterned paper then mounted the whole piece onto some glossy black card. 


I cut 4 corners from the same black card and then mounted the whole piece onto a burgundy coloured card. A black pearl gem was added to the gate to form a handle.


I would like to enter this into Lavinia Stamps challenge no 7 titled 'Add a Flower'. To view the DT's wonderful samples for this challenge click on the link here.


Thanks as always for stopping by, hope this might inspire you to get 'painty' too. Take care and have a great week, Jane x


Monday, 6 July 2015

The Embroidery Bug !

Good evening, hope you had a great weekend perhaps watching the tennis or maybe like us joining the family for a BBQ. Well in-between gardening, making salads and visiting I decided to get the embroidery threads out again and here is my entry for Crafty Individuals July Challenge titled 'Face Value', to view Florence's gorgeous samples and the other entries click on the link here.


To begin with I stamped CI 378 onto a piece of calico that had some iron-on interfacing on the back. I  used Archival Sepia ink and wiped as much ink as I could off of the bird before stamping onto the material.


I then embroidered the leaves and flowers on the centre of the frame. 


Pearls and beads were then added to the hanging chains.

Next I stamped the bird onto white card in VersaFine Onyx Black and heat embossed using clear embossing powder.


The crown was stamped again on another piece of white card and embossed using platinum embossing powder.


Both the bird and the crown were then cut out.

The frame was cut from some darkish green textured card, lightly sanded, the corners then stamped with one of CI lovely freebies and embossed with clear embossing powder. small areas were lightly rubbed with Treasure Gold wax in Olive Bronze.


The embroidery was then attached to the back of the frame, a small amount of toy stuffing was added to the back of the material so as to give a slight 'domed' effect, then the whole art work was mounted onto some cream coloured card before adding it to a kraft card.


Finally the crown was stuck onto the bird and the bird attached to the embroidery as in the original stamp.


I am very pleased with how this has turned out, I love the different textures and I will be experimenting further with stamping and embroidery.

Thanks as always for stopping by and reading this blog and all comments are much appreciated. Take care and enjoy your week, Jane x


Sunday, 28 June 2015

'Flower Power' Mini Canvas

A very happy Sunday to you and thanks for popping over, today I've being getting 'painty' whilst preparing a mini canvas for Tando-Creative's challenge whose theme for this week is 'Flower Power".
To view their DT's wonderful samples click on the link here.


I started with a mini canvas measuring 10cm square which I painted using Fresco Chalk Acrylics in Seaweed, Haystack, Tikka and Chartreuse.

I then drew around one of the arches from the 4 arch set onto the canvas where it would be placed later. I proceeded to paint the sky using China, Lake Wanaka and Snowflake.


Next I made a post-it note mask of the arch and cut out the centre aperture so that I could stamp the trees and flying birds to form a view.


For this I used Crafty Individuals 429 stamp set, black archival ink and then clear embossed.

The arch was painted with a coat of Evergreen paint, then a coat of Americana Weathered Wood and finally a coat of Hint of Mint. The edges were lightly rubbed with DecoArt Metallic Lustre in Black Shimmer.


The fern leaves are from the Mini Leaves set and were painted in Toad Hall.

For the brick work I used Rectangle Grids and painted the grout with a mix of Haystack, Slate and Snowflake and for the bricks Autumn Fire, Chutney, Tikka and Slate.

The words were stamped using archival watering can on to tissue paper, then once completely dry turned over and painted with Tikka. These were then torn out and applied to the canvas with a coat of PaperArtsy Satin Glaze.


Finally the flower was given a coat of Very Berry, then stamped in VersaMagic perfect Plumeria and clear embossed.


A flower shaped button was then threaded with some bakers twine and added to the flower centre.


Well that's all from me, I'm off to put the lunch on. Hope you all have a good week, it's just started to rain so that's put a stop to cutting the grass later ----- ( what a shame !) Take care Jane x


Sunday, 21 June 2015

'Hidden Objects'

Hi and welcome, today I'd like to share my entry for PaperArsty's challenge titled 'Hidden Objects'. I was so enthralled by the video titled 'Patience' on their blog site that I just had to make something. If you have a few moments , grab a coffee and do have a look at the video which can be found on the link here.

Several Christmases ago I received this wonderful book of William Morris designs,


it's full of papers that are to be removed and used,


but I have always felt I didn't want to cut into the pages and in my mind 'spoil' the book.


Then sensible Hubby said "Use it and if you want buy another" ahhh I thought.


Needless to say the book of papers is no longer pristine!


The inside cover and first page.


One of his stained glass designs I printed onto acetate.


How the booklet came to be.


Both wallpaper patterns taken from the book.


Tag with one of his reputed sayings.


Some of the items he was famous for designing.


The hare is one of his well known tapestry designs.


Tag made from some curtain fabric. 


This is a picture I down loaded of some of his ceramic tile designs.


The chap himself.


And finally a few details.


Well I have to say this took much longer than I anticipated but then I did get rather 'wrapped up' in it!
As he was such a prolific artist and designer it was hard to chose which patterns or designs I included.


Thought I'd add this picture to give an indication as to the booklet's size, quite small --- measuring  just 10cm high and 9cm wide.


I hope you have enjoyed looking through my hidden world of William Morris, thanks as always for stopping by and do head over to PaperArtsy's blog if you get a chance. take care and have a good week, Jane x


Sunday, 14 June 2015

"Any Colours You Like"

Good morning and welcome, hope everything is good in your world and that fingers crossed some of you might have some summer sunshine! ----- really not quite sure where it's popped off too.

It's been a few weeks since I last blogged as I've been gardening----


and making a few items for our local care homes fete---


So, back to todays entry which is a card I've made for Lavinia Stamps Challenge titled "Any Colours You Like". To view their DT's wonderful samples click on the link here.


For this I started with a piece of linen card which I brayered with chalk acrylics in Lake Wanaka, Haystack, Snowflake and Beach Hut.


I then stamped the fairy in the middle with Versafine black onyx and then clear embossed.


Next I made a post-it note mask of the fairy to cover up the embossed image before stamping the Spiral of Spells.


This I stamped in Versa-magic and embossed in white powder.


I then cut out the embossed image and using the spare painted card stamped stars in Versa-magic and again white embossed.


Having chosen some blue checked card to mount this onto I inked all the edges with antique Linen and Vintage Photo DI.

I had decided to use a dried poppy seed head but felt I needed something else to go with it as an embellishment--- so I cut a card tag as a template and drew around it onto some floral material twice, cut them out and frayed the edges and then lightly inked the edges with Archival Cornflower Blue. Then I chose 2 phrases from the spell and stamped these onto the tags in the cornflower blue ink.

The embossed fairy was lightly rubbed with Inka-Gold in Platinum and the poppy had touches of Treasure Gold in Olive Bronze added.


Thanks for stopping by today I hope you have a restful Sunday and can perhaps squeeze in a little crafty-time for yourself!
Any comments are always appreciated, take care, Jane x


Monday, 11 May 2015

White Board Embellishments

Hi and welcome, hope you are having a good week so far. Yesterday afternoon I fancied getting inky/painty, had noticed Tando-Creatives colour theme for May which sort of fitted in with a bag I'm crocheting at the moment so thought I'd make a couple of board flowers as embellishments to hang from the handles with some beads etc.


These are decorated on both sides, so there are a total of 4 designs.

 Below is the colour chart for Tando-Creatives challenge.


I started with 2 flowers from Tando's Floral Grab Bag, punched a small hole in each one and gave all 4 sides a coat of white gesso.

On one side I added some Tim Holtz tissue tape and then painted one flower with Fresco Chalk Acrylics in Mermaid and china.


The other side was just painted.


Then added some Beach Hut and Inky Pool.


And then some Chartreuse.


The side without the tissue tape I stamped with the largest flower stamp from P.A. HP1004 in versa-mark and then white embossing powder.


On the other side I stamped the medium sized flower from Heartfelt Creations 3374 in versa-mark and used platinum embossing powder.


To both sides I added touches of Treasure Gold that I had mixed to make a purple colour--- ruby and sapphire.

Now onto the second flower, both sides were painted in Plum and Pansy.


On the first side using Tim Holtz Holiday Knits layering stencil and Dusty Concord D.I. I stencilled across the centre and then brushed the wet ink with perfect pearls mica powder.


Then added a blue bird and the word happiness with rub-ons. Then lightly rubbed with Inka-Gold in platinum.


On the reverse side I stamped using Archival Cornflower ink and the register stamp from Studio 490 Love to Make Art set. Then once dry added grunge paste through Tando's  Bird and Branch mask.
Once thoroughly dry I coloured the grunge paste with a mix of paint and Distress Markers. This side also had a little Inka-Gold added.


All 4 sides were given 2 coats of satin glaze to give them a little protection.


And once threaded on either cord or plaited crochet cotton should hang and twist nicely.


Now all I need to do is finish the second handle of the bag before attaching with beads and either some crocheted flowers or maybe something made from needle felting.


Thanks as always for stopping by, enjoy your week and take care Jane x