Sunday, 31 January 2016

Oooow Yummy, Scrummy Hearts!

Over on the PaperArtsy Blog their challenge at the moment is 'Hearts' ------  and if you have read any of my previous blogs you will realise I'm partial to the odd heart so I had to make something to enter.


To see the wonderful collection of different hearts Leandra has put together and all the inspiration of the DT click here.

On Friday the postman delivered an order I'd placed with a firm called Artcuts who sell wooden cut shapes, words etc. The timing was perfect as in my order there was a box of 'Not Quite Perfect' items which consisted of may beautiful shapes including lots of hearts!


I was thrilled with my order and if you too use wooden shapes you might like to look on their site

So equipped with my base I was off.


The 12cm base needed a slight sanding on one side then it was given a coat of White gesso. Dry wall tape was added to the lefthand side and the definition of Home was torn from an old dictionary and struck on the righthand side.

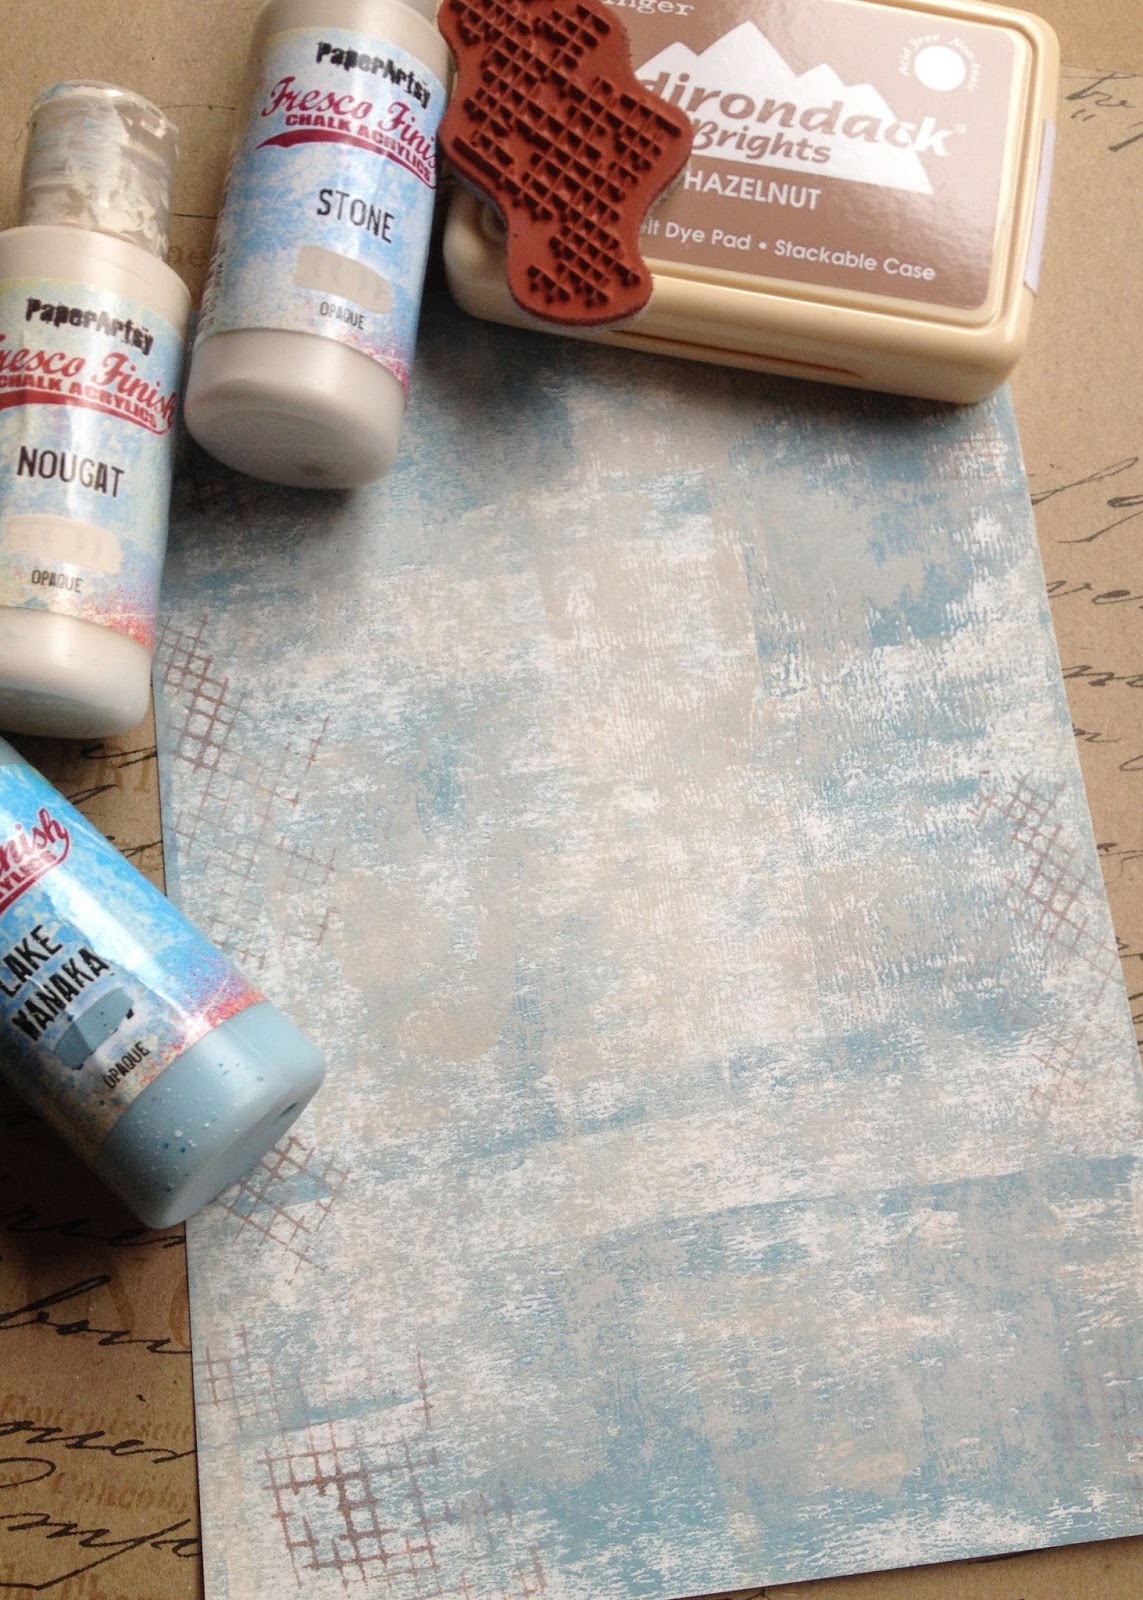
Next I brayered some Fresco Chalk Acrylic in Haystack, Hint of Mint and Nougat. Grunge paste was added through a Clarity stencil, and once dry these were dry brushed with London Bus. The ivy was stamped to the edges using DI in Peeled Paint and then using clear EP heat embossed.


Then using stamp sets Crowns and Castles 2 & 9 and Archival Watering Can ink stamped images onto tissue paper and coloured in with water colour pencils.

The hinges were stamped onto shrink plastic with black archival ink and when dry coloured from the back with a gold Pro-marker pen. One hinge shrunk a little on the wonky side( probably my uneven cutting out) but I like the quirkiness it adds.

Using kraft card and Jofy 42 'Home is where the Heart is' was stamped and white embossed, then cut out and each of the 3 pieces edged with a black pen.

Treasure Gold was added to the hearts in ruby and olive bronze on the ivy leaves.

A length of rusty floristry wire was attached to the top and a carved wooden bead wooden.


Then all the elements were attached with either matt medium or Pinflair glue.


The material heart was simply made by cutting a paper shape for a pattern, embroidering 'Love' onto a piece of 16count Aida and sewing this onto the front of the heart along with the ribbon before sewing the back and front together leaving a small gap for the stuffing. Once stuffed the gap was sewn up.

If there was more time in the day and more space on my walls in my craft room I would make many more hearts of all shapes,sizes and materials but alas there's not !

Thanks for taking the time to read this blog, I hope you have a relaxing Sunday afternoon---- perhaps making something 'Heart Shaped' Have a good week,  Jane X


Sunday, 24 January 2016

!st for 2016 --- Lace, Buttons, Bits and Bobs.

Hi and welcome, gosh it's already 24th January and I've only just got round to doing my 1st blog entry for 2016 !!! and what could be a better way to start than an entry for Crafty Individuals bi-monthly challenge. To view the DTs samples and the other wonderful entries click on the link here.


For this I started by stamping C.I. 386 onto various different card stock, vellum and calico. The vellum was coloured from the back using watercolored pencils.


The different elements were cut out and then gradually rearranged to reform the stamped image. A piece of crochet cotton and ribbons were used for the kite's tail, and a little Treasure pewter was added to the material of the balloon.

Then using C.I.182 the corners of the blank card were stamped in Versa-mark and clear embossed. The card was then inked with DI in Antique Linen using a large brush.

A small MDF heart was given 2 coats of Fresco paint in Mermaid and then stamped and embossed using pewter EP.

'For You' was stamped from C.I.438 set onto a tiny tag, a flower die was used to cut soft leather and crunchy wax kraft paper for the top and a single swirl was cut using the Elegant Swirl die and then cut in 2 so as to connect the top through to the bottom of the card.


Buttons, lace and a pearl bead were all added as the card was assembled. Although this wasn't the quickest card in the world to make as there was quite a large amount of cutting out, it was fun and very relaxing. I am pleased with how it has turned out and I feel it full fills the brief of 'Butons, Lace, Bits and Bobs'.

Thank you for stopping by and I hope this might get you looking in your button box and having a go.Take care and I hope you all have a good week, Jane X

Thank-you to all that left such lovely comments in 2015, they were all very much appreciated X


Sunday, 29 November 2015

Christmas Cards using Masterboards

Hi, I hope your weekend has been going well, this afternoon I've been making some christmas cards using masterboards as a basis to work from. Over on the PaperArtsy Blog there is a brilliant video by Leandra showing how to create a masterboard and some wonderful examples on how to use them, to view the video etc click here.


For these I made 2 different colour combinations but still have plenty left to use on other projects.


The paints used for my first board are ; Evergreen, Toad Hall, Guacamole, London Bus, Inky Pool, Snowflake and a little Pewter to finish. These were all applied with a brayer.


I then stamped text from ESN 03 in archival watering, the hanging star from Jofy 06 in archival jet black and finally the swirl from Special Christmas plate 3 in snowflake paint.


For my second board the following colours were used; China, Lake Wanaka, Beach Hut, Claret, Stone, Autumn Fire and Snowflake.


Then the design was created using T.H. Holiday Knit stencil with stone paint, the lines from Jofy 07 stamped in archival cornflower, noel from special christmas plate in archival watering can and finally the rings from HP1004 in snowflake paint.


For my first card I stamped the bunting from Jofy 07 onto my master board in versa-mark and white heat embossed.


This was cut out and the tassels were hi-lighted with a little Treasure Pewter.


The trees were stamped from the special christmas plate 3 and also white embossed. Stars were punched from trimmings after cutting out the trees.

I used the edging stamp from Jofy 06 for the bottom edge of the card.


For my second card I cut a piece of the master board and mounted it onto some burgundy coloured card. The star was stamped from Jofy 07 onto some kraft card , white embossed, cut out and then some Treasure Pewter was added. The white flower/tree from Jofy 38 was white embossed and then some glitter added. The MDF star was given 2 coats of gold embossing powder.


My final card which is my favourite out of the 3 repeats some of the 2nd card but uses the large flower from Jofy 38 ( which was one of my gifts from winning the blog challenge a few weeks ago and I love!) this was embossed using a clear glitter embossing powder and then hi-lighting with treasure Gold in Renaissance.


Bows, buttons, wire and hearts were added for detail but I felt they were all fairly quick and easy to make as it is sometimes too easy to get engrossed in making christmas cards and the time just vanishes. The next thing you know it's the last day for posting!!!

And on that note I shall away--- many thanks to PaperArtsy for the nudge into master boards, much appreciated. Hope you enjoy what is left of the weekend and many thanks for stopping by. Take care and all comments are much appreciated, Jane x


Monday, 16 November 2015

Festive Heart

Good evening and welcome, hope your Monday has gone well so far. Today I would like to share a christmas heart I've made over the weekend using Lavinia Stamps and some lovely christmas fabric my daughter bought for me.


I started by stamping 'Believe' onto some natural coloured calico which had some iron-on interfacing on the back. This really stabilises the fabric when embroidering.


This was left for a couple of hours to ensure the ink was completely dry before stitching the outer edge of each letter.


Next I cut a heart from a scrap of card to use as my template to cut from the material. The calico was then stitched to the front of the heart before cutting to size and fraying the edges.

The heart was then stitched on the wrong sides, turned inside out and stuffed.

Using the smallest of the Lavinia snowflake stamps I stamped onto some frosted shrink plastic in archival watering can. This was cut out and a small hole made before heating and shrinking.


Thread was added and 2 brass bells.


The heart was finished with some grosgrain ribbon and a small satin ribbon bow.

I have made hanging hearts for decorations other years and they tend to all be on the traditional side but I am very pleased with how this has turned out and this fabric has so much detail printed on it, it's fab!

I would like to enter this for Lavinia's challenge 11 titled Christmas. To view the DT's inspiring samples and the other entries click here.

Thank you for stopping by and a big thank-you for all the lovely comments on my last couple of posts, they are very much appreciated.

Take care and have a good week Jane x


Friday, 6 November 2015

'Winter Frost'

Hi and welcome, today has been a very wet and humid type of day so entering a piece for a challenge titled 'Winter Frost' seems a tad bizarre, but I'm sure it won't be too long before 'Jack Frost ' gets his brushes out!


This card I would like to enter for Crafty individuals November challenge, to view their DT's samples and the other entries click here.

I started by rubbing some charcoal onto a sheet of medium weight white card which was placed on top of a piece of material so as to gain some texture.


This was then stamped and heat embossed with platinum EP. I masked the very centre off so as to leave a clear space to then stamp the word Peace in ocean depth ink and then clear embossed. 


Some of the flowers and leaves were then coloured in using Distress Markers, glitter was added to some areas and a little Inka Gold in Platin.

The card blank and hand-made blue paper were cut using dies and all stuck with double sided tape.


I had stamped a spare piece of charcoal card so decided to cut-out and add a couple of flowers and leaves to give some depth to the piece.

Next I stamped the tags onto white card in versa-mark and heat embossed with white sparkle EP. These were then coloured with Distress Inks.


The christmasy embellishments were cut, stamped, glittered and embossed before attaching to the card.


It was not an easy piece to photograph to capture all the sparkly glitter.


But I was pleased with how it turned out and then made another in a different colour combination.


For these cards I used the following stamp sets from Crafty Individuals 443, 446 and 447.

Well there are fireworks being set off outside in peoples gardens and my dinner smells like it's ready so I shall away!

Have a great weekend, many thanks for stopping by and hopefully we will meet up again soon. Take care Jane x


Friday, 16 October 2015

Oh No, Face Drawing!!!

Well Leandra you certainly know how to fill people with DREAD! Over on PaperArtsy's Blog the challenge this fortnight is Faces and I'm certain that I was not the only person who said out loud "No Way" but a challenge is a challenge after all-----
So I set to and watched various videos and I have to say the Dina Wakely's were for me the easiest to follow and encouraged me to put pencil to paper.


I decided to do a plain pencil drawing first to see how difficult it would be. Hmmm not too bad for the very first attempt since secondary school in the late 1960's.

Watched more videos and then made a background for my poor unsuspecting lady.


Not too dark Dina said!


Once I'd drawn the face in pencil I then decided ( or chickened out!) not to paint my face but to use charcoal instead.


I felt more comfortable with attempting the shading with the charcoal and I am very fond of the lovely texture it gives.


I added a little scattered straw DI to the edges which I felt added some warmth to the whole piece.

Well I'm pleasantly surprised with the finished piece, I know there are plenty of faults and I'm not really happy with the shape of the mouth but this time last week I would have said "I can't draw a face" so many thanks to Leandra and all at PaperArtsy for the challenge.

Hope you all have a good weekend and if you have a spare 15mins do watch Dina Wakely's videos as they are a brilliant place to start. Bye for now and take care, Jane x


Sunday, 11 October 2015

Wearable Art !


Having just spent a few very relaxing days in Dorset I returned armed with a metal hair grip which I purchased in a wonderful craft shop in Dorchester called Frank Herrings ------ a crafters paradise, filled to the gunnels with everything imaginable from paint to spinning wheels, looms to Airfix kits! It's one of those shops that you need to go in several times as you don't see everything on the first visit.

Anyway back to the job in hand, I saw this hair grip and immediately thought of the Paperartsy blog challenge "Wearable Art ".
Click on the link to view a fab short video and all the other very clever entries here. 


I began by cutting 2 pieces of crunchy waxed kraft paper using a paperArtsy die, then I applied various layers of translucent paint. Next I stamped one with a text stamp and embossed in copper and the other using the larger stamp from set HP1004 which was stamped in black and then clear embossed. These were both scrunged up to form the flower shape.
Grunge paper was then painted with the 2 greens, stamped in black using the larger leaf from Jofy 15.
A thin leather flower was cut using a die and the flower centre was made from crocheting some jewellery wire and adding some tiny beads.

The hessian was frayed and slightly gathered before sewing onto the clip. I then added another layer of printed material for texture before attaching the flower and leaves.


The reason I chose the crunchy waxed kraft paper for this was that if the flower becomes flattened after wearing it can then be re-shaped.


This would show up more on someone with darker hair than me --- ( not easy photographing your own head!) This is perhaps not as adventurous as some entries but I had fun making it, and it was good to get back into the craft room and play again.

Thanks for stopping by and if you have a spare 5 mins do pop over to the PaperArtsy blog and see the other fab creations.
Take care and have a good Sunday, whats left of it! Jane x